ChannelReply’s API enables you to manage Amazon messages in Zendesk. This lets you do things that are normally impossible, like use customer and order data in macros.
There’s just one problem for international users: the automatic language detection feature in Zendesk Professional and Enterprise only works with emails, not with messages delivered through an API. This can make translation a pain. Here’s how to work around that issue and turn Zendesk into a multilingual helpdesk for Amazon:
Need a Walmart or eBay translation solution? We’re looking for a volunteer to help us test one! Contact us if you have a multinational eBay or Walmart customer base and want to lend a hand.
Make Sure Languages Are Enabled
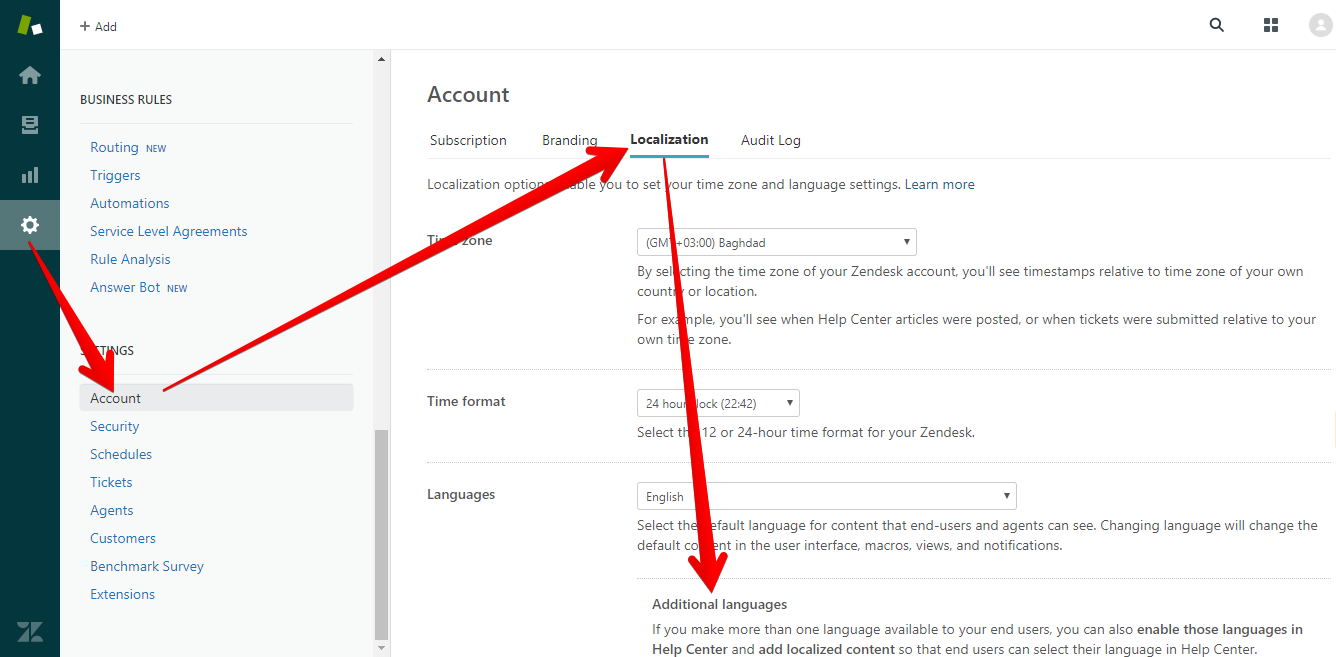
To set up multilingual support for Amazon, you must first have more than one language set up in Zendesk. You can add languages by going to Admin (the gear icon) > Account > Localization > Additional Languages.
Note: Click on any image to view it at full resolution.
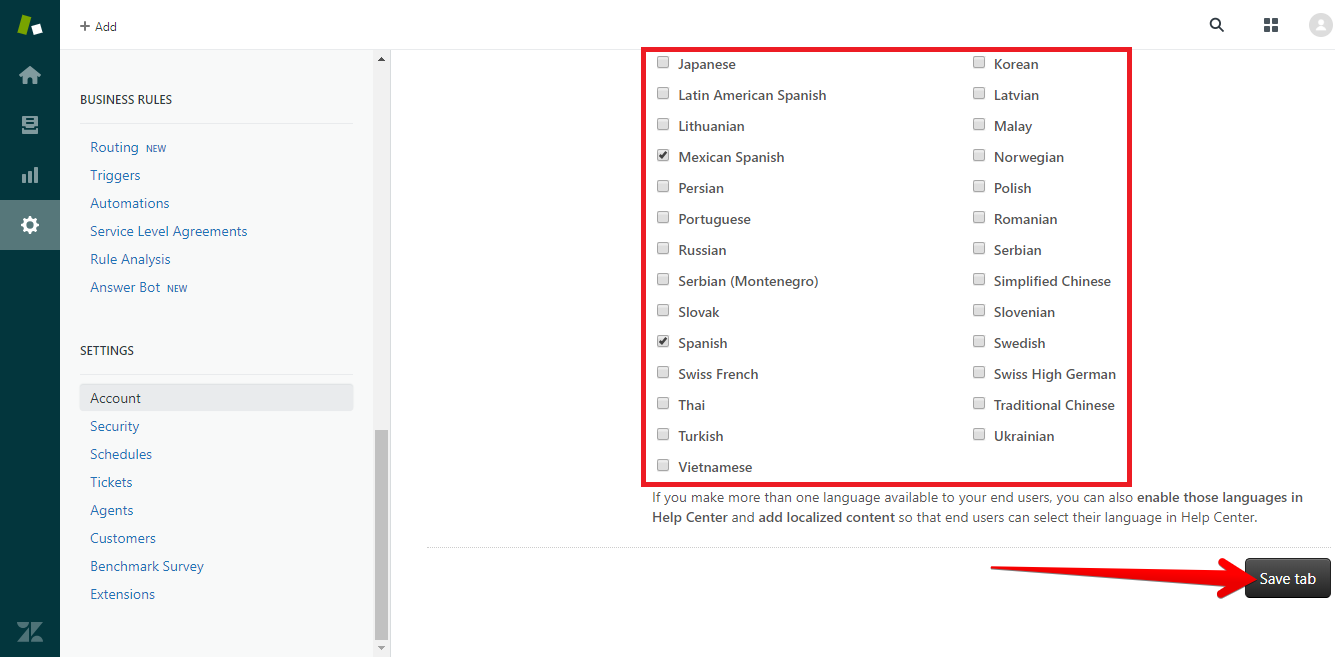
Then check off the boxes next to the languages you want to support and click “Save Tab.”
Automatic Language Assignment by Country
By taking advantage of Zendesk’s powerful business rules, you can divide Amazon messages by country. Then you can treat them as using the language of your choice. You can automatically set the language for German customers to German, Canadian customers to English or French, and so on.
Step 1: Tag Your Amazon Accounts
Follow the instructions in "Creating and Using ChannelReply Tags." Create a unique tag for each Amazon marketplace that you have connected.
If you created your account in early 2019 or earlier, you may have your Amazon accounts integrated by region (e.g. Europe) instead of by marketplace (e.g. France). You can follow the instructions in "How to Tag Amazon Marketplaces in Zendesk" to complete this step. Or, you can disconnect and re-integrate your Amazon accounts to create a unique integration and tag for each marketplace.
Step 2: Create a Trigger or Automation
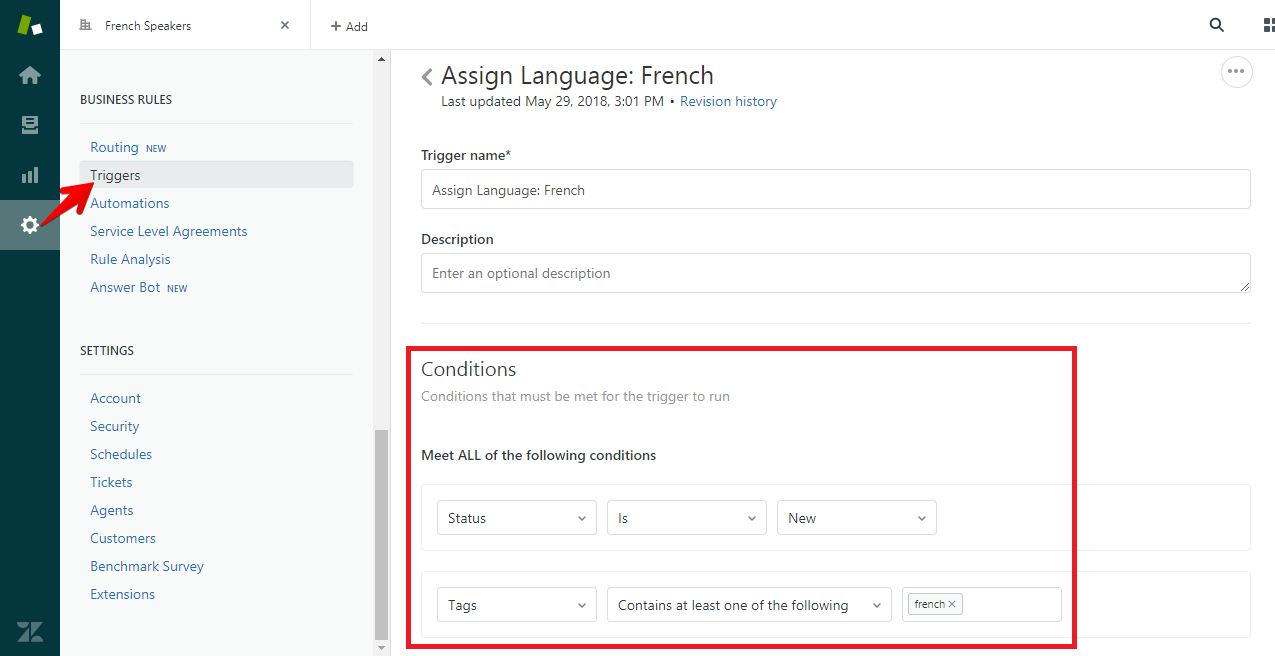
Once your marketplaces have been tagged, you can set the language for each one with a trigger or automation. Here’s one example of a trigger for setting the language:
- Conditions
- Meet all of the following conditions
- Status| Is | New
- Tags | Contains at least one of the following | [the tag you assigned to the marketplace]
- Meet all of the following conditions
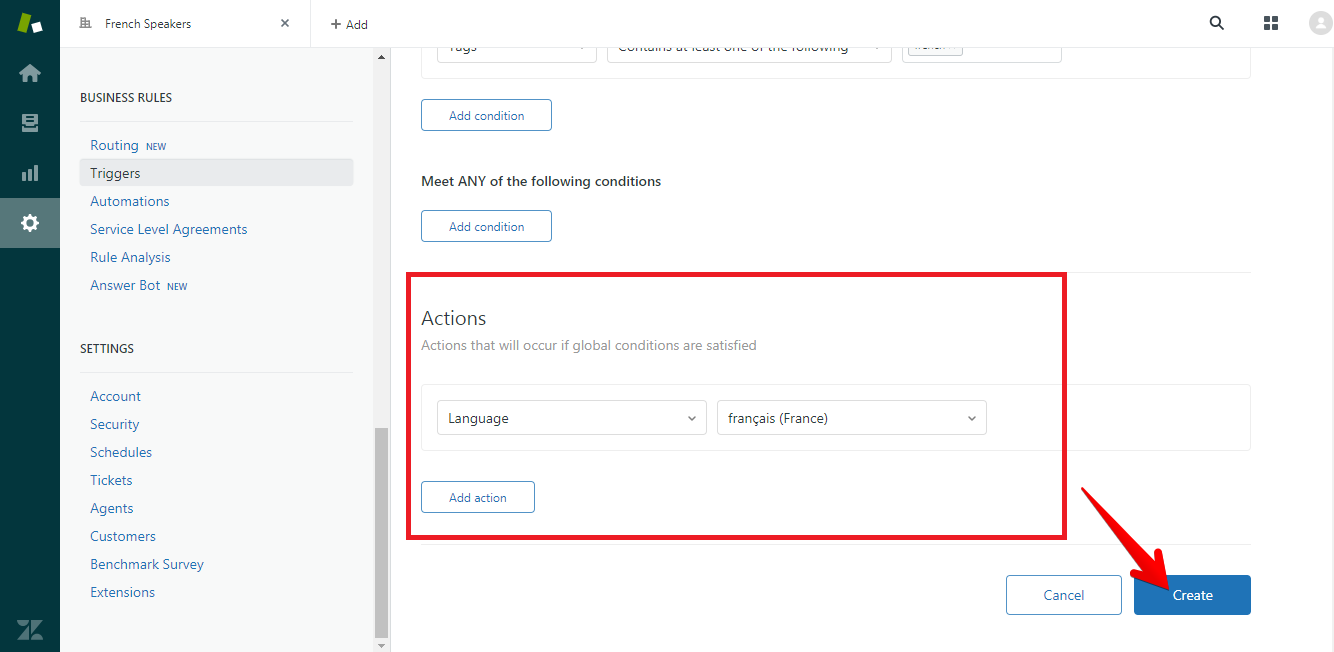
- Actions
- Language | [the language associated with the tag]
Click “Create” to save your trigger.
Bam! All new tickets from that marketplace will automatically be assigned the appropriate language.
Manual Language Assignment
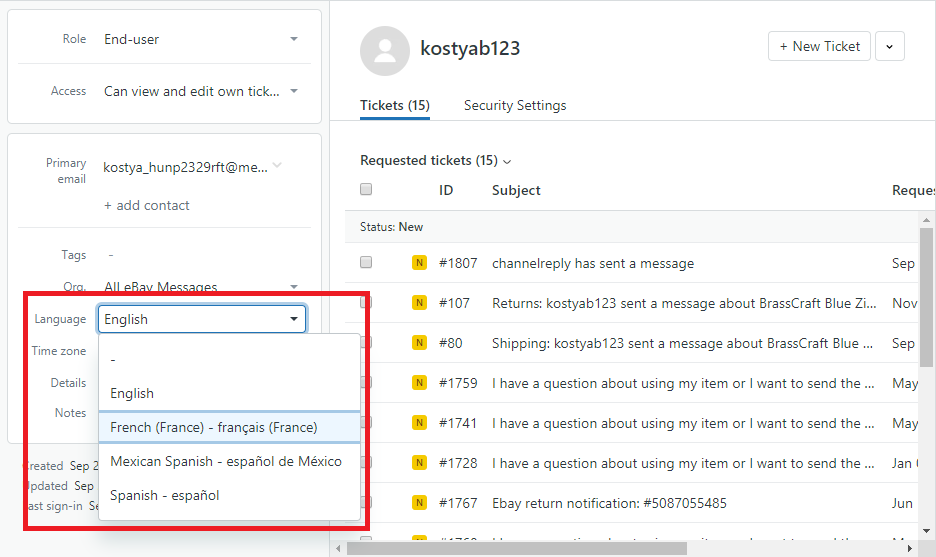
Need to set a customer’s language manually? Easy! All you have to do is navigate to their profile (you can do this by clicking on their name in any ticket) and then use the language dropdown on the left to select their language.
Great, Everyone’s Language Is Set! So… What Can I Do Now?
Now you can use languages in any language-dependent trigger, macro or automation! For example, you can use Zendesk’s dynamic content feature to create a single macro that holds all translations of a canned reply. When you choose the macro, it will detect the language and automatically fill in the correct translation.
This is on top of the other powerful features of using ChannelReply with Zendesk macros, like being able to auto-enter the Amazon customer’s name, the title of the item they ordered, and the total order amount. That’s a lot accomplished with just one click!
If you’ve used ChannelReply to turn Zendesk into an eBay/Walmart/Amazon autoresponder, you can also use these steps to auto-translate your automatic replies. You can set things up so that when an Amazon France customer contacts you, they’ll instantly receive a message in French thanking them by name and explaining your business hours in Central European time.
Another great option is setting up triggers to auto-assign tickets to agents or teams who speak that language.
There’s a lot more you can do, of course. Explore and experiment, and soon you’ll find ways to save your team hours of work every day!


