ChannelReply and Onsite Support usually work together with zero maintenance needed. However, in rare situations, it's possible for the connection to fail or be interrupted. If you can't connect ChannelReply to Onsite, aren't receiving any messages, or don't see data on any ticket, then here's how you can fix the problem.
1. Whitelist ChannelReply's IP Address
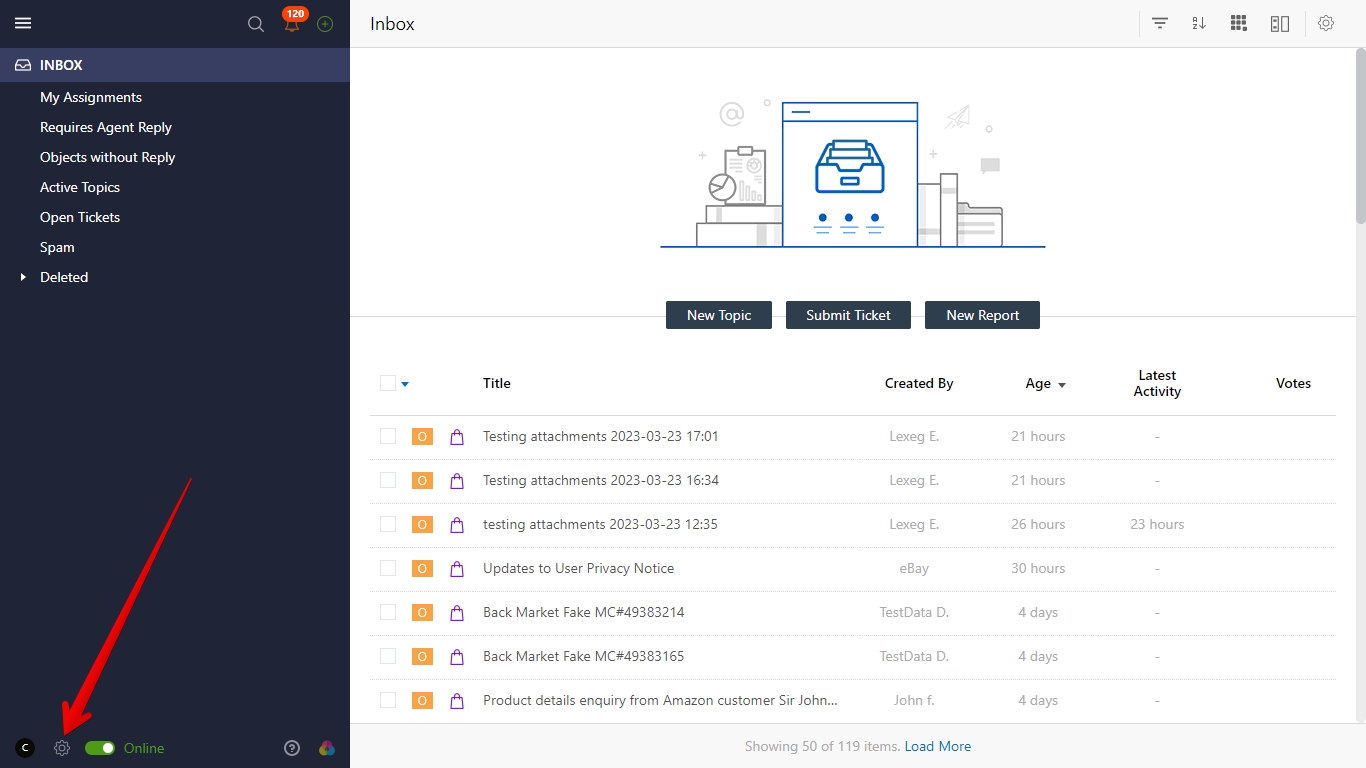
If you have restricted API access to your Onsite account, you may need to whitelist ChannelReply. Log in to Onsite Support as an administrator. Then go to "Administration" (the gear icon in the lower-left corner).
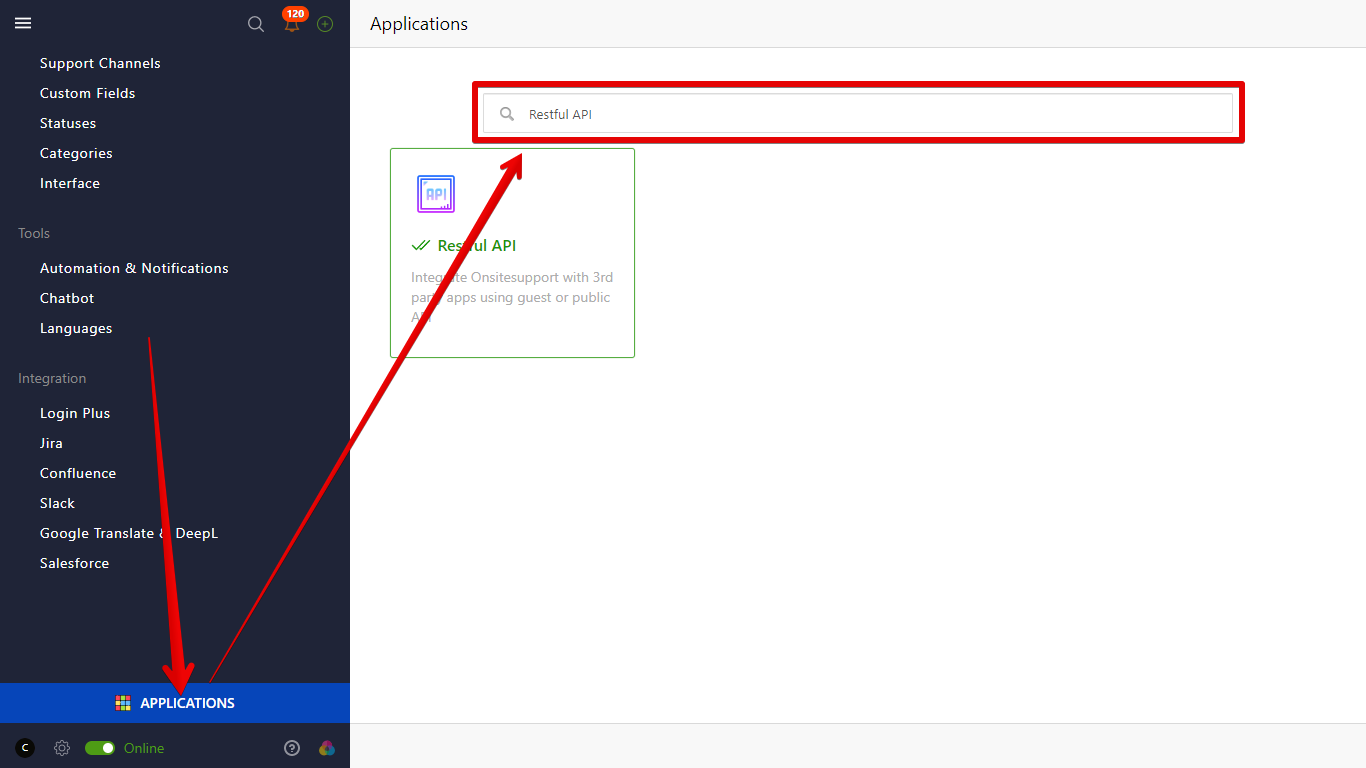
Click "APPLICATIONS," then search for the following: Restful API
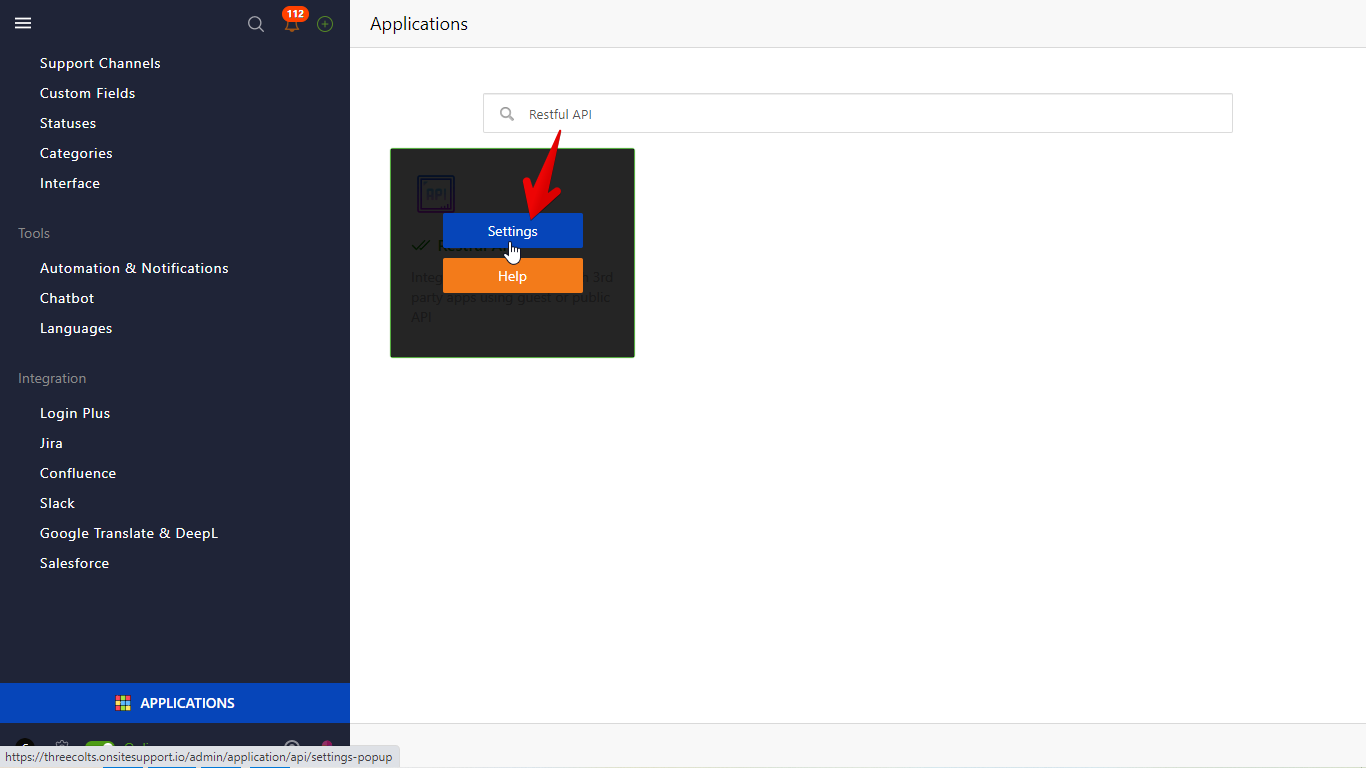
Mouse over the Restful API tile and click "Settings."
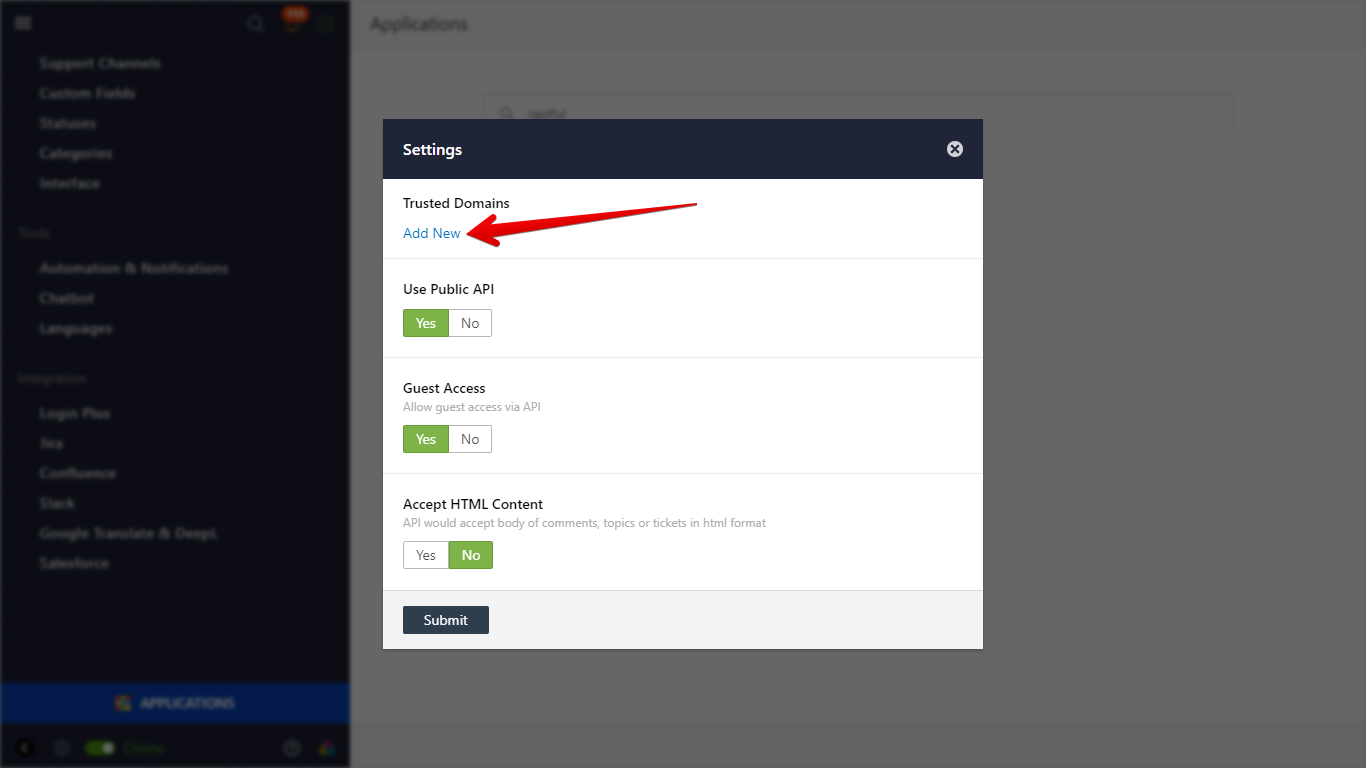
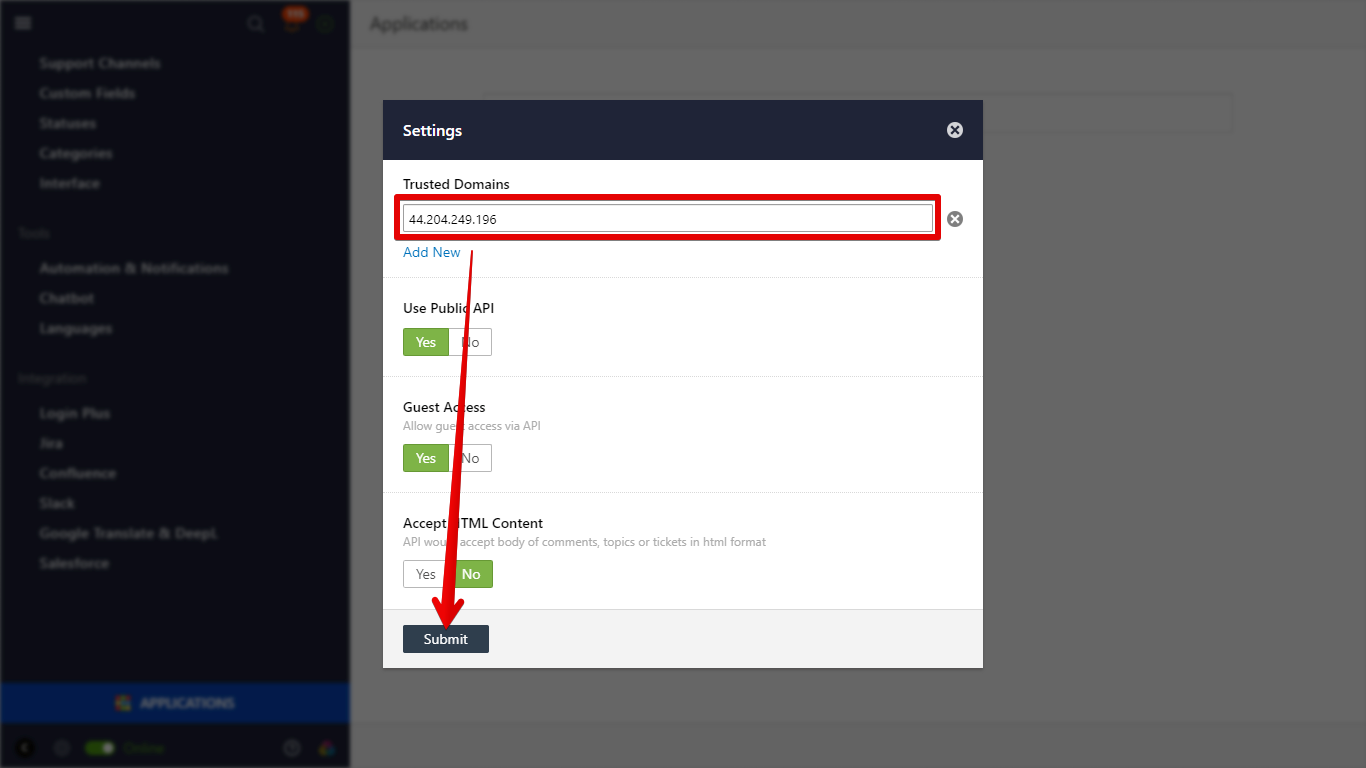
Under "Trusted Domains," click "Add New."
Copy the following IP address: 44.204.249.196
Paste it into the new Trusted Domains field in Onsite, then click "Submit."
ChannelReply should now be able to connect!
- If you ran into trouble during initial setup, please try following our Onsite integration guide again now.
- If ChannelReply and Onsite are already integrated and you're trying to fix the connection, continue to step 2 below.
2. Hit "Test & Fix Connection" in ChannelReply
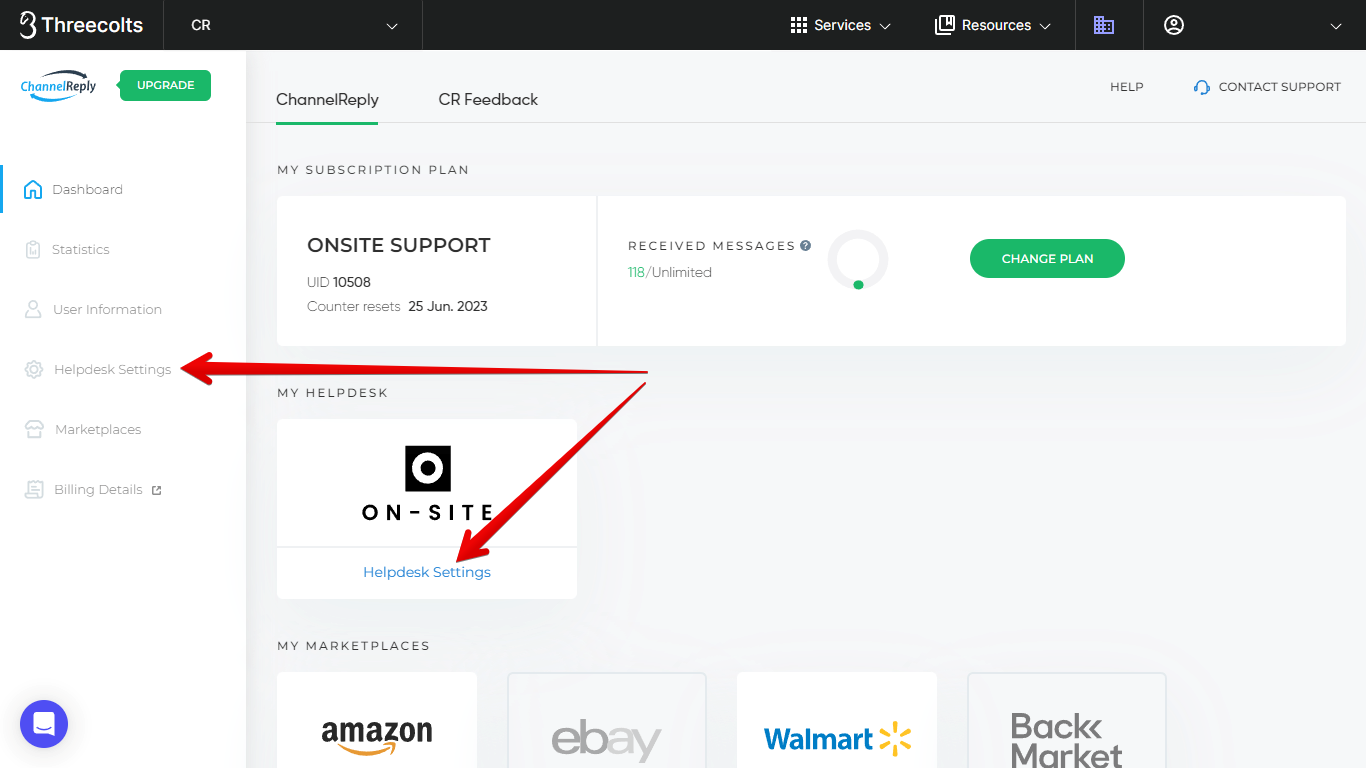
Sign in to ChannelReply. Then click either "Helpdesk Settings" button on your dashboard.
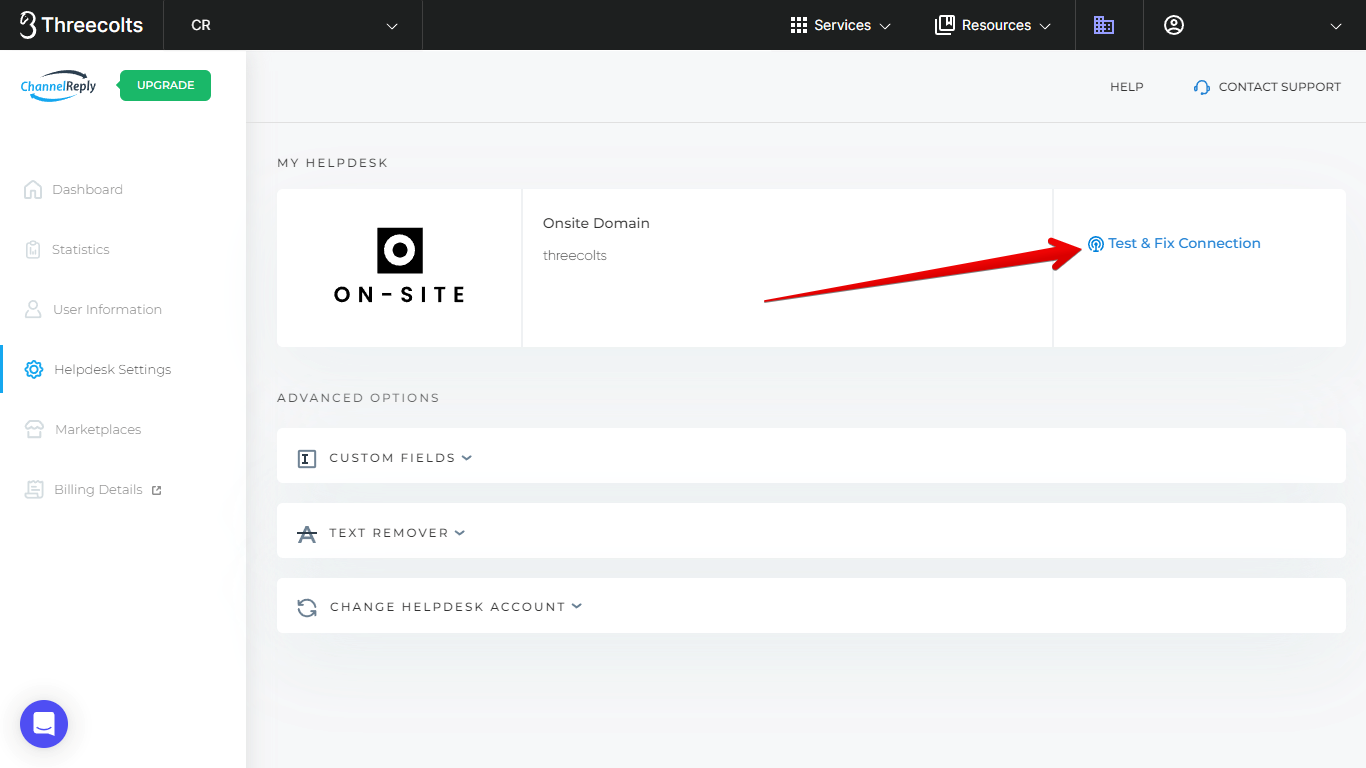
On the next screen, hit "Test & Fix Connection."
You should see a success notification. If so, then virtually all possible issues are now resolved! All that's left is to confirm messaging is enabled.
If you see an error message after hitting "Test & Fix Connection," please contact us.
3. Check the Messaging Slider on Your Dashboard
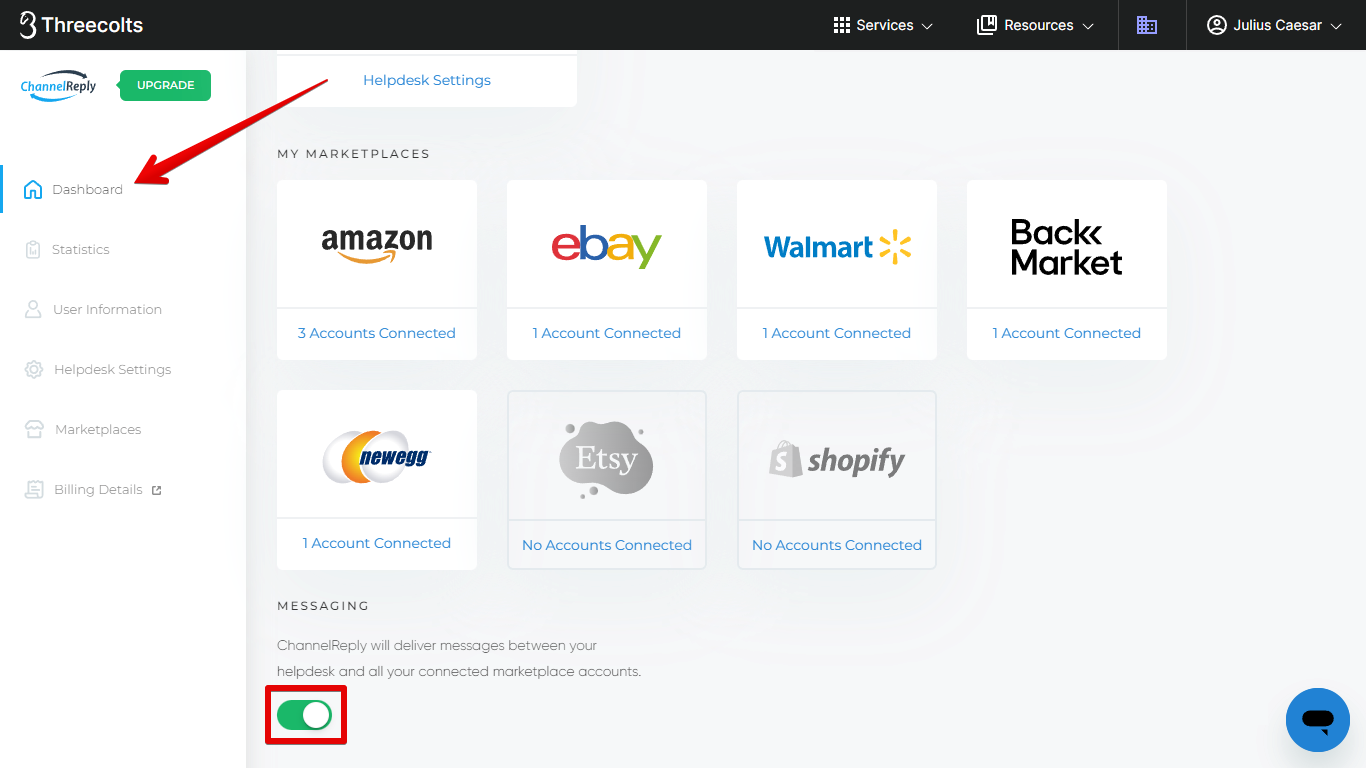
Return to your ChannelReply dashboard by clicking "Dashboard" in the left-hand menu. Then scroll to the bottom of the screen and make sure the "MESSAGING" slider is enabled (green with the knob on the right, as shown below).
If the "MESSAGING" slider is disabled (grey with the knob on the left), simply click it now to enable it.
All possible issues with your Onsite Support integration are now fixed! If you have any questions or need further assistance, please don't hesitate to contact us. We'll be happy to assist you!


