ChannelReply-Re:amaze integration is as simple as it is fast. Follow along with the video or written instructions below and you’ll be done in minutes.
Click on any image to view it at full resolution.
1. Sign In
Sign in to ChannelReply. If you don’t have an account yet, you can start your free trial now.
Next, sign in to your Re:amaze account in a separate browser tab.
2. Select Re:amaze
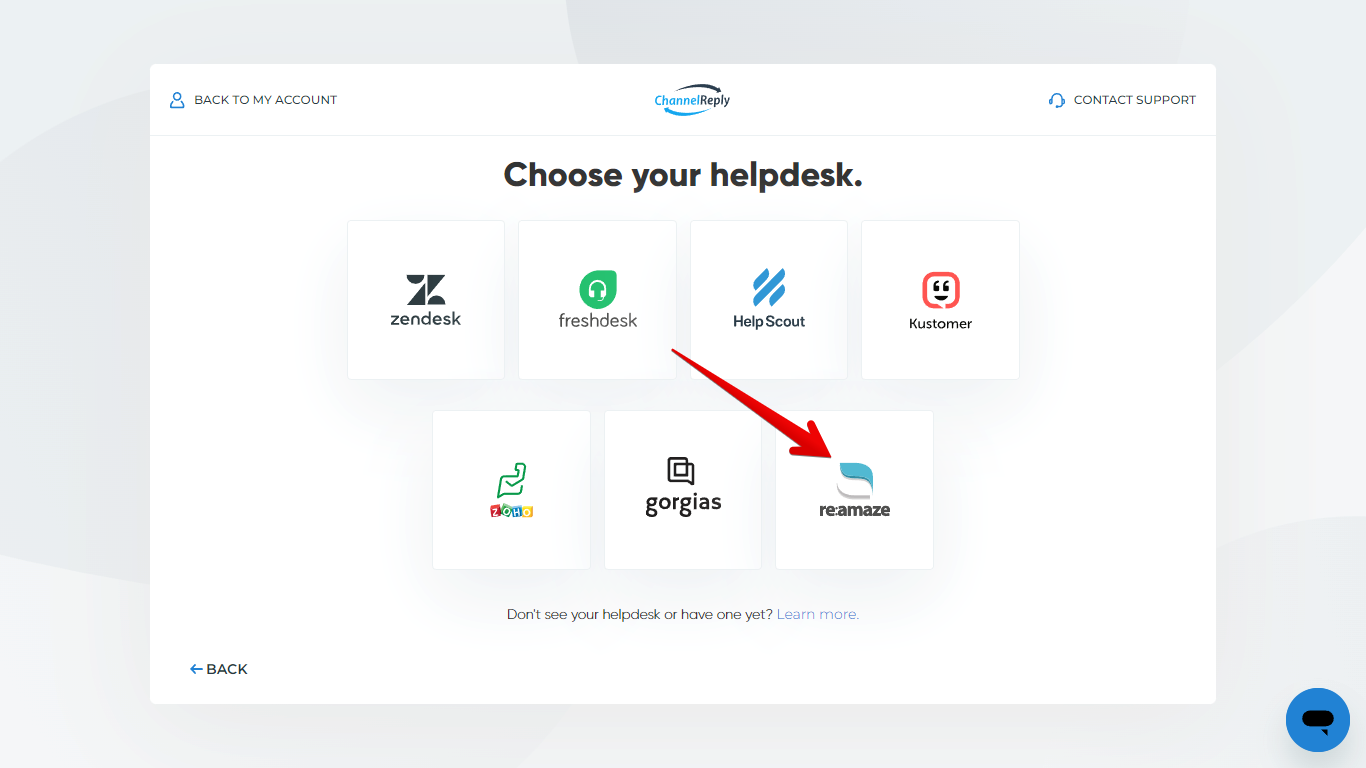
Select Re:amaze from the list of helpdesks. This can be done one of two ways. The first option is to choose it when prompted right after creating an account, as shown below.
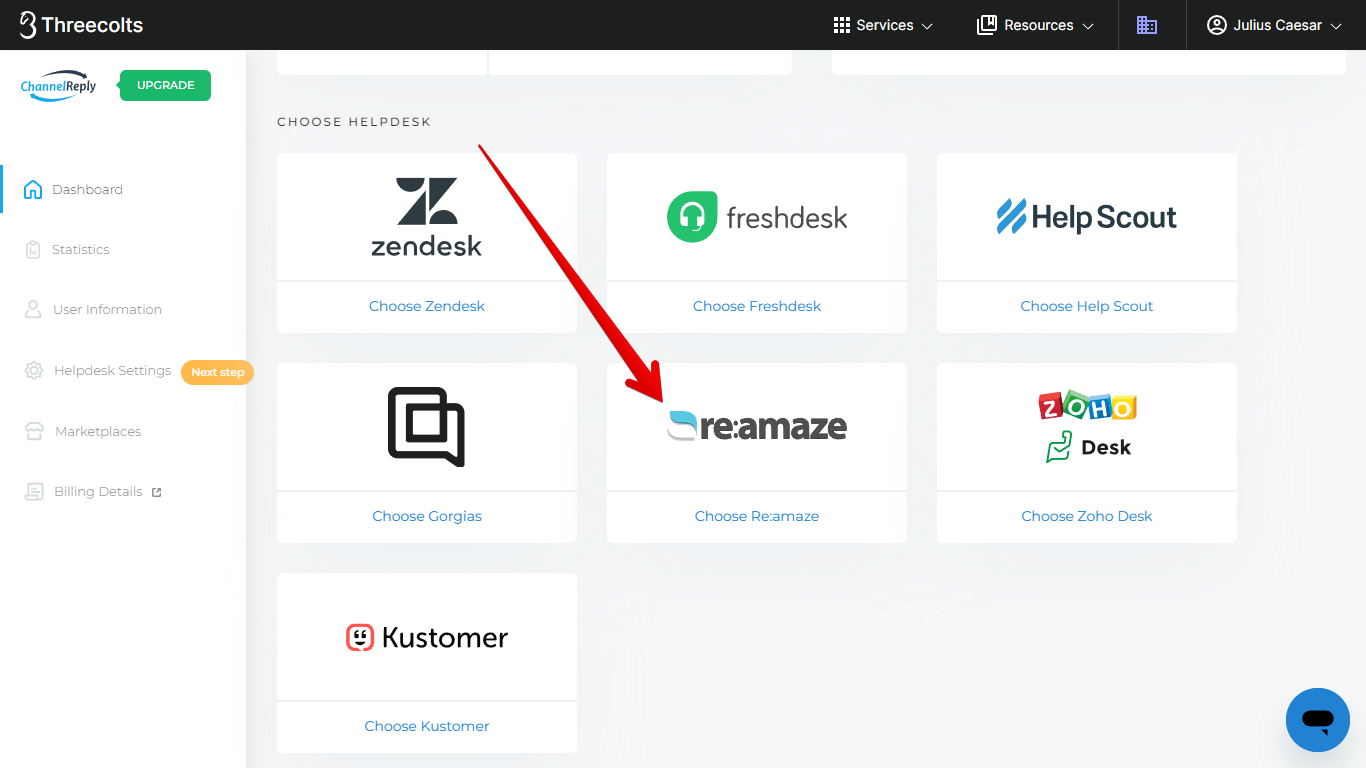
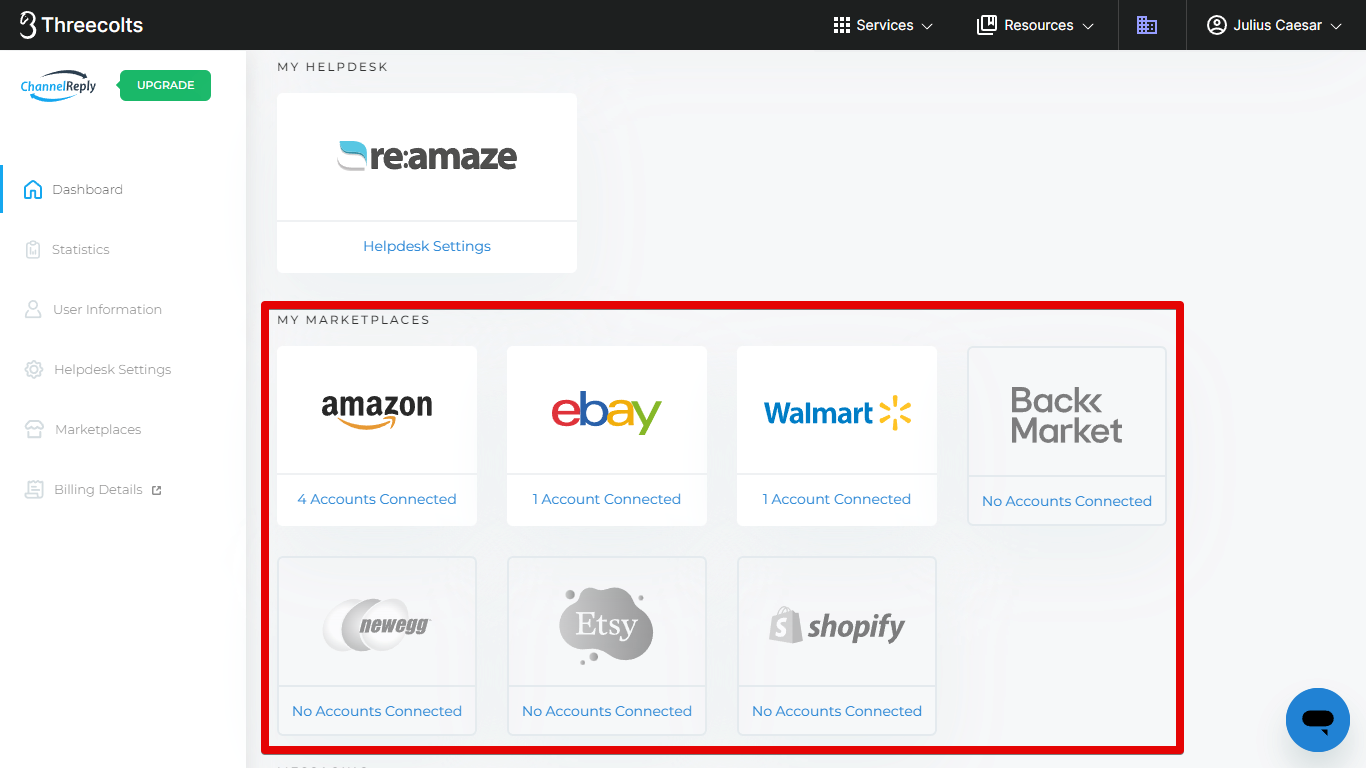
The second option is to choose it from the account dashboard. You can do this anytime if you haven’t chosen a helpdesk yet, or after disconnecting your old helpdesk.
3. Fill in Your Re:amaze Details
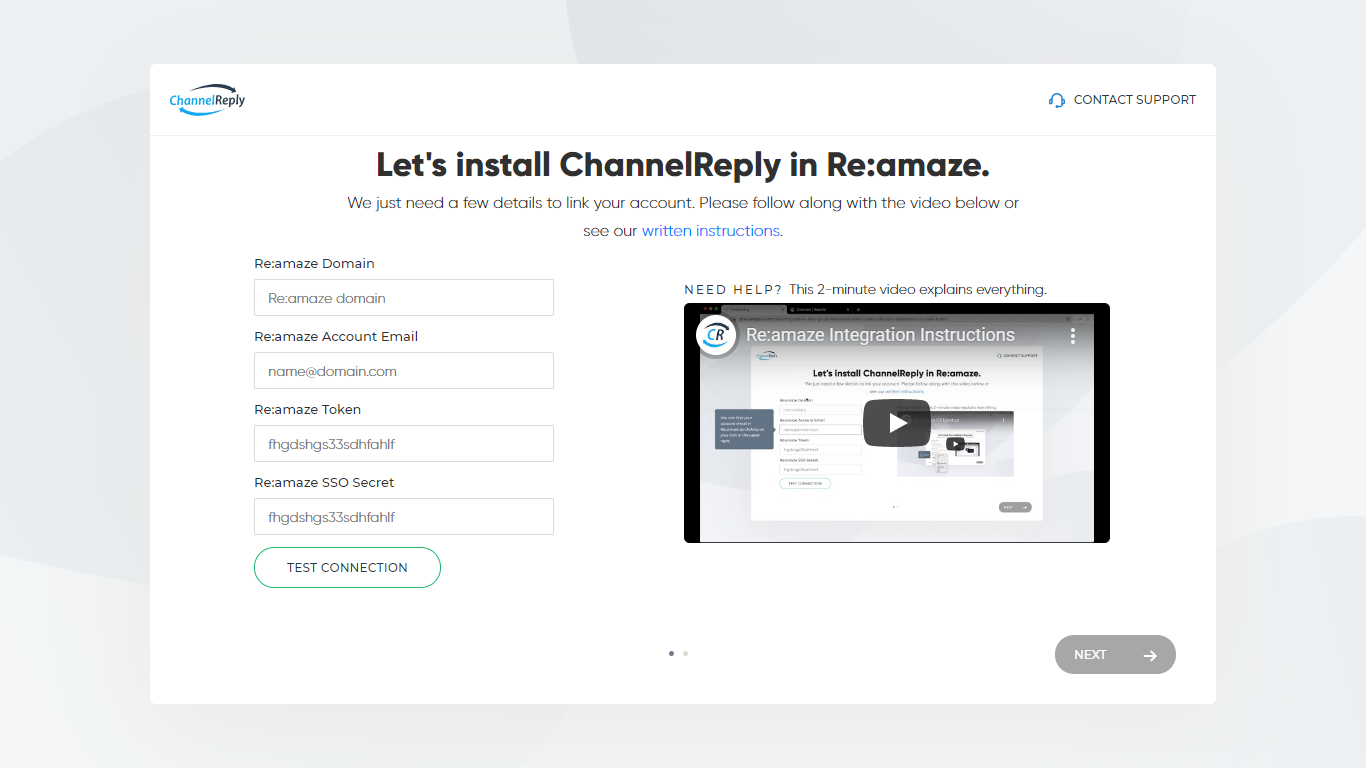
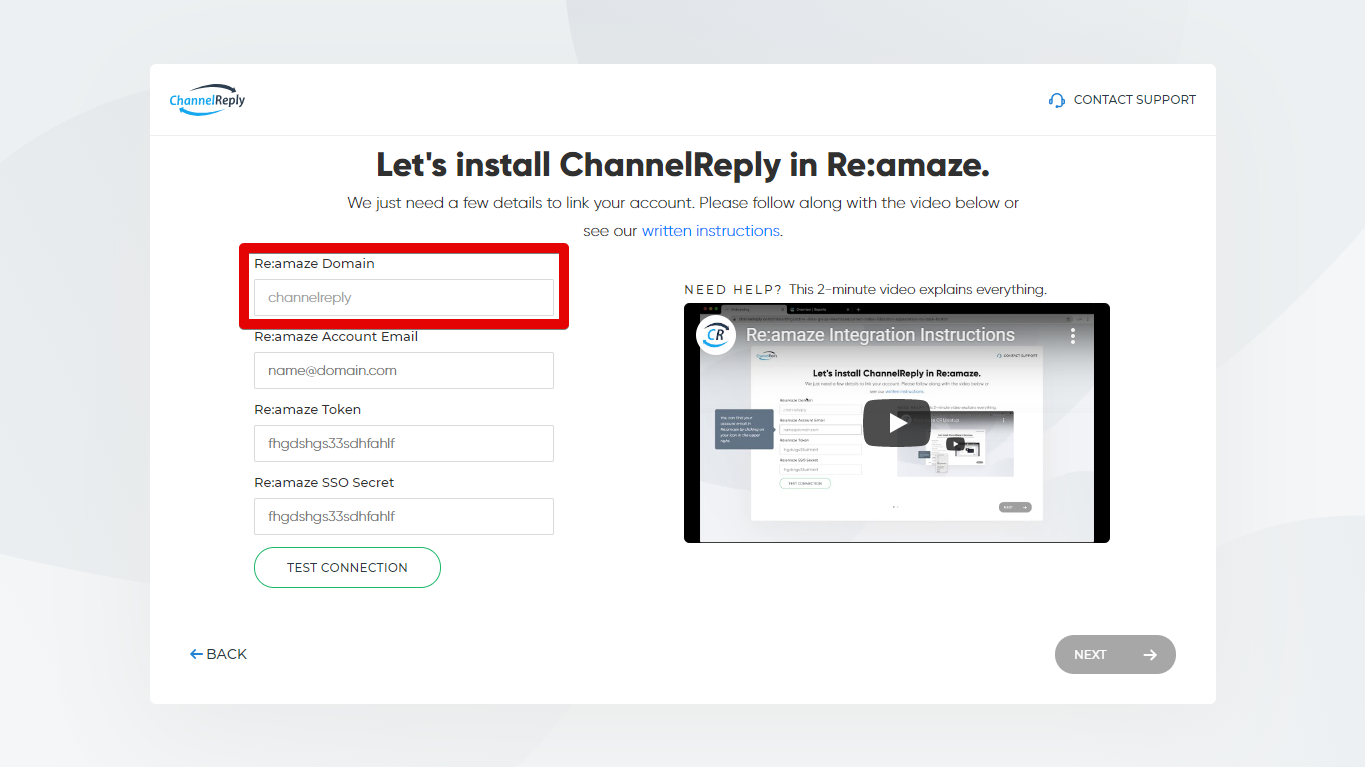
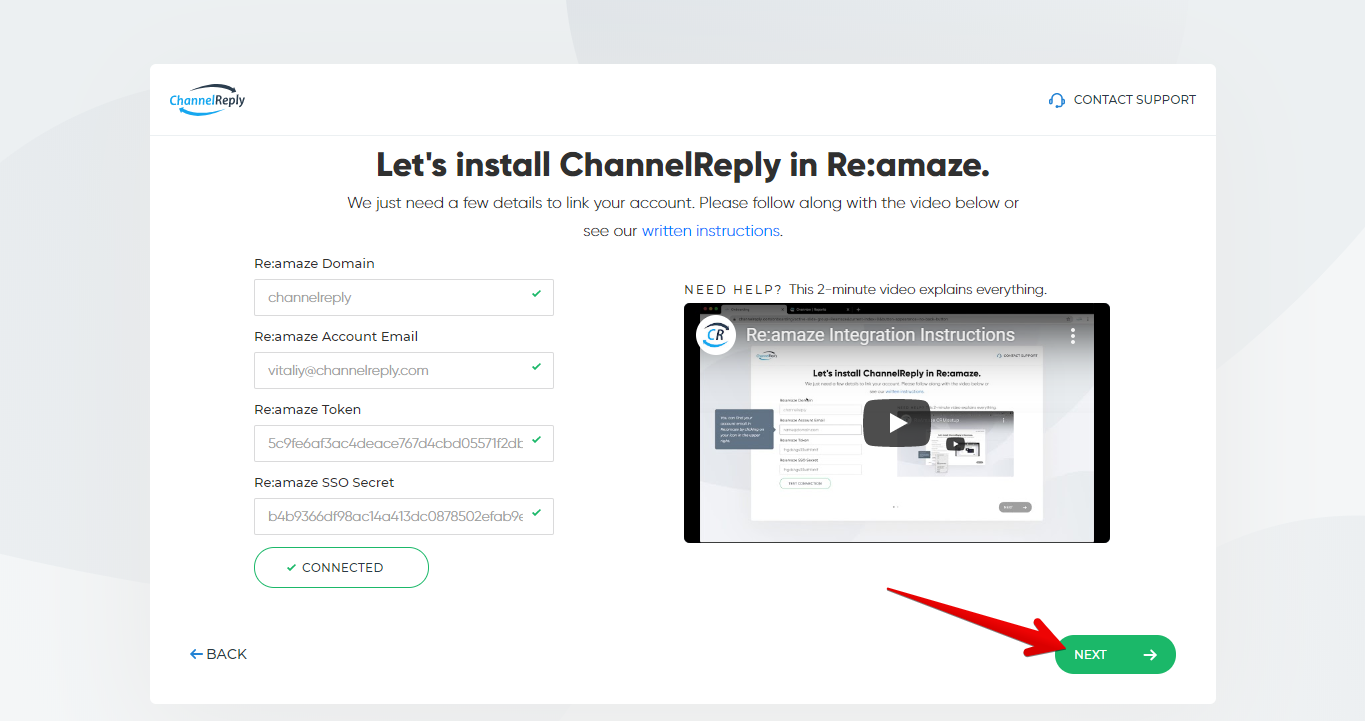
You’ll see a screen asking for details about your Re:amaze account.
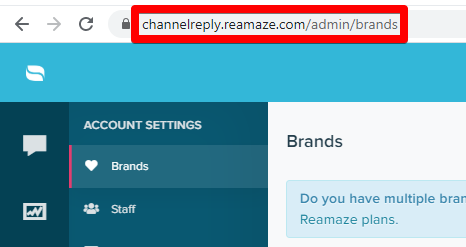
To get your Re:amaze domain, copy the URL on any page in your Re:amaze account.
Paste it into the “Re:amaze Domain” field in ChannelReply. Everything except your unique domain will be deleted automatically. For example, when we enter something like https://channelreply.reamaze.com/admin/brands from our account, it becomes “channelreply” instead.
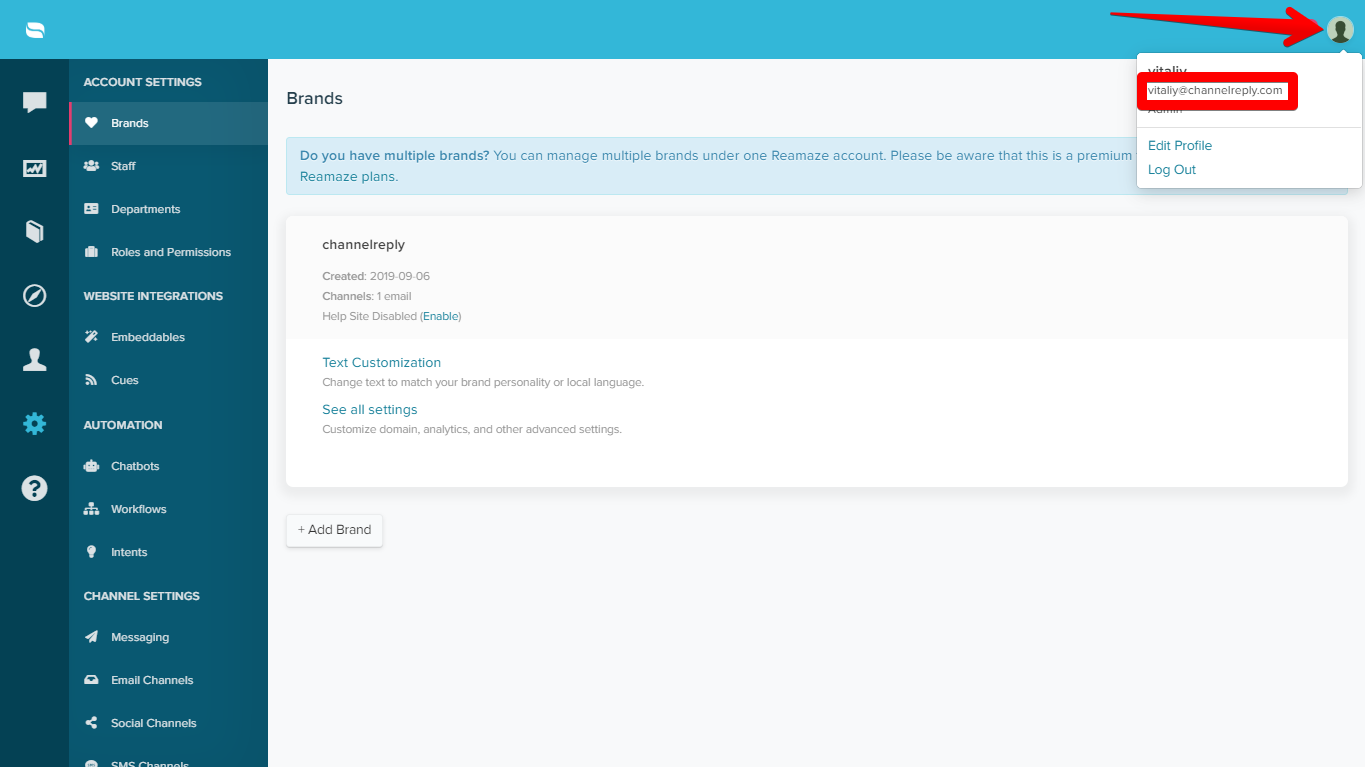
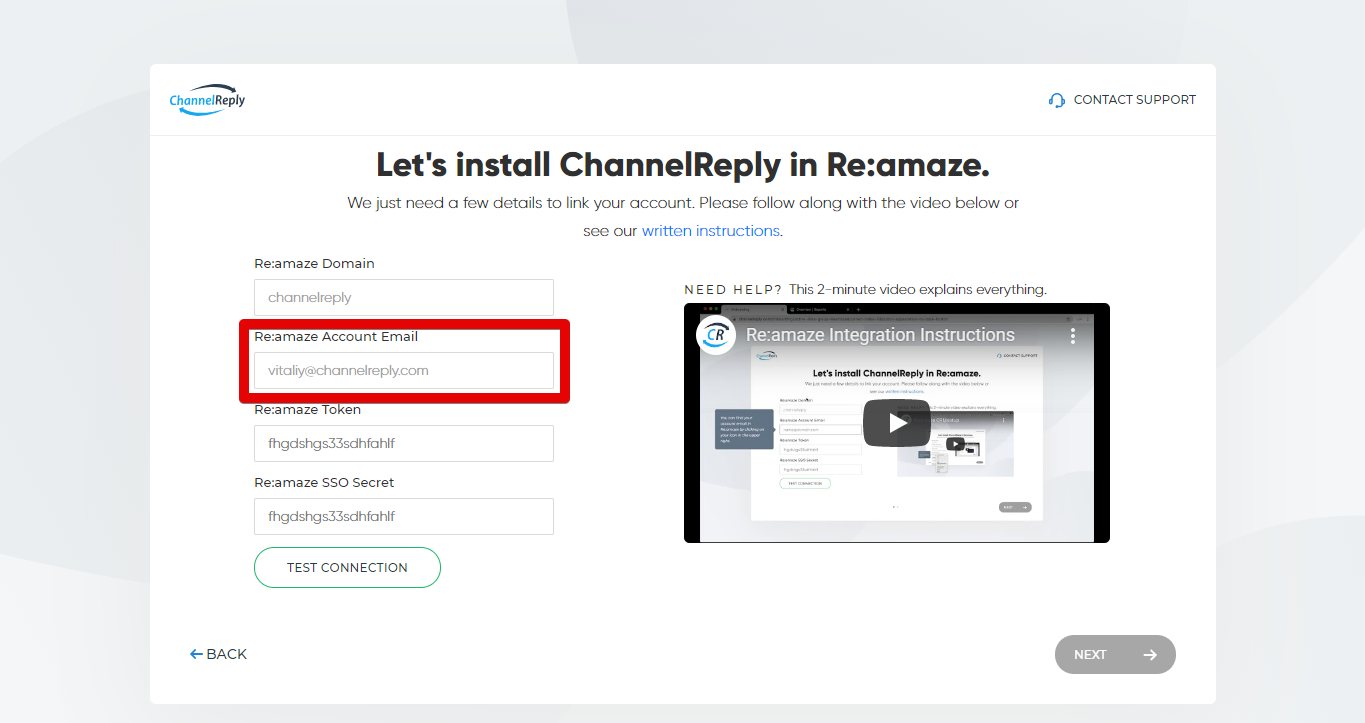
Next, enter your Re:amaze account email address. The fastest way to find this in Re:amaze is to click on your profile picture in the upper right.
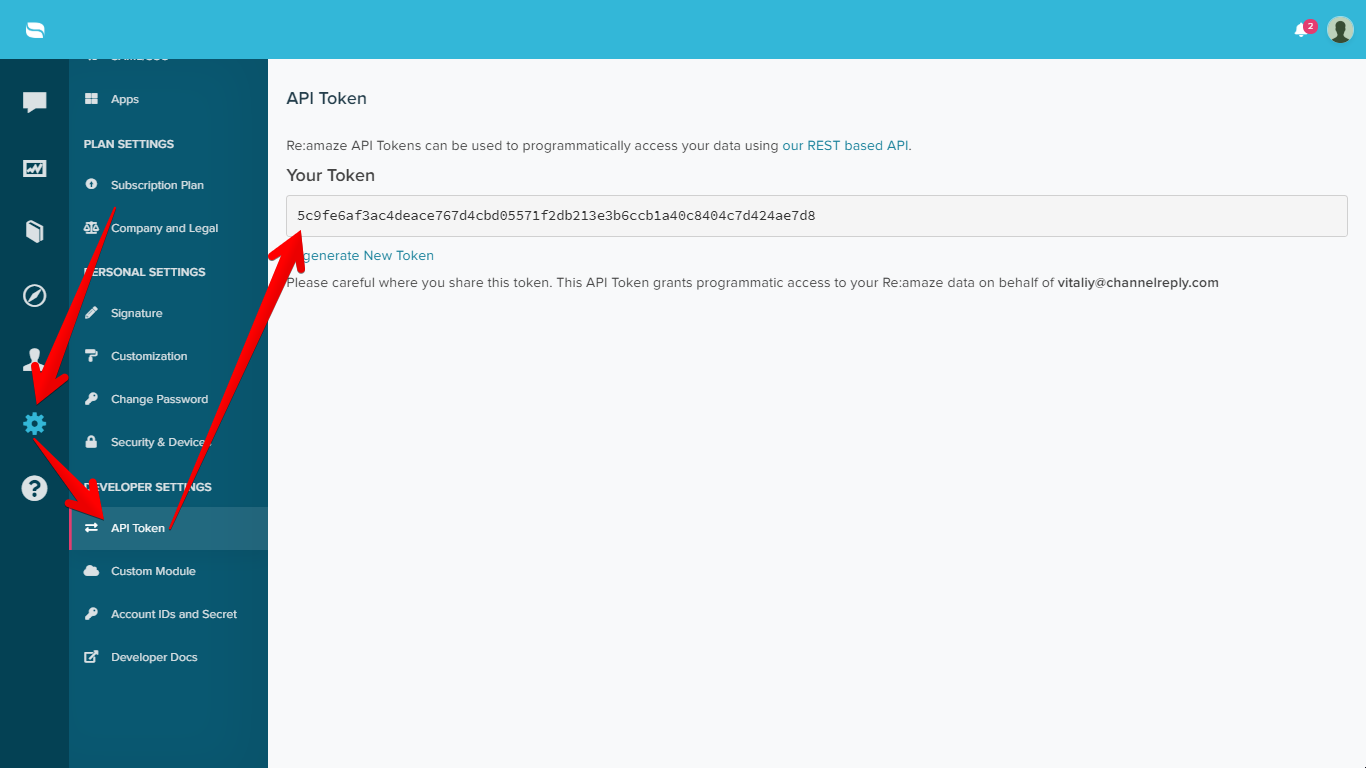
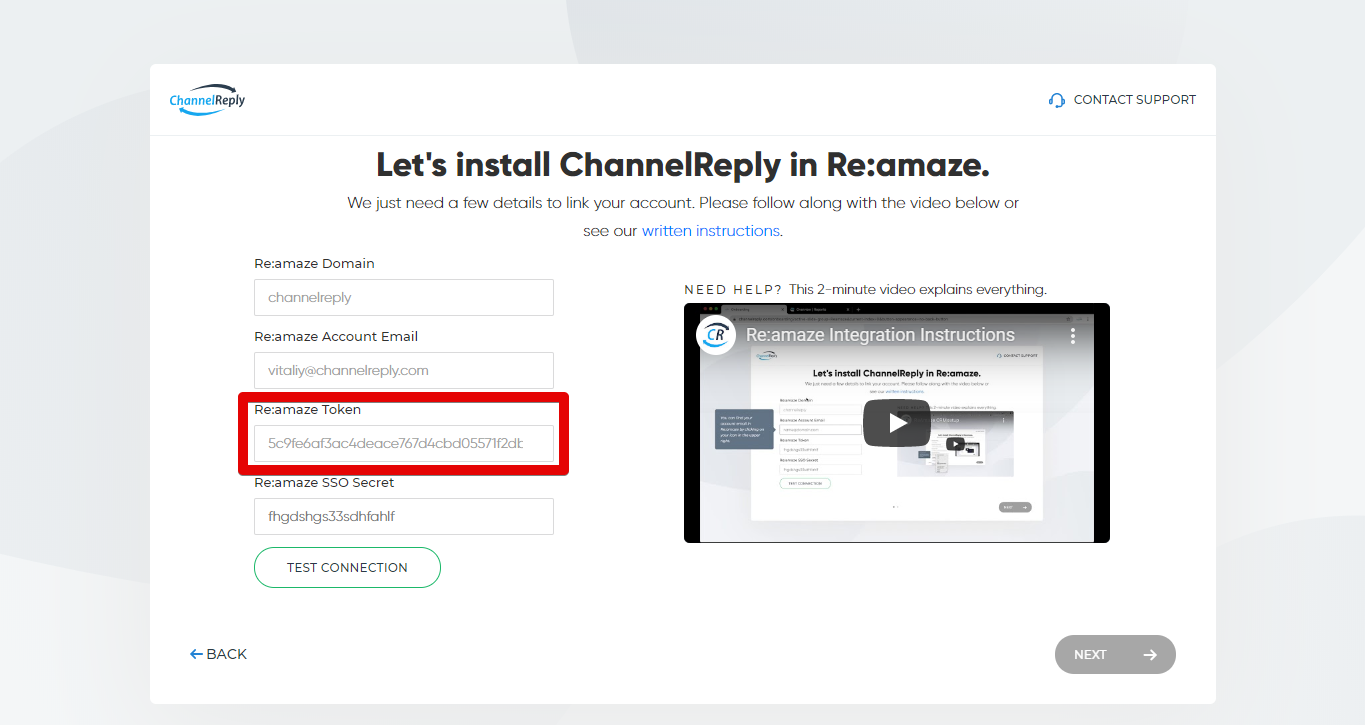
To get your API token, go to Settings > API Token in Re:amaze. Copy it from the “Your Token” field. (If you do not have a token yet, simply click “Generate New Token” to create one, then copy it.)
Next, paste your token into the “Re:amaze Token” field in ChannelReply.
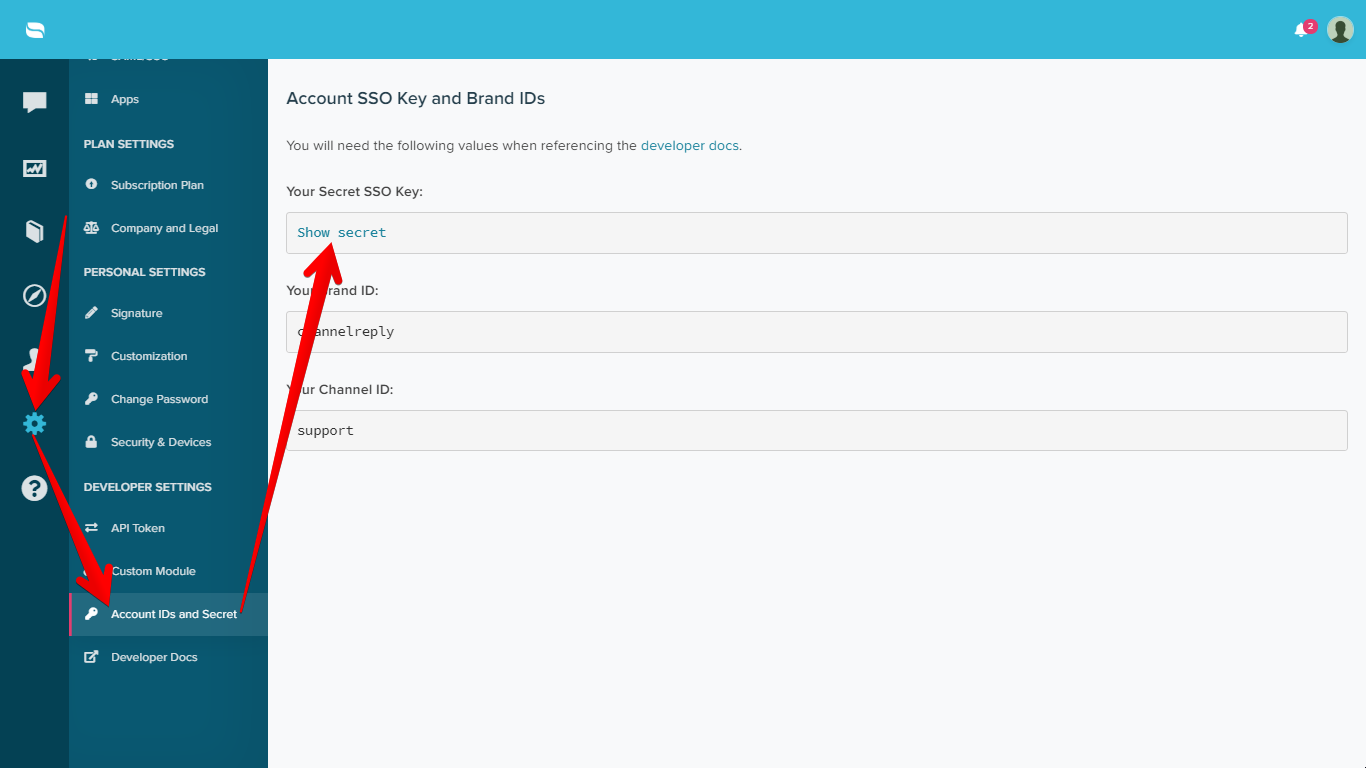
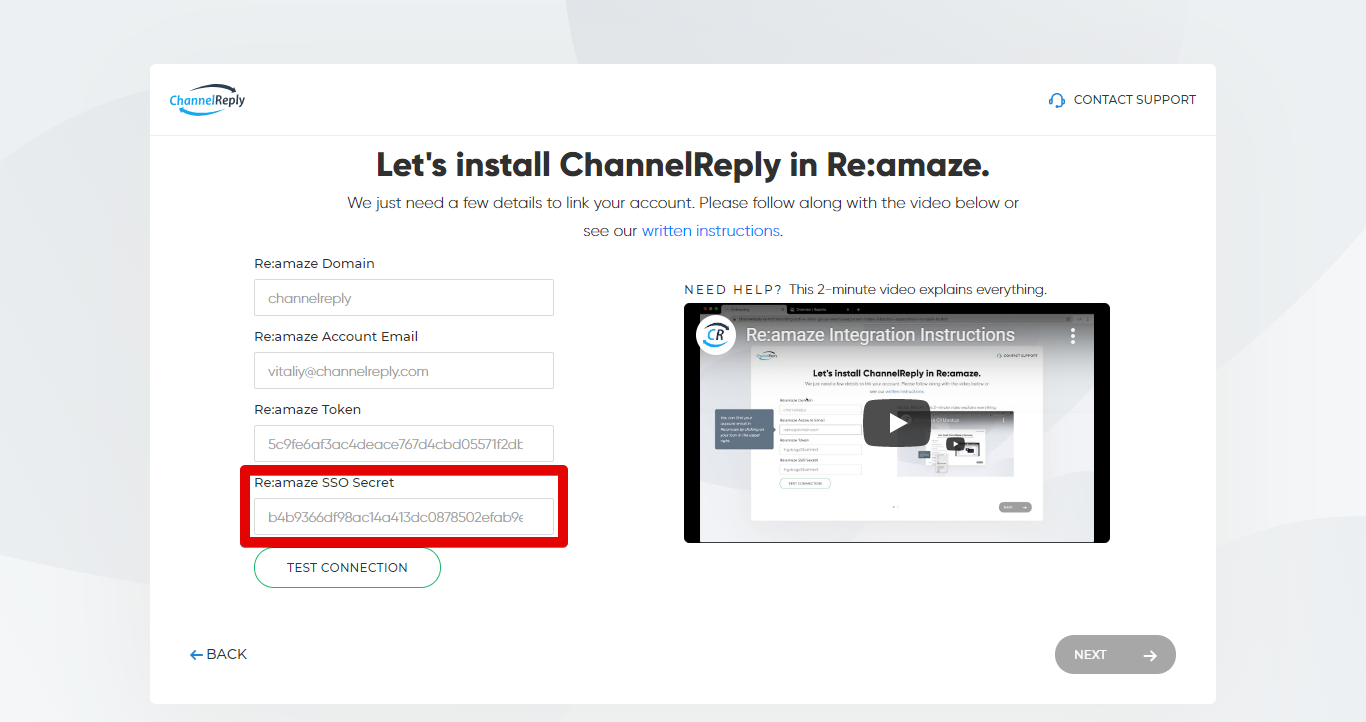
Now for the SSO secret. Go to Settings > Account IDs and Secret in Re:amaze. Under “Your Secret SSO Key,” click “Show Secret.”
Copy the key that appears, then paste it into ChannelReply.
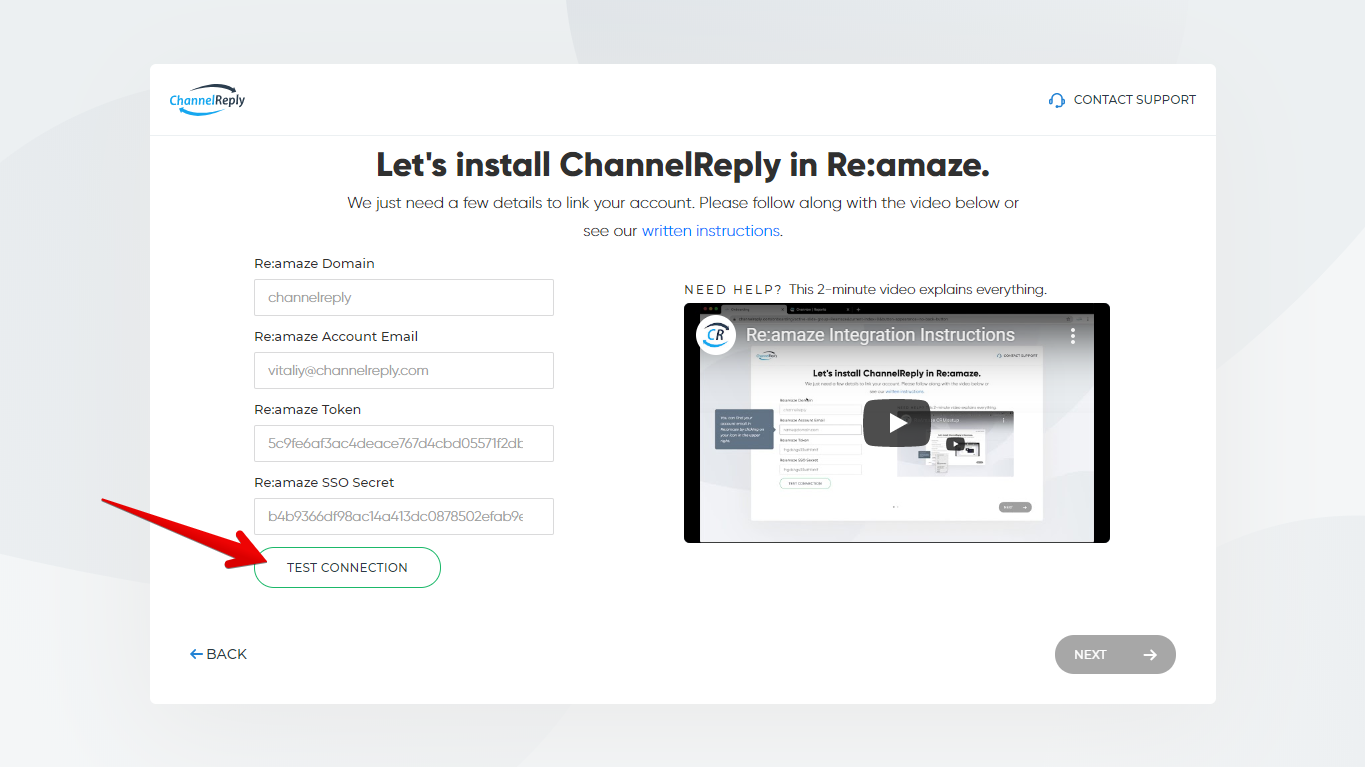
Click “Test Connection.”
Green checkmarks will appear next to every field that has accurate info. “Test Connection” will also change to “Connected” if everything is correct. Click “Next” to continue.
4. Install the Re:amaze App
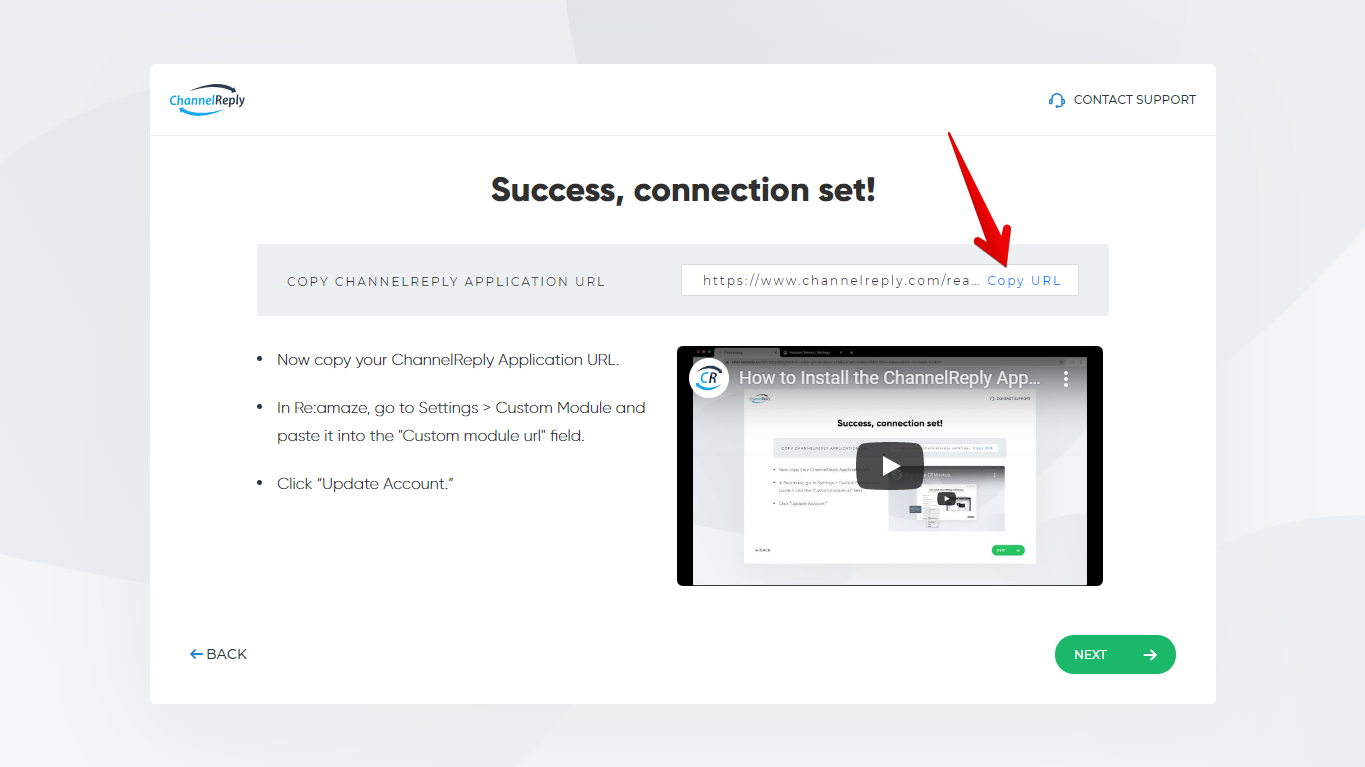
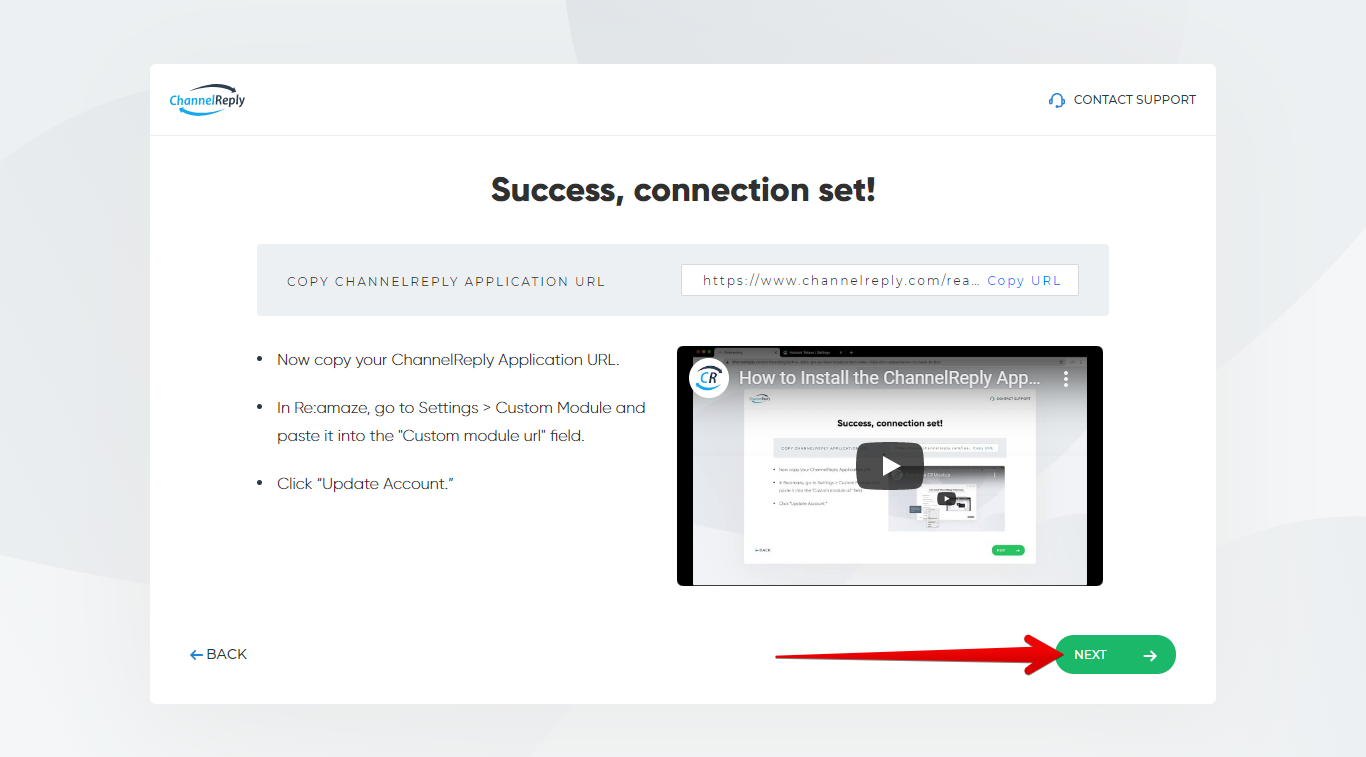
Click "Copy URL" to copy your ChannelReply application URL.
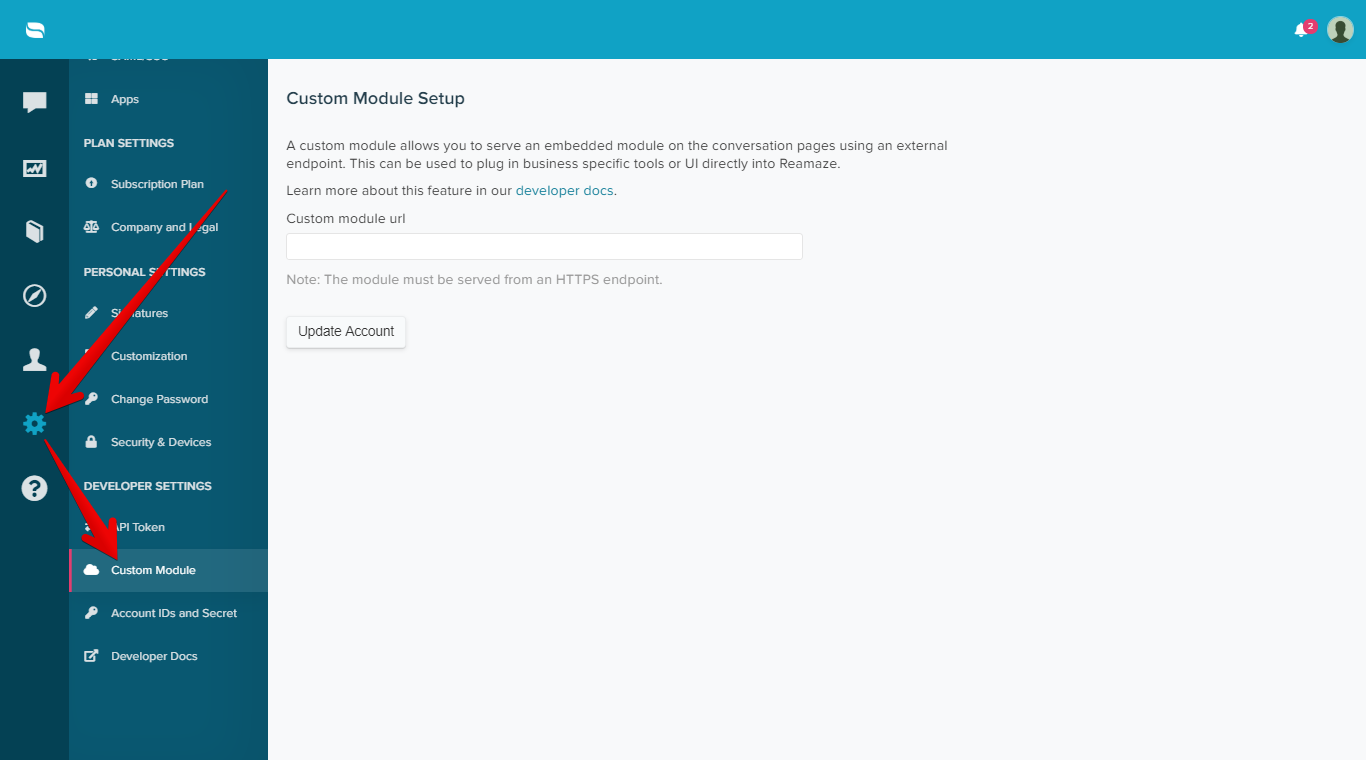
In Re:amaze, go to Settings > Custom Module.
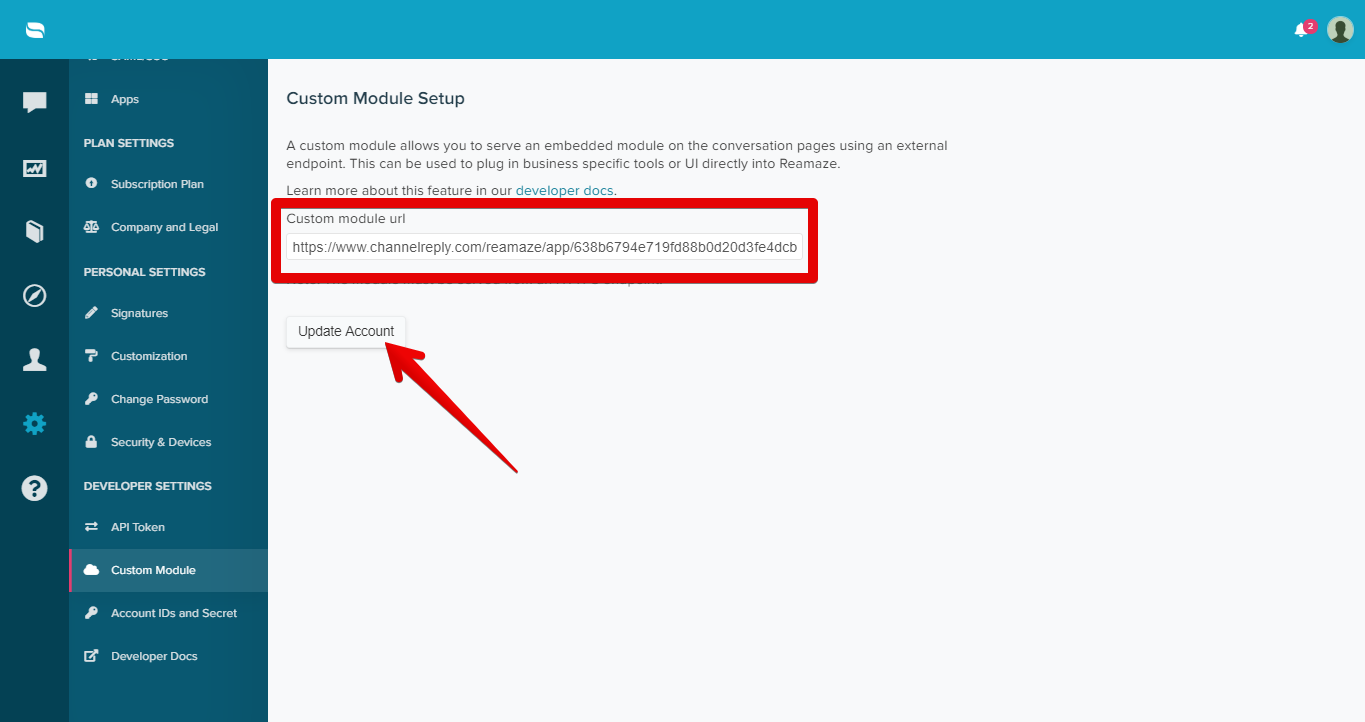
Then paste your ChannelReply application URL into the “Custom module url” field and click “Update Account.”
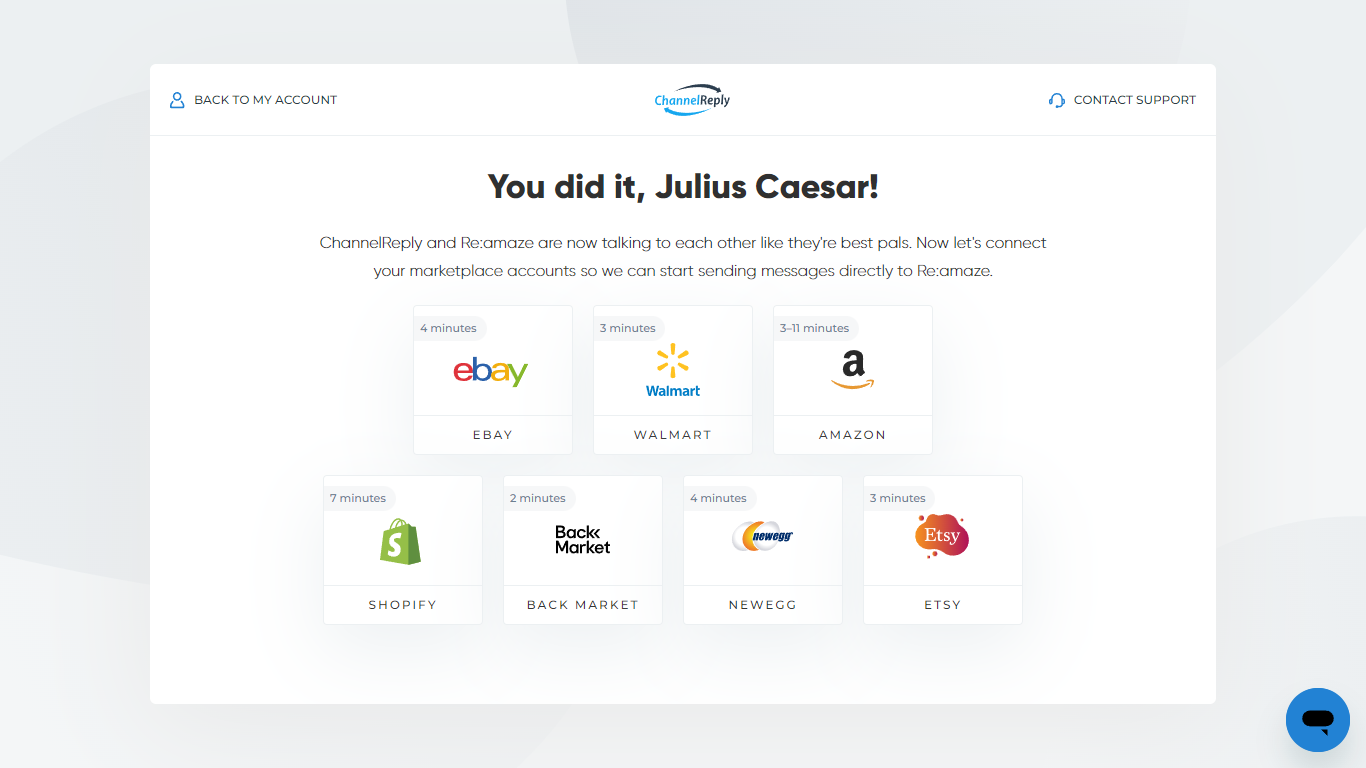
Congratulations! The app has been successfully installed, and Re:amaze and ChannelReply are now integrated. If you want to continue with setup now, return to ChannelReply and click "Next."
Then choose whichever marketplace you’d like to connect first.
Written instructions are available for all our marketplace integrations: Amazon, eBay, Shopify, Walmart US, Walmart Canada, Back Market, Newegg, Etsy, WooCommerce, Octopia, Mirakl, and TikTok Shop.
Alternatively, you can safely exit setup now if you need a break. You can continue anytime by choosing a marketplace from your account dashboard.
Need help? Contact us and we’ll be happy to assist you.


