This article covers how to disconnect Zendesk from ChannelReply completely.
Click on any image to view it at full resolution.
1. Disconnect Zendesk from Inside ChannelReply
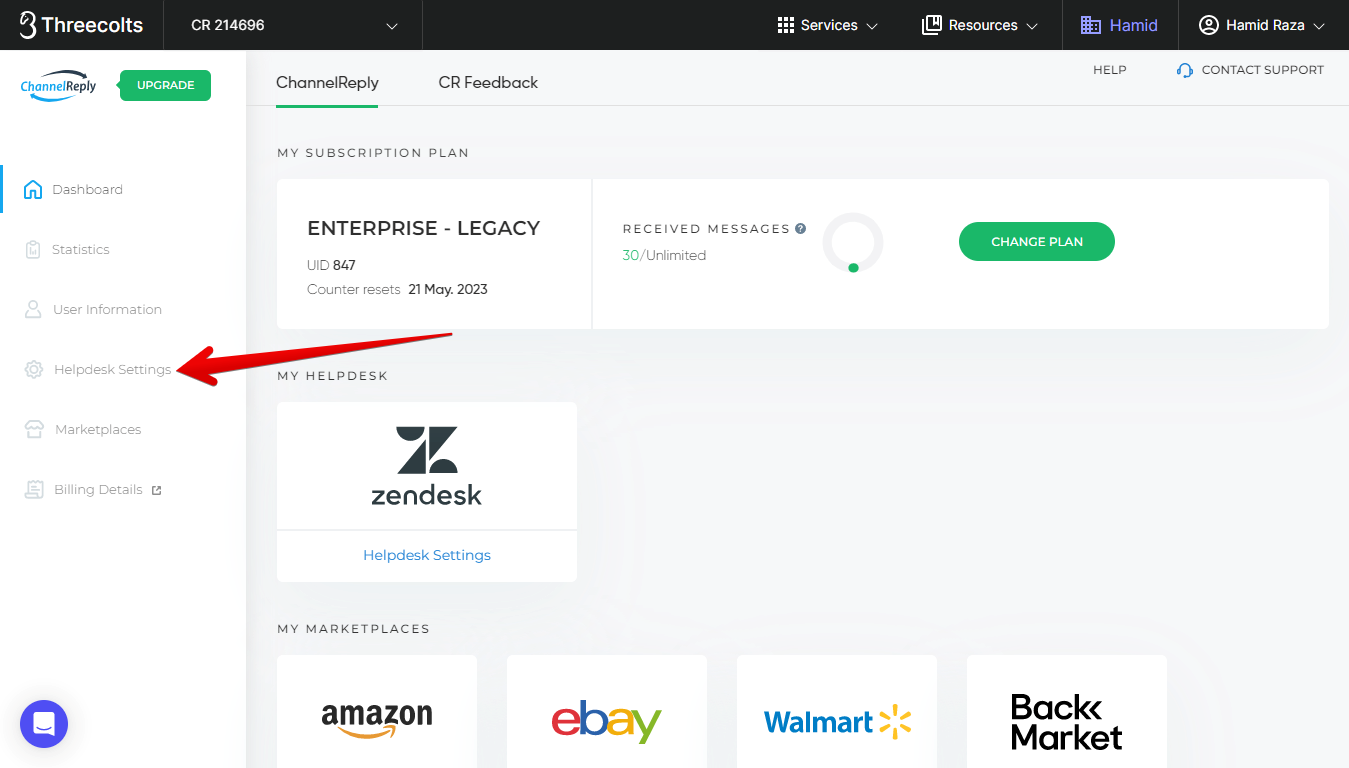
Sign in to ChannelReply and click “Helpdesk Settings.”
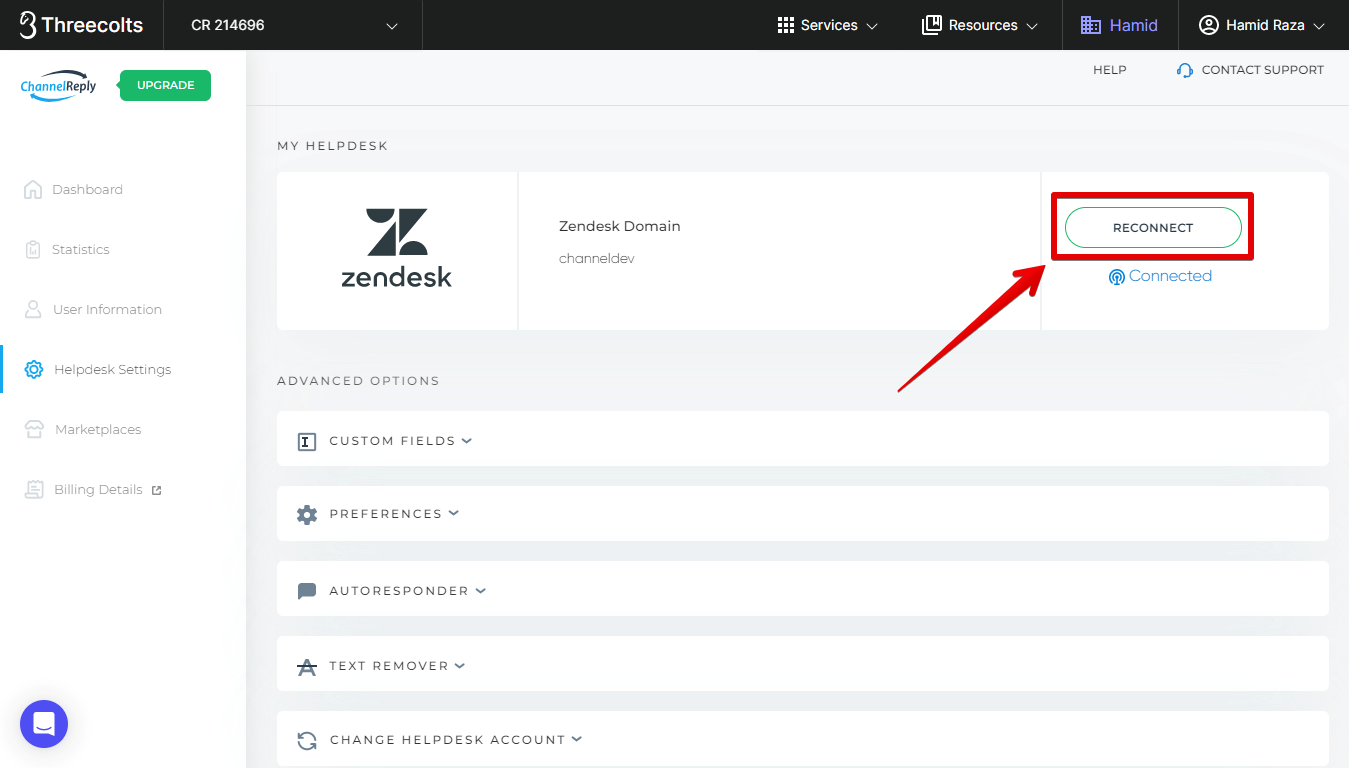
If you see a “RECONNECT” button at the top of the screen, it means you used our OAuth setup.
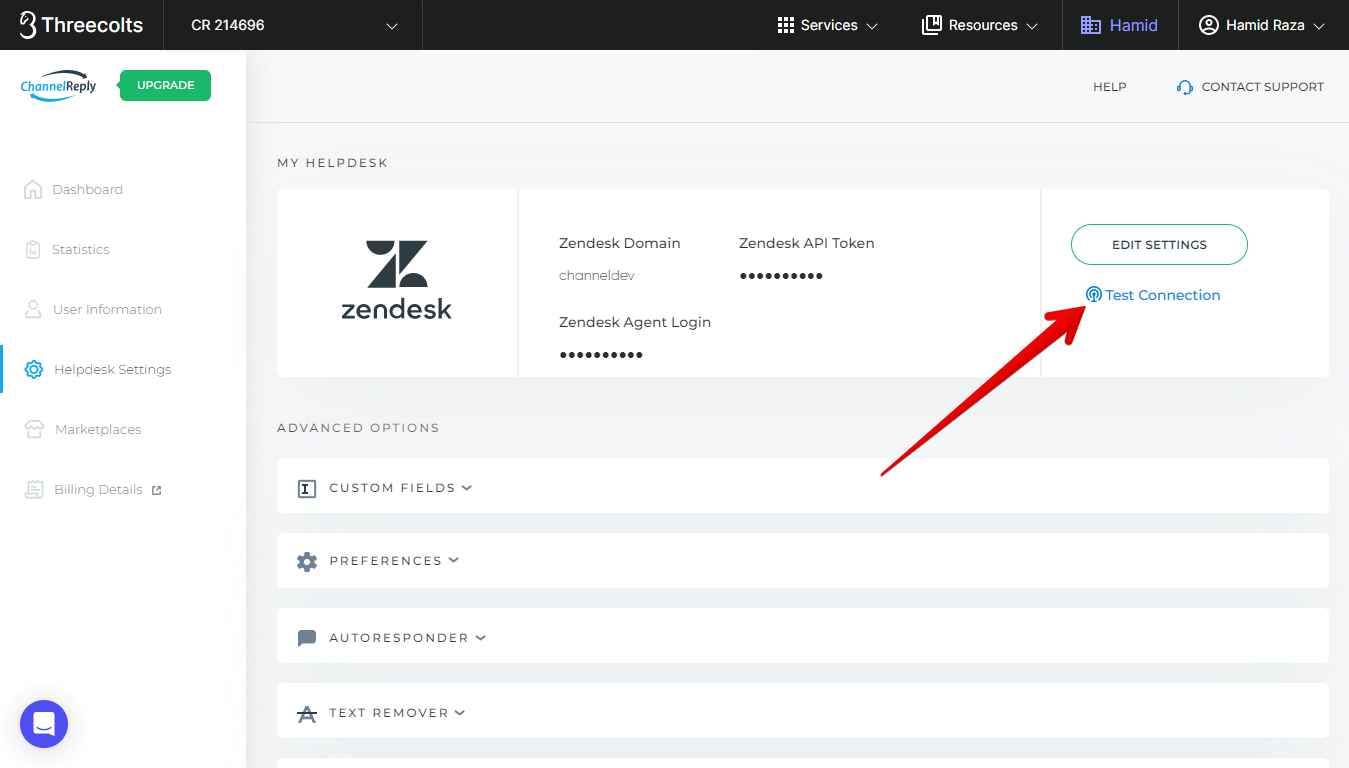
If you see “Test Connection” instead, though, then you have our classic setup.
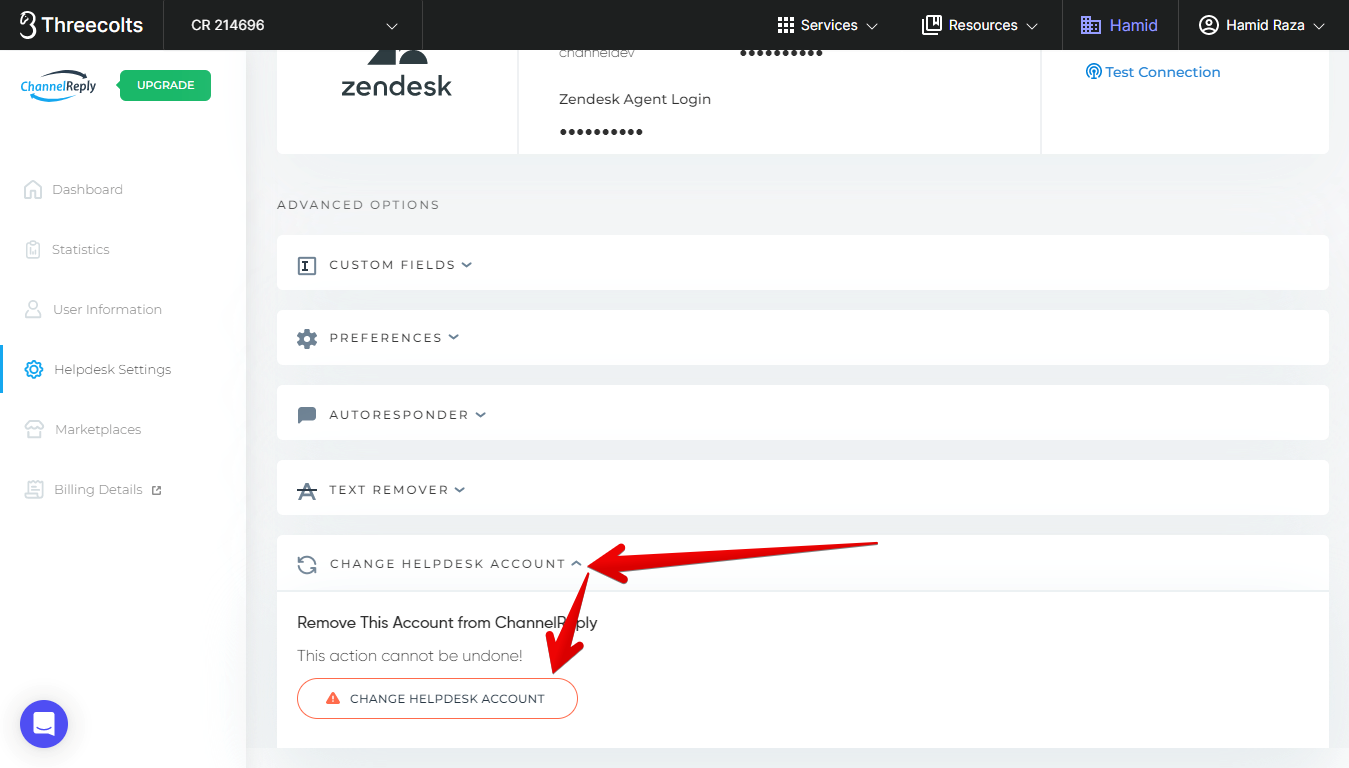
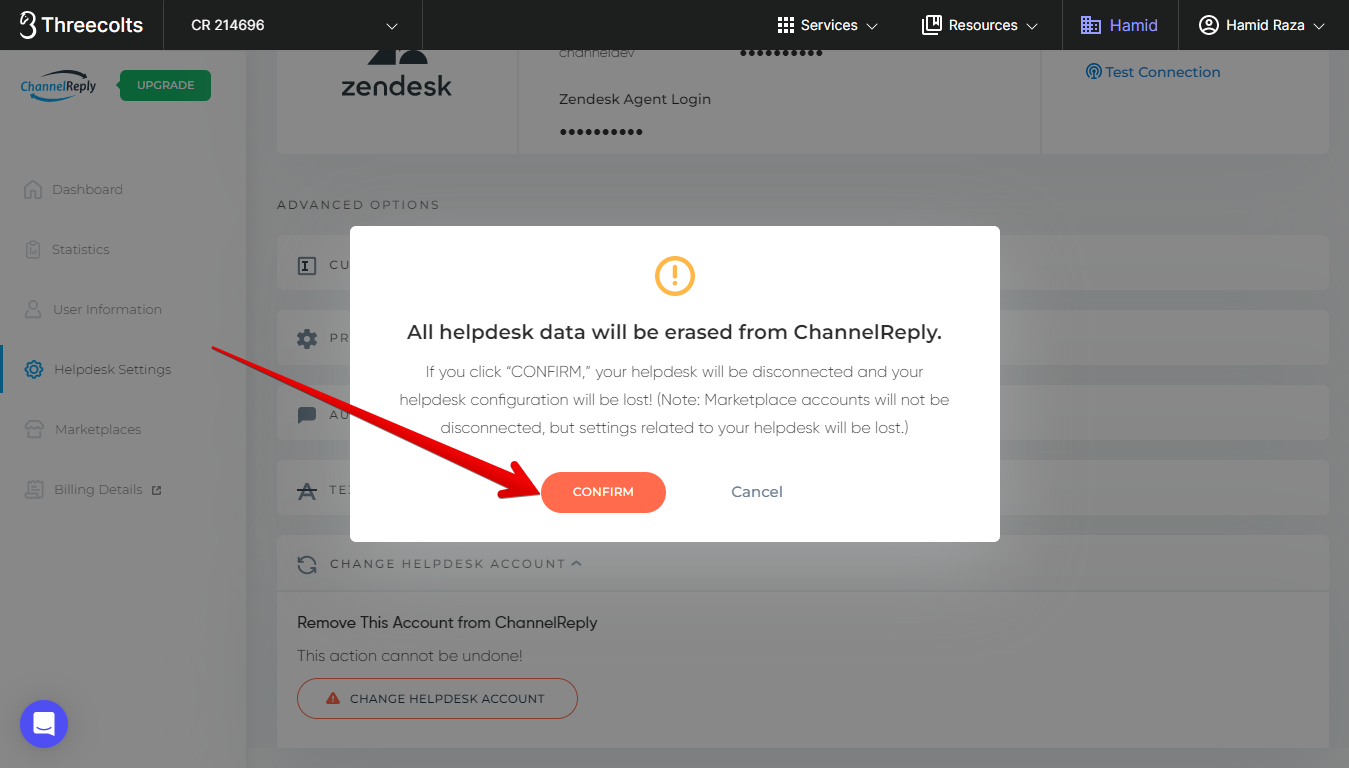
Take note of which setup you have. Then scroll to the bottom of the page and click “CHANGE HELPDESK ACCOUNT.”
A warning message will appear. Click “CONFIRM” to delete your Zendesk info from ChannelReply.
2. Uninstall the ChannelReply App
Log in to Zendesk using the same agent account you used to integrate with ChannelReply.
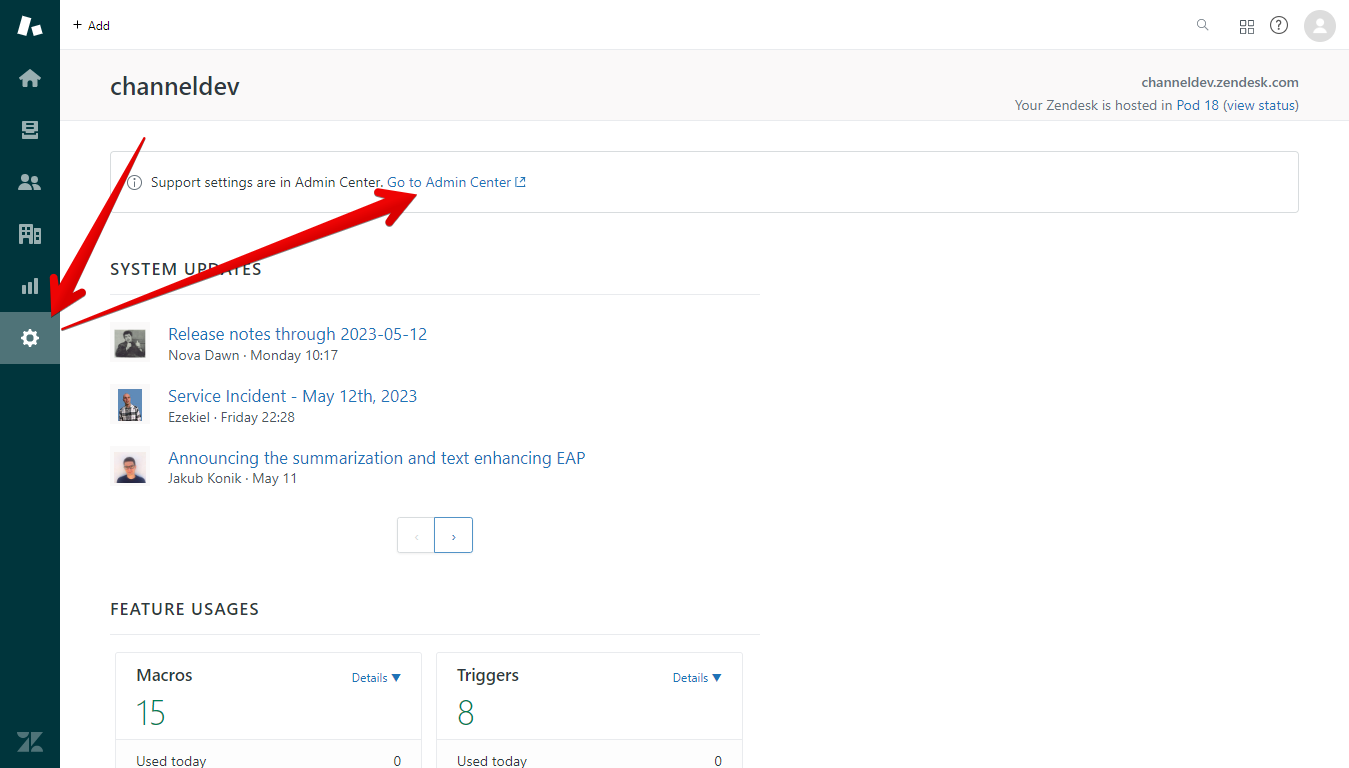
Next, go to Admin Center by clicking Admin (the gear icon on the left) and then selecting “Go to Admin Center.”
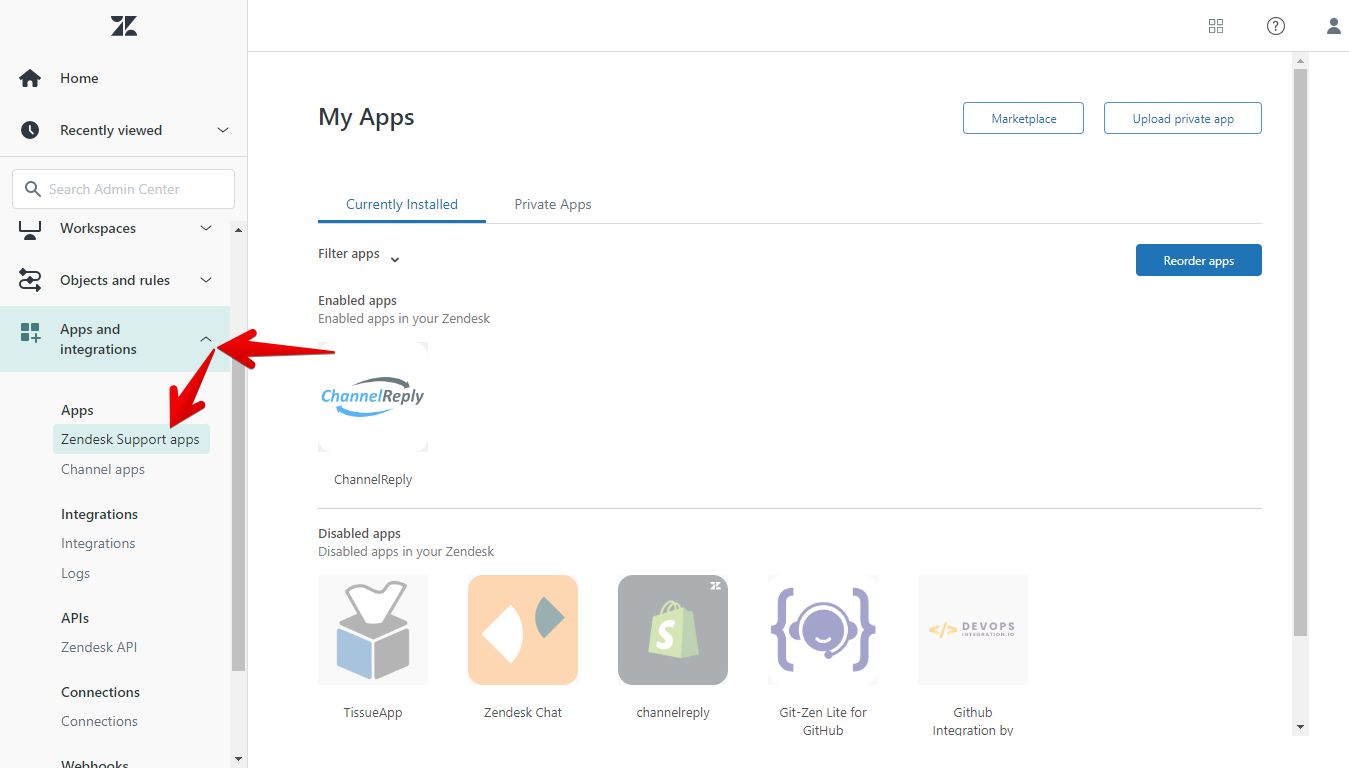
Once you’re in Admin Center, click “Apps and integrations” and select “Zendesk Support apps.”
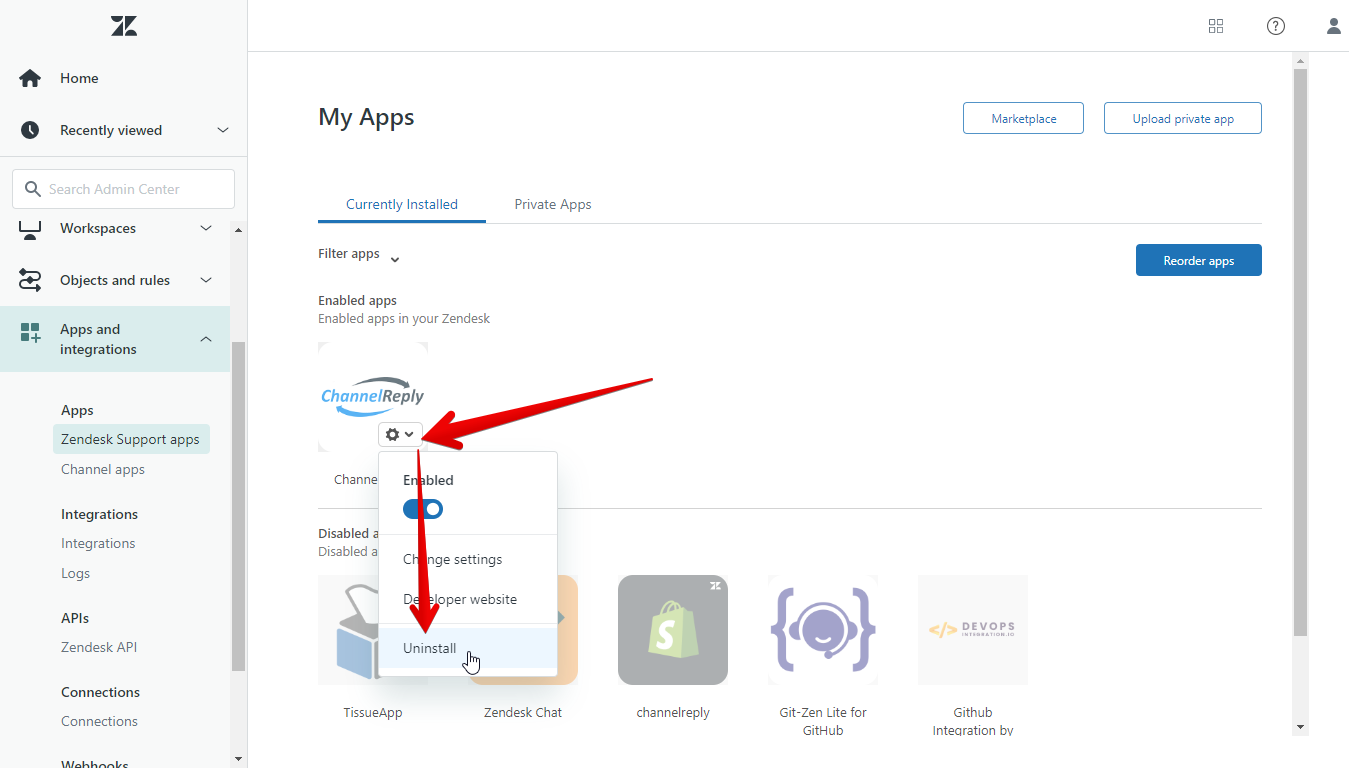
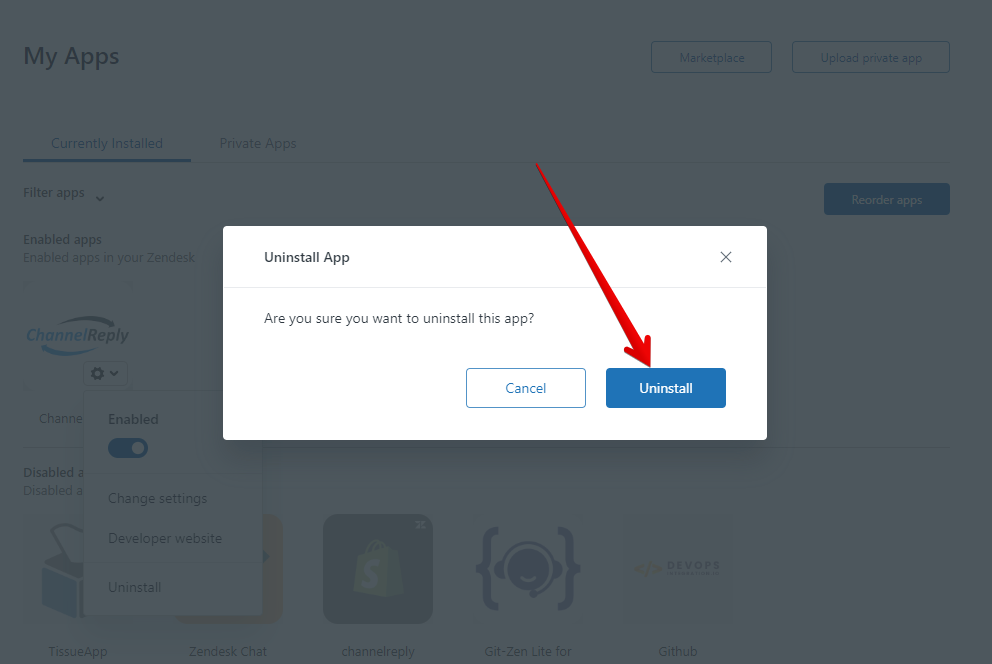
Mouse over ChannelReply and click the gear icon. Choose “Uninstall.”
Confirm by clicking “Uninstall” on the popup that appears.
A success notification will appear briefly, then disappear again.
3. Disconnect ChannelReply from Inside Zendesk
If you were using our classic setup, skip to step 4. If you were using our OAuth setup, continue following these instructions.
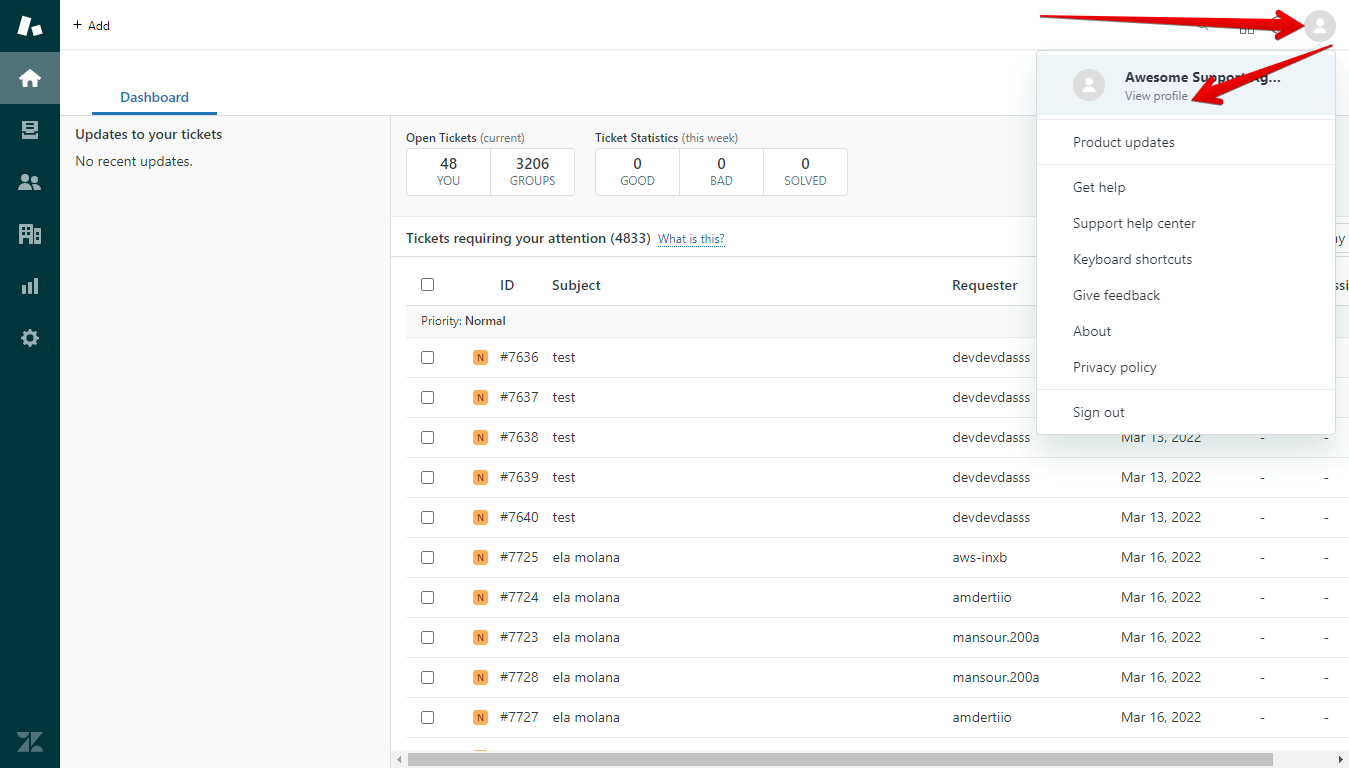
From your Zendesk home screen, click your profile picture in the upper right and choose “View profile.”
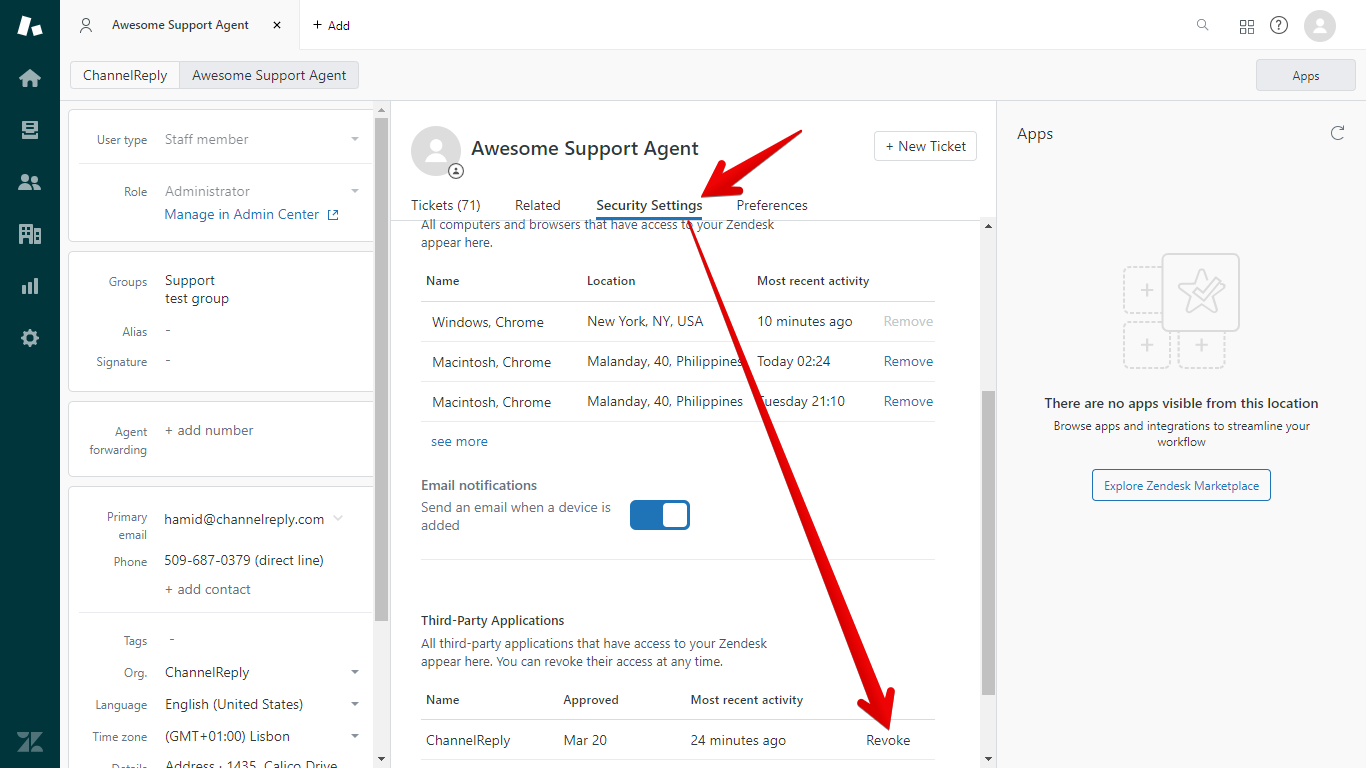
Choose “Security Settings” under your name near the top of the page. Then scroll to the bottom of the Security Settings screen until you find “Third-Party Applications.” Click “Revoke” next to ChannelReply.
Zendesk will display a success notification, and ChannelReply will no longer appear in the list of third-party applications.
4. Remove the Notify ChannelReply Trigger
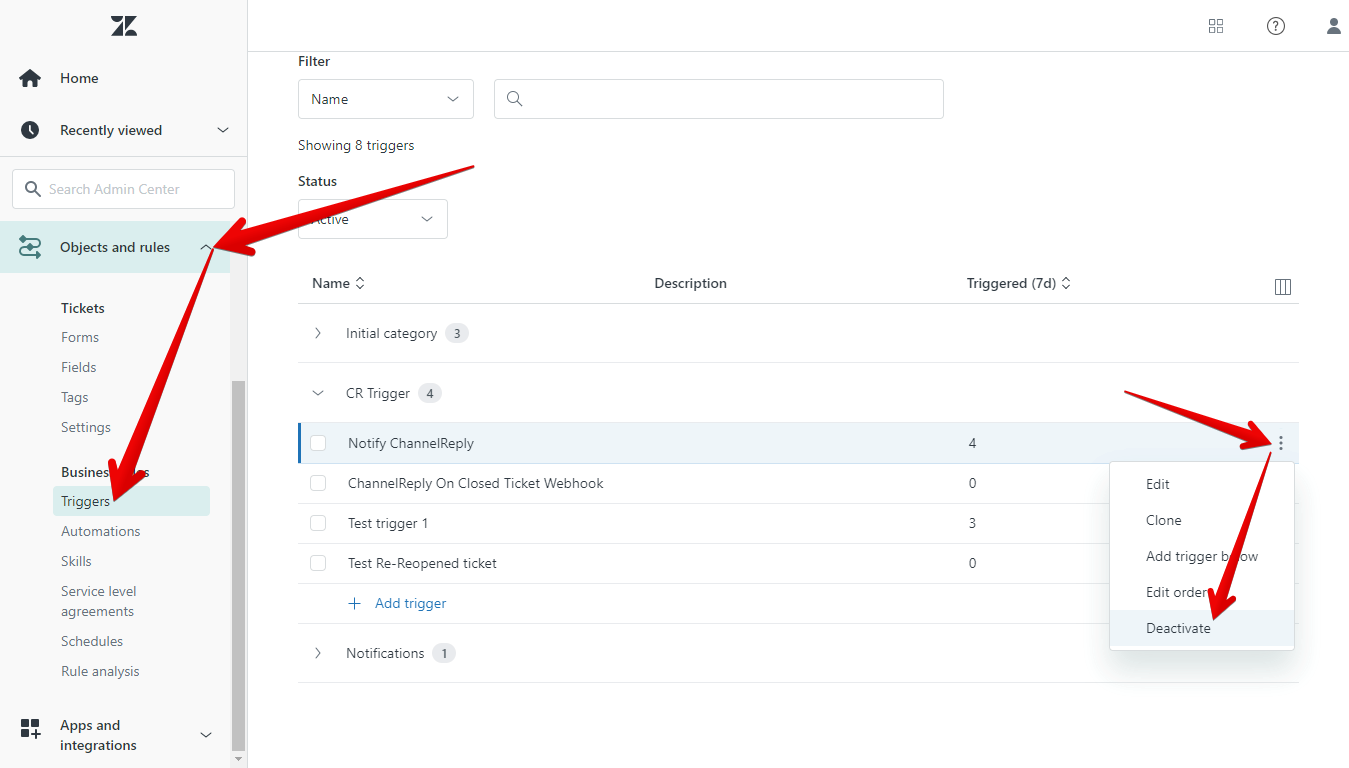
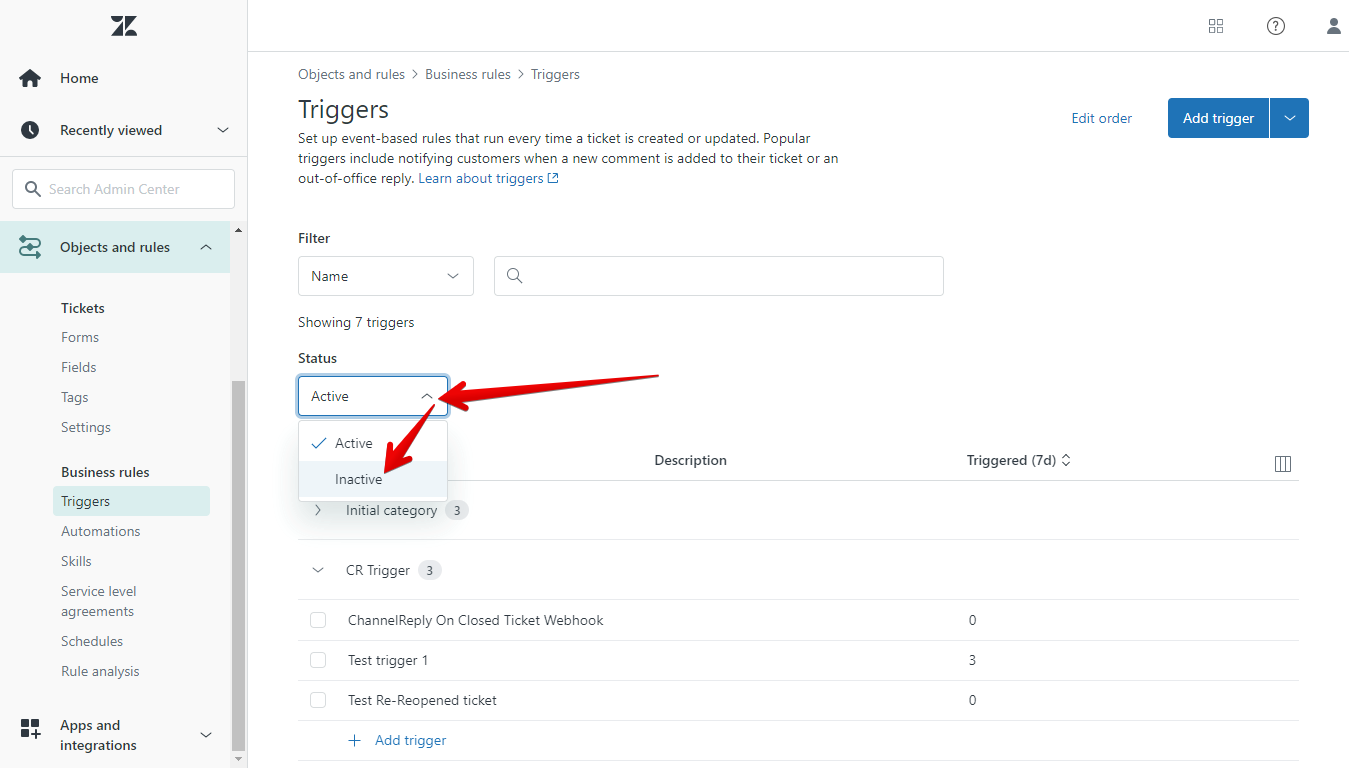
In Zendesk Admin Center, go to “Objects and rules” > “Triggers.” Locate the "Notify ChannelReply" trigger and click the three dots icon next to it. Hit "Deactivate" to deactivate the trigger.
Finally, switch to “Inactive” at the top of the list of triggers.
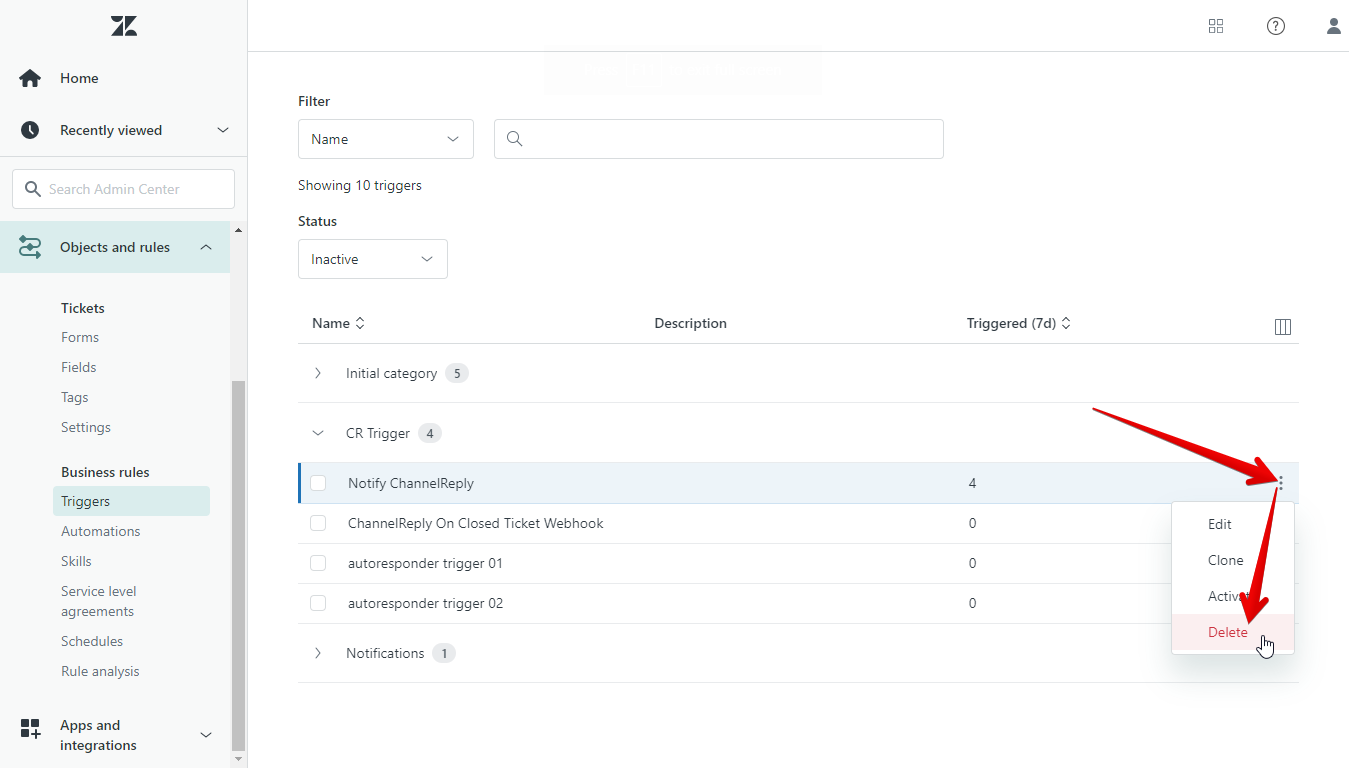
Mouse over “Notify ChannelReply” again, click the column of three dots, and choose “Delete.”
Confirm by clicking “Delete trigger” on the next screen.

ChannelReply is now completely disconnected from Zendesk!
If you disconnected to troubleshoot an issue, you can reconnect now. Simply follow our Zendesk integration instructions.
Decided you want to try a different helpdesk instead of Zendesk? Check out “Which Helpdesk Should I Use with ChannelReply?” for help finding one that may be a better fit!
As always, if you have any questions, contact us and our Awesome Support Team will get back to you ASAP.


