Having trouble using your normal Help Scout Auto Reply for Amazon, eBay, Shopify, Walmart, Back Market or Newegg? With ChannelReply, you can turn Help Scout workflows into ecommerce autoresponders. They’ll even count toward Amazon’s 24-hour response time SLA!
All you need to do is:
- Sign up for ChannelReply if you haven’t already.
- Connect your Help Scout and marketplace accounts.
- Follow the easy instructions below.
Overview
To build a good ecommerce autoresponder in Help Scout, you’ll need two workflows.
- The first will save customers from getting auto-replies if an agent has already responded. That way, nobody gets annoyed by unwanted messages.
- The second is your actual ecommerce autoresponder. This will send a delayed auto-reply to the first message in each conversation. You can use this for any number of Amazon, eBay, Shopify, Walmart, Back Market and Newegg accounts.
Click on any image to view it at full resolution.
1. Create ChannelReply Tags
If you have not done so already, set up ChannelReply tags for every marketplace account that needs an autoresponder. Make sure you know your tags before continuing.
2. Create a Workflow to Prevent Double Responses
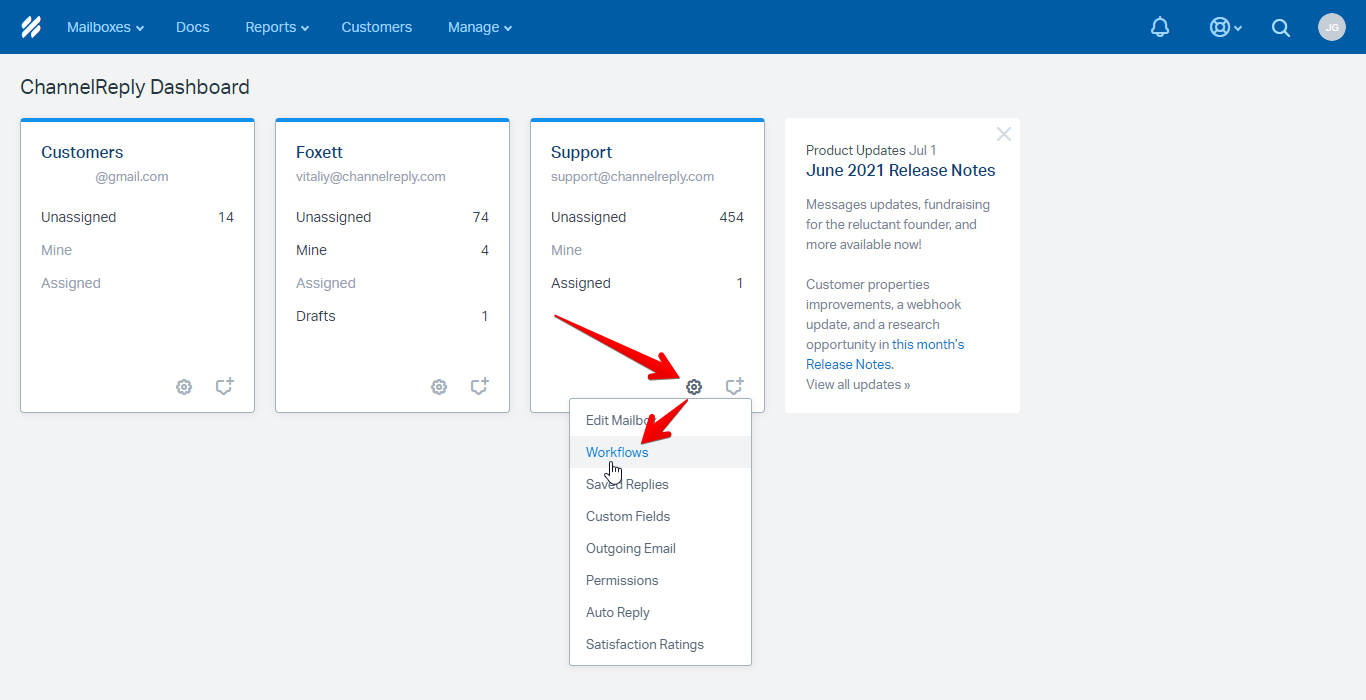
Sign in to Help Scout in a new tab. Under the mailbox that should send your auto-reply, click “Mailbox Settings” (the little gear icon at the bottom). Select “Workflows.”
Click “New Workflow.”
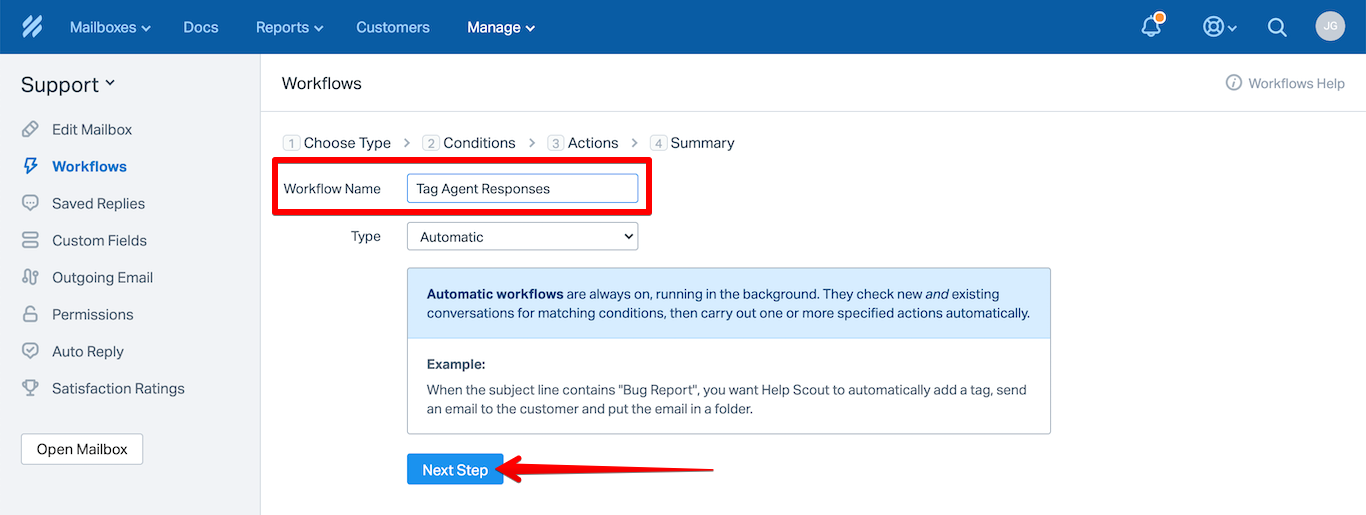
This workflow will tag tickets that received an agent response. Give it a suitable name, like “Tag Agent Responses.”
Leave the type on “Automatic.” Then click “Next Step.”
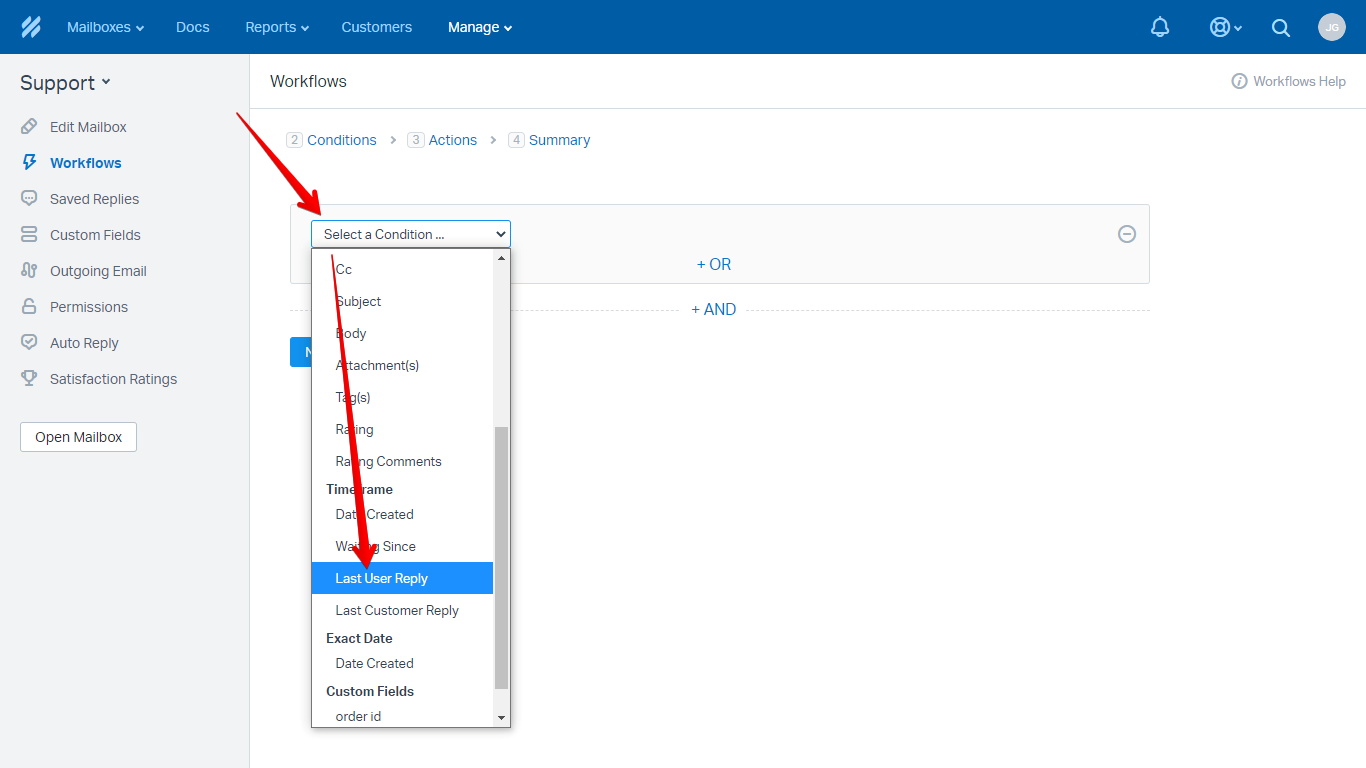
Click “Select a Condition” and choose “Last User Reply.”
Leave “Is in the last” and “1.” Change “Days” to “Hours,” then hit “Next Step.”
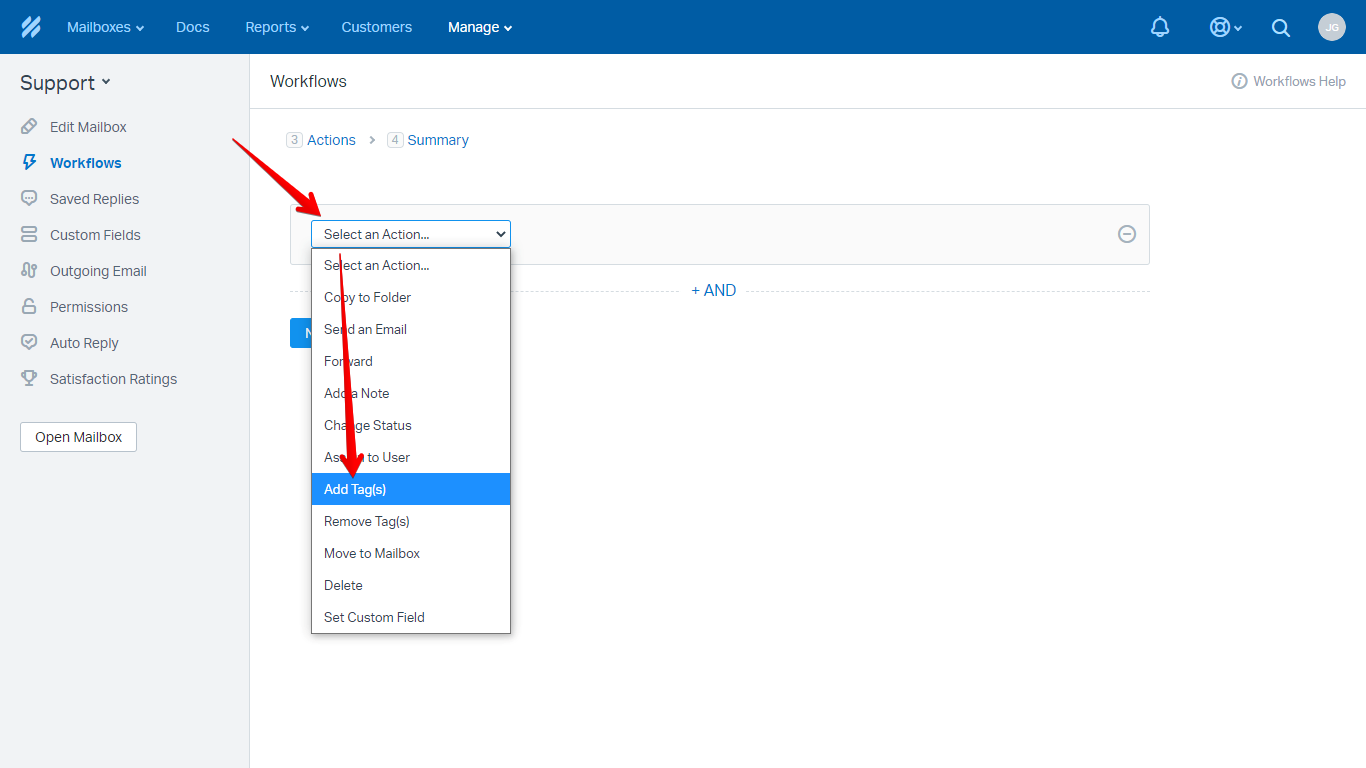
Click “Select an action” and choose “Add Tag(s).”
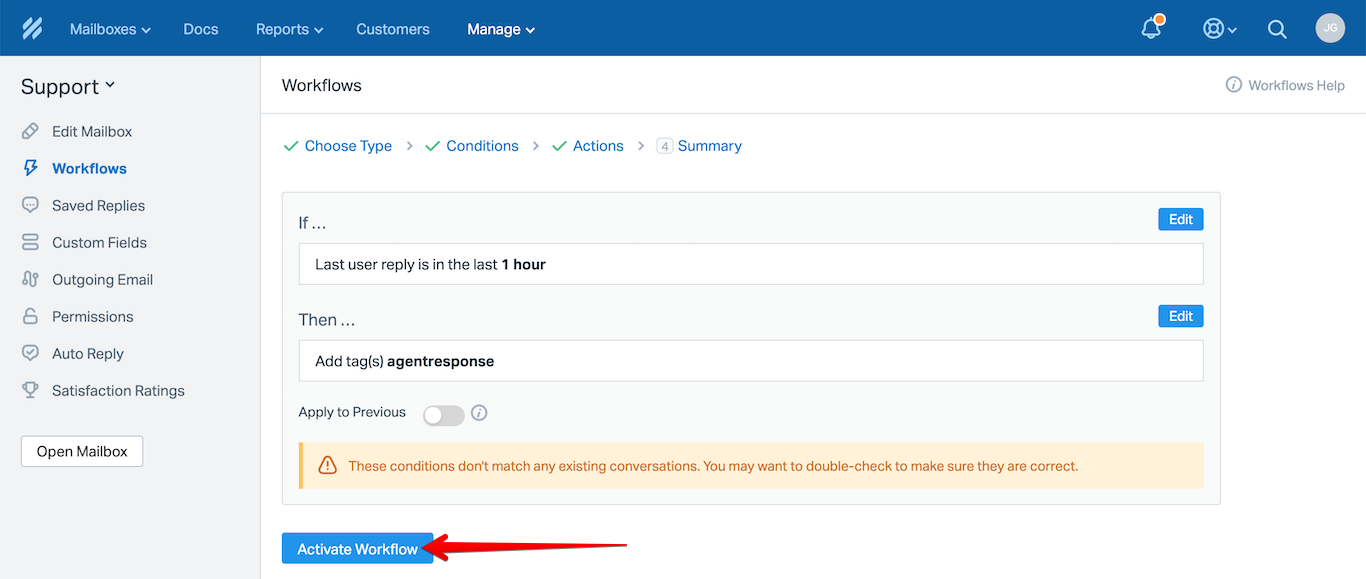
Enter the tag “agentresponse.” (You can use a different tag if desired, but you’ll need to make sure you use it anywhere else we mention the “agentresponse” tag.) Once finished, hit “Next Step.”
Click “Activate Workflow.”
3. Create an Ecommerce Autoresponder in Help Scout
You’ll be returned to the Workflows page automatically. Click “New Workflow.”
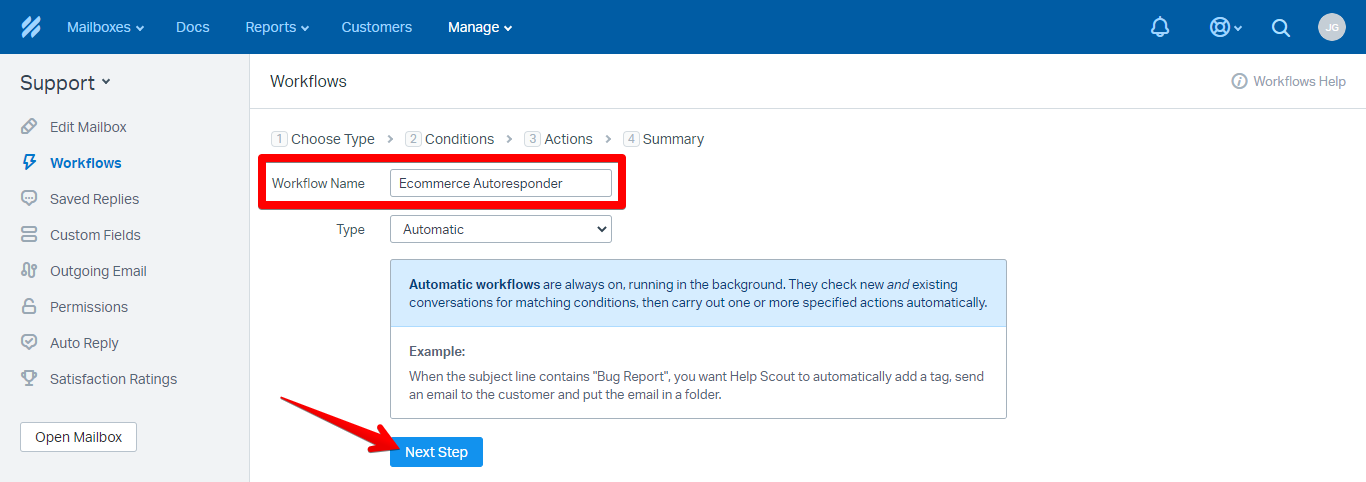
Give the workflow a name, like “Ecommerce Autoresponder.” Leave the “Type” set to “Automatic” and click “Next Step.”
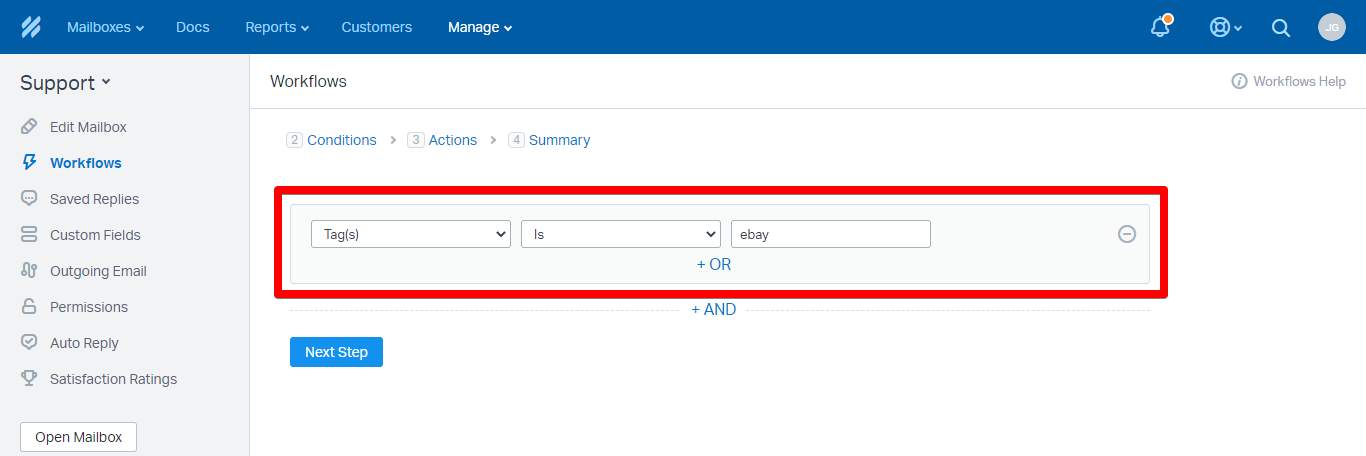
Enter the following condition:
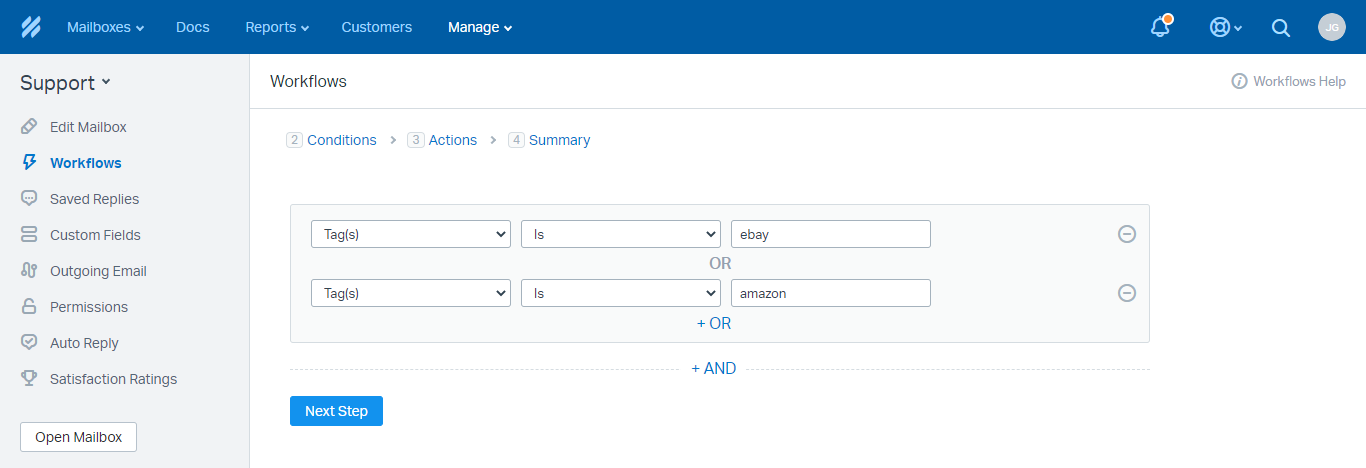
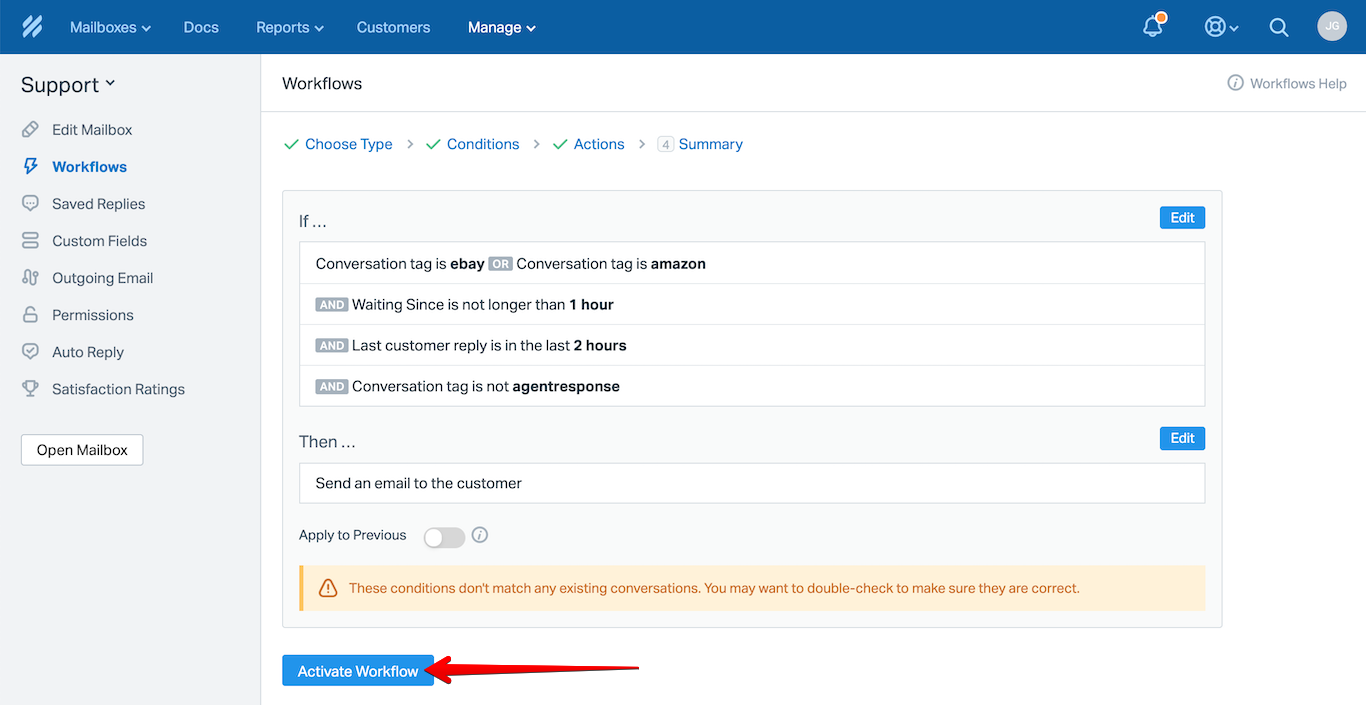
Tag(s) | Is | the ChannelReply tag of any marketplace account you want this autoresponder to run on.
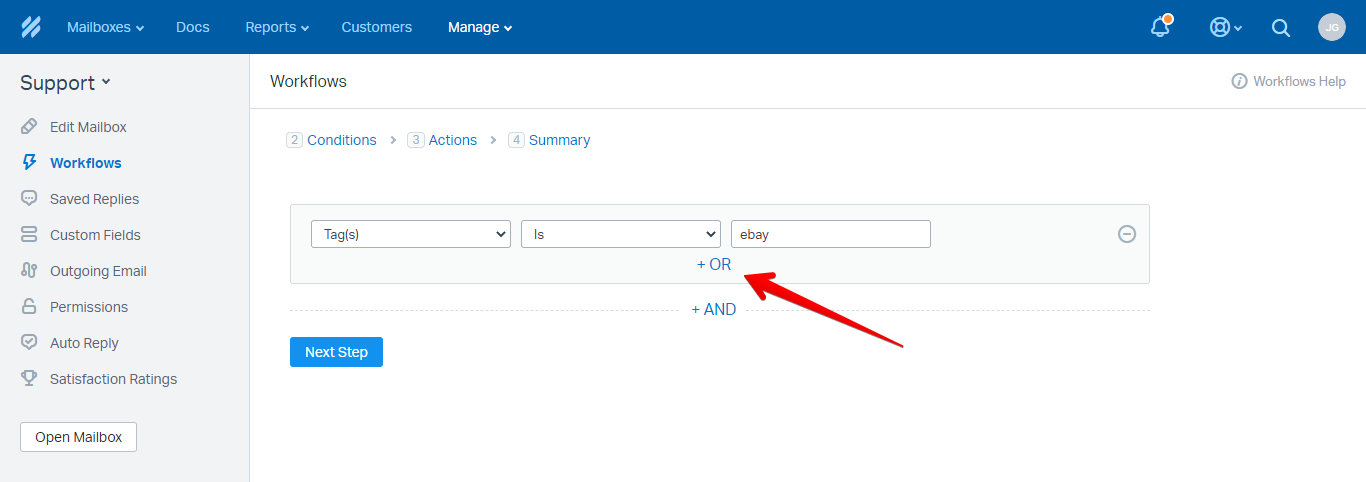
If you want to use this autoresponder for multiple accounts, click “+ OR.” Then choose “Tag(s) | Is” again and enter the tag for the next account. Repeat for as many tags as you would like.
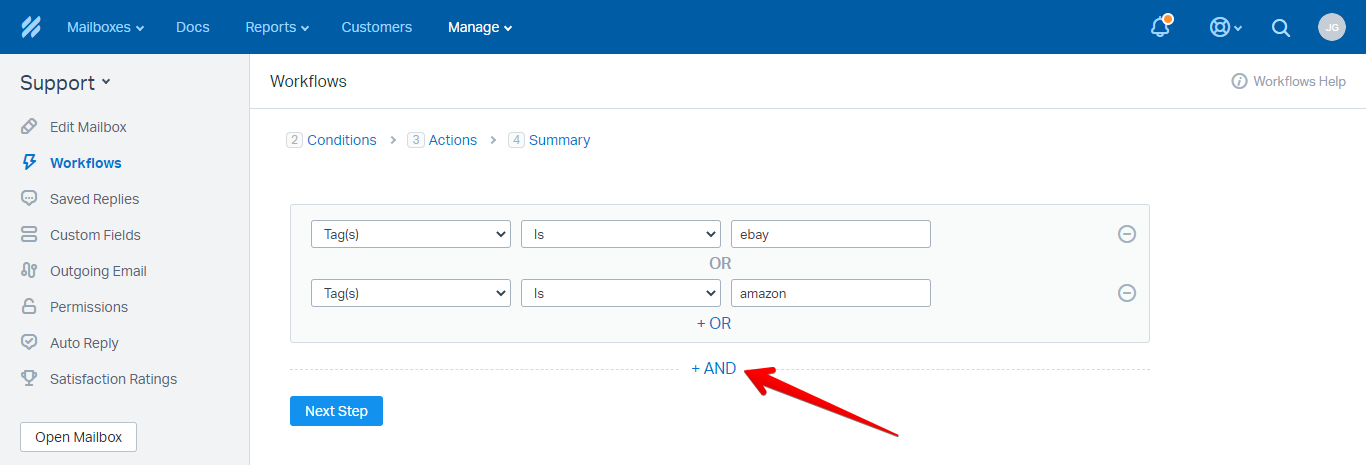
Once all tags are set, click “+ AND.”
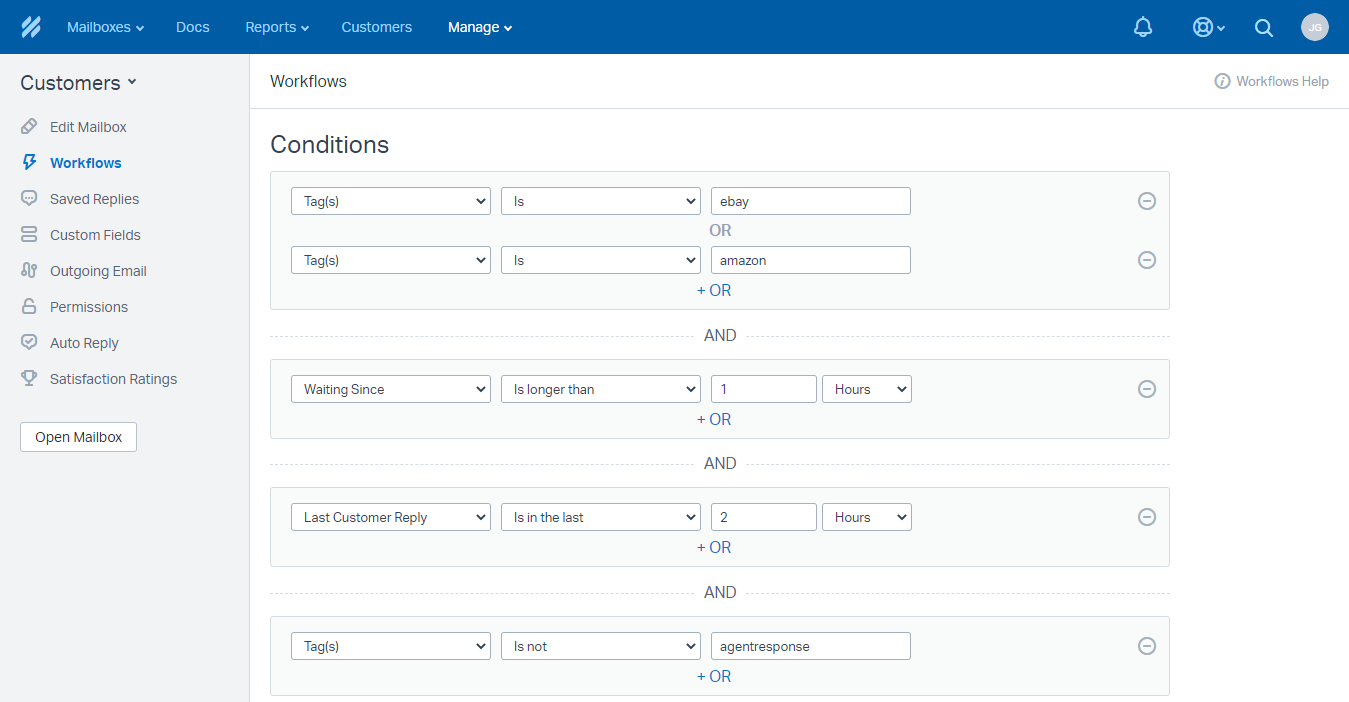
Enter each of the following conditions, clicking “+ AND” after each one.
Waiting Since | Is longer than | 1 | Hours
Last Customer Reply | Is in the last | 2 | Hours
Tag(s) | Is not | agentresponse
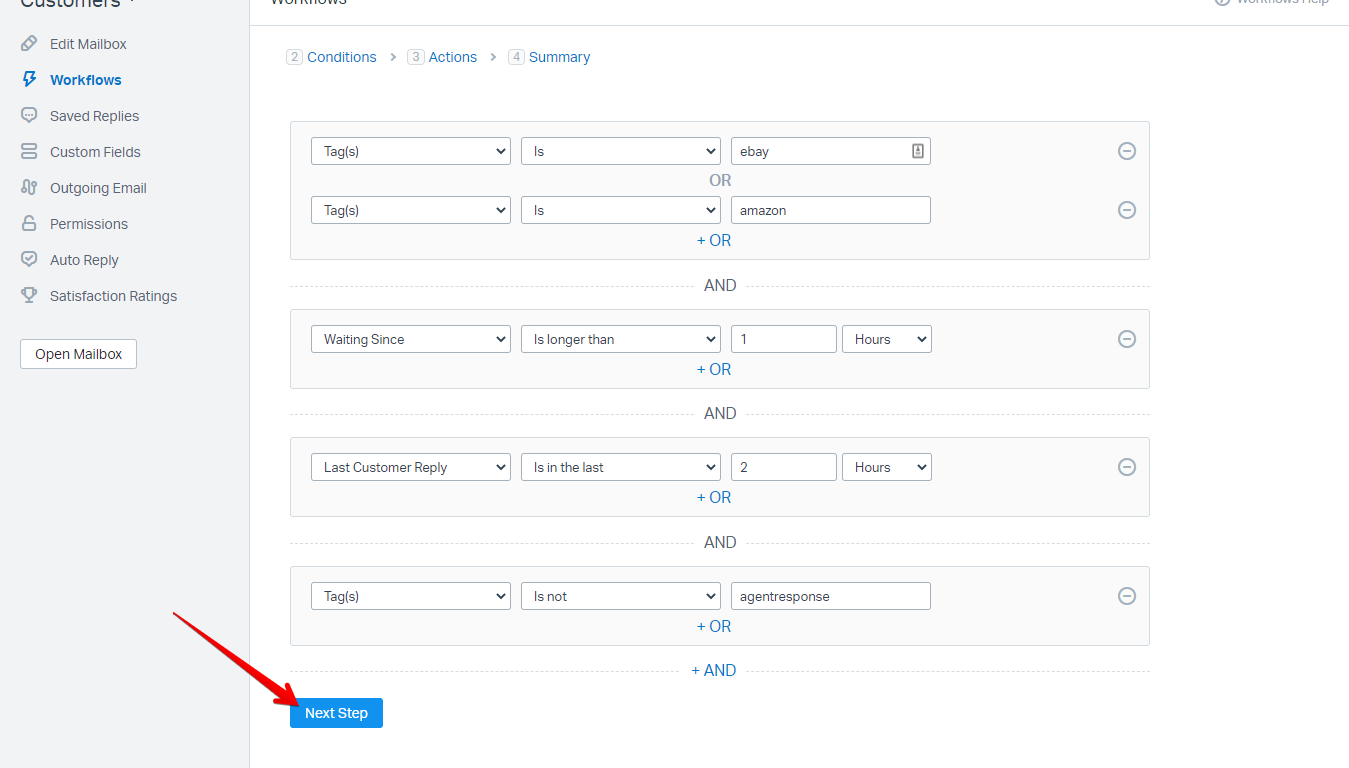
Click “Next Step” at the bottom of the page.
Now it’s time to create an action for your workflow. Select the action “Send an Email” and change “Notify Help Scout User(s)” to “Reply to the Customer.” Finally, click “Customize Email.”
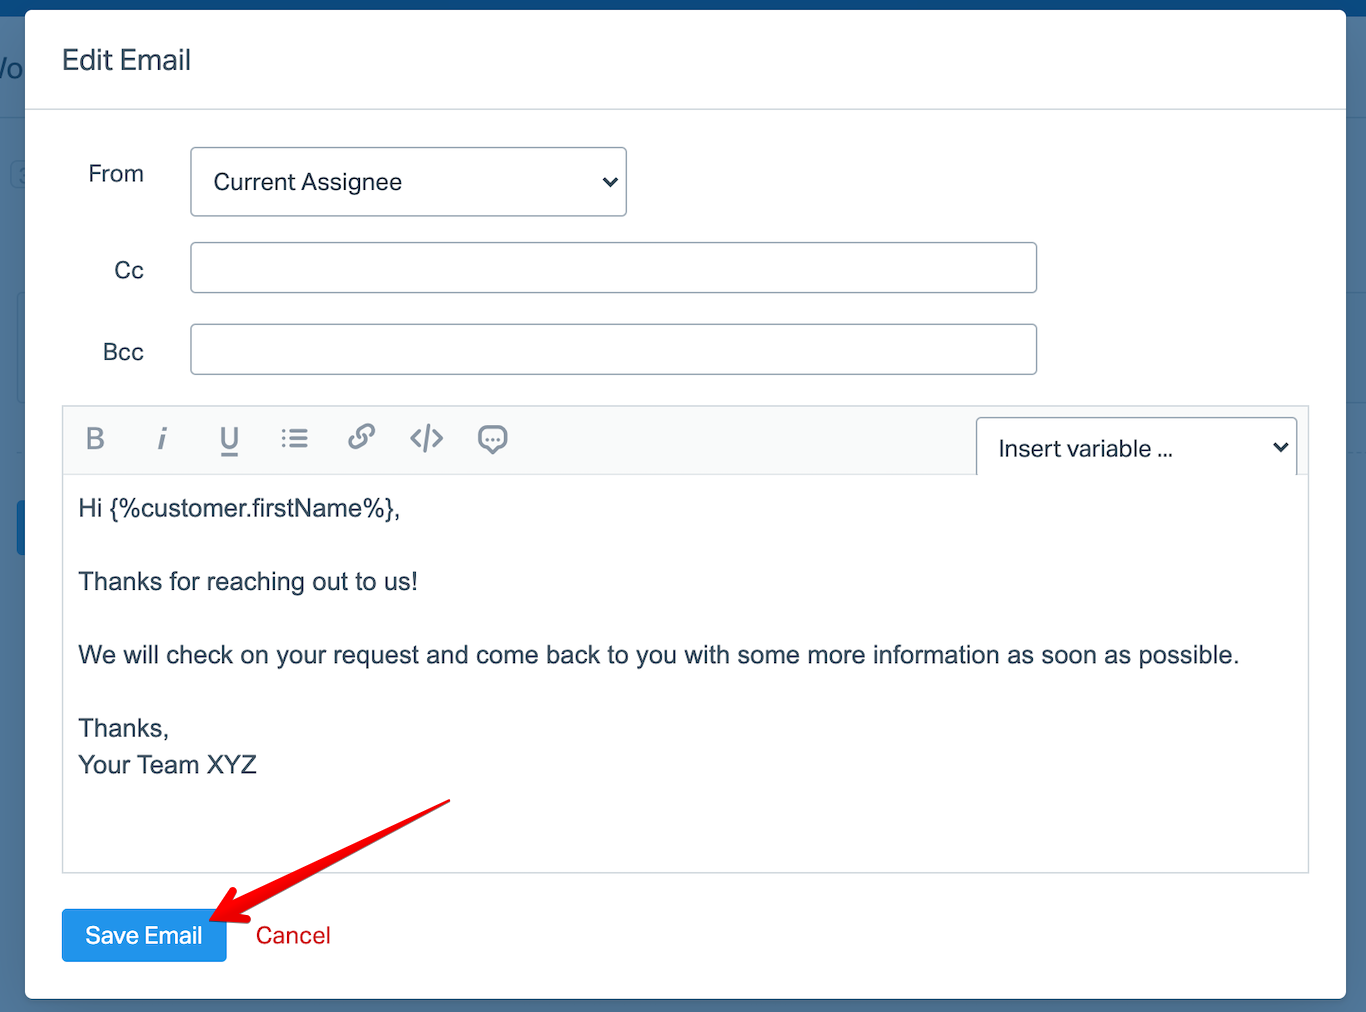
Choose the agent who should be the sender of the response from the “From” dropdown list.
You can leave “Cc” and “Bcc” blank. You only need to fill these in if you would like a member of your team to receive a copy.
Type in your auto-reply text next and hit “Save Email” once you are satisfied with it.
Click “Next Step.”
Then click “Activate Workflow.”
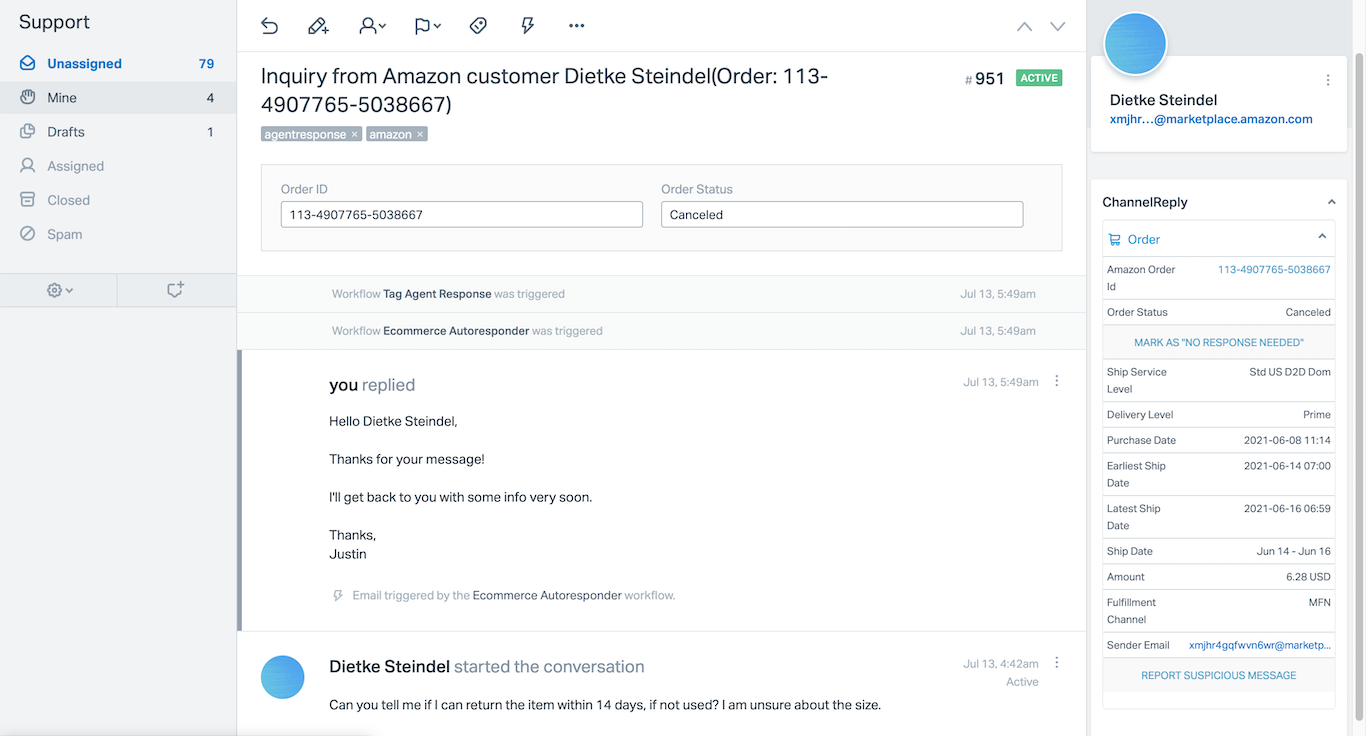
Your autoresponder is now live! Here’s an example of how the auto-reply will appear in Help Scout:
Notes on Advanced Setup
Creating Additional Autoresponders
Having an autoresponder is great. But what if you want to create something like a Walmart autoresponder that's different from your Amazon autoresponder? In that case, you need to create an additional workflow or two.
The good news is that you don't have to follow these instructions from scratch every time:
- If you're trying to create a new autoresponder in the same mailbox, you just need to clone your Ecommerce Autoresponder trigger.
- If you're creating one in a different mailbox, you'll want to copy over both Ecommerce Autoresponder and Tag Agent Responses. Each mailbox that has autoresponders will need one copy of Tag Agent Responses.
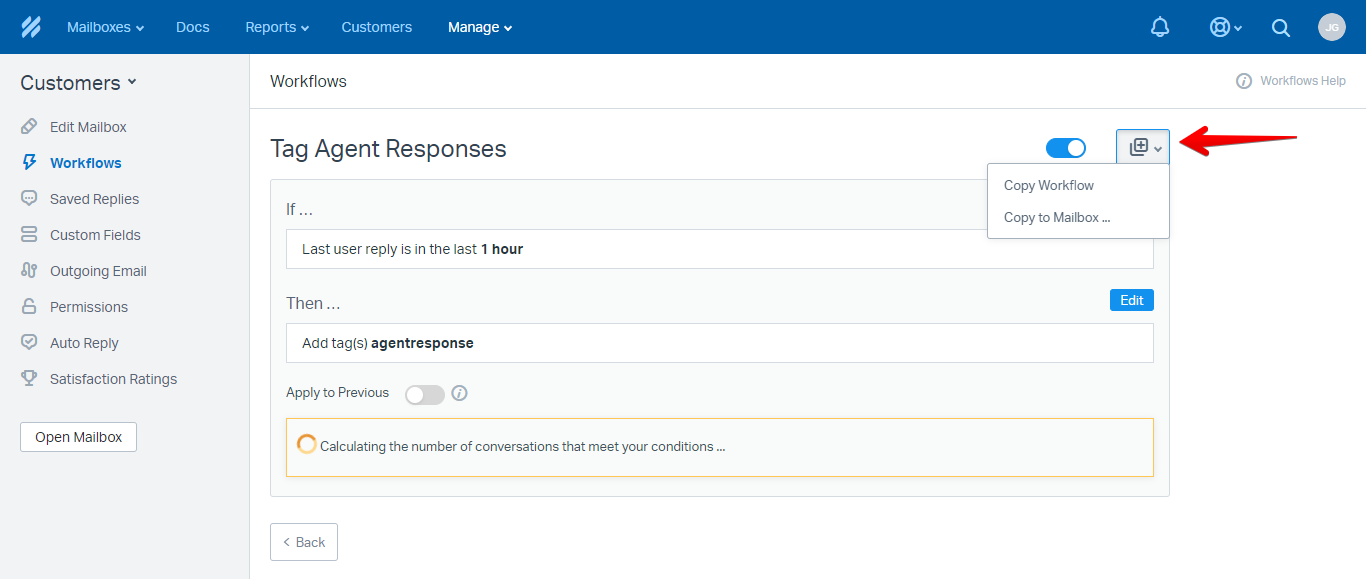
First, return to Mailbox Settings > Workflows and choose the workflow you want to clone.
Then click the copy icon in the upper right. You’ll see two options: Copy Workflow and Copy to Mailbox.
Use Copy Workflow if you're creating an additional autoresponder in the same Help Scout mailbox.
If you need to set up autoresponders in a different mailbox, use Copy to Mailbox instead. Be sure to copy over both “Tag Agent Responses” and “Ecommerce Autoresponder."
After making the copy, you can tweak the settings however you please. For example, if you wanted this autoresponder to fire for Walmart instead of Amazon, you would just need to change this condition:
Tags | Is | (your Amazon tag)
To this:
Tags | Is | (your Walmart tag)
Using Marketplace Data in Autoresponder Conditions
Want to build more advanced autoresponders that do things like only reply to customers who ordered a specific item? All you need are custom fields! Learn how to set up ChannelReply custom fields for Help Scout here.
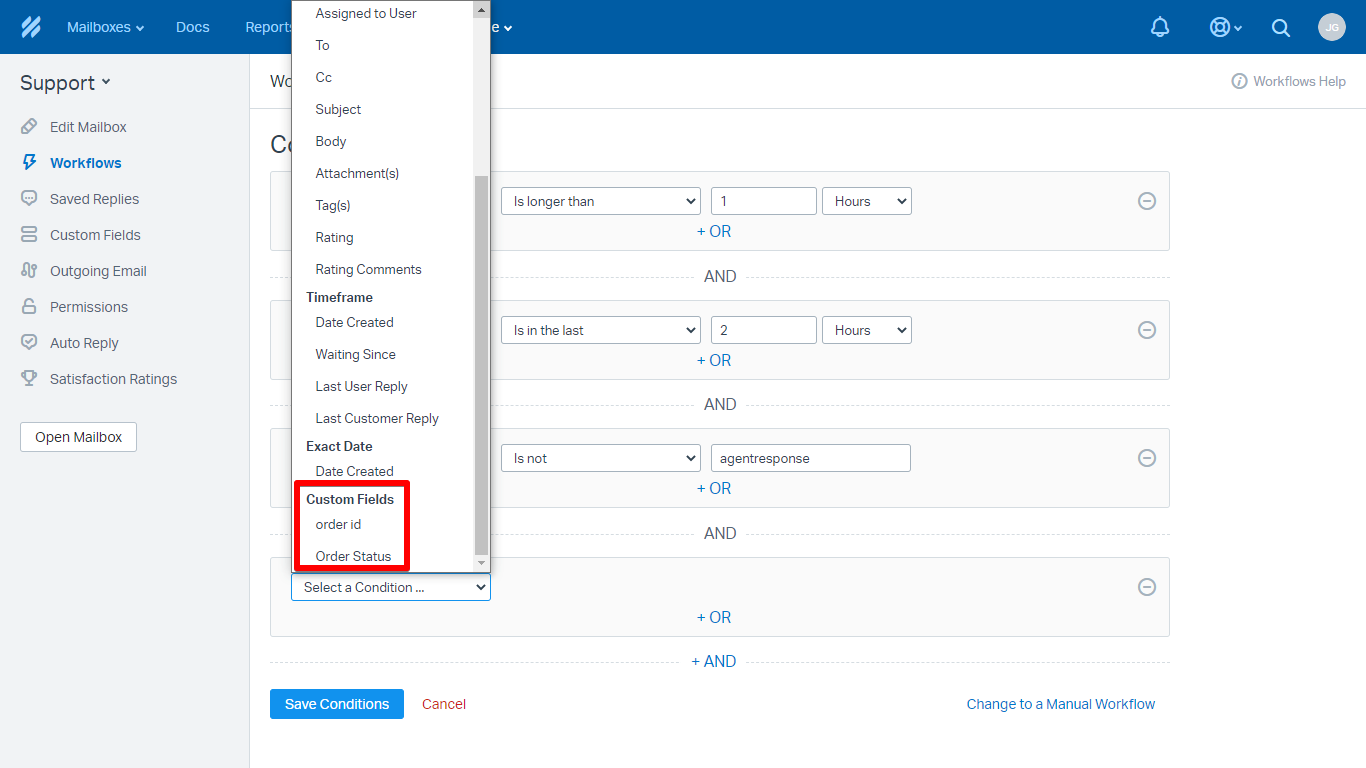
You can use any ChannelReply custom field in your Help Scout autoresponder conditions. When you click “Select a Condition,” you’ll find a Custom Fields section at the bottom.
Note that you’ll need to know exactly what each custom field will contain to build effective workflows. See our list of custom field definitions to learn what text will appear in each field.
Ensuring Delivery
Marketplaces sometimes block spammy auto-replies from being delivered or counting as responses. Check your autoresponder's replies occasionally to see if they are being delivered and counting as answers. If there are any issues, try following these tips:
- Don't use a generic autoreply. Write something unique to your brand's voice and identity, and try to sound human rather than robotic. Unique, human-sounding autoreplies work much better on sites like Amazon.
- Use Help Scout variables like Customer First Name in your autoreplies. This will make sure that the autoreply's content usually has at least one or two words different each time it is sent. Some marketplaces, like Newegg, will block autoreplies if they see two or more with the exact same content going to one customer.
- Use fallbacks with your variables to make sure the message still reads naturally if no data is available.
- If you have access to custom fields, use them to create targeted autoresponses. A specialized response just for eBay customers with an order status of Delivered will do much better than a generic autoreply.
Need help setting up a Newegg, Back Market, Walmart, Shopify, eBay or Amazon autoresponder in Help Scout? Contact us and we’ll get back to you in no time! Our agents are available seven days a week.


