We sometimes need to provide important info about one of your tickets. We do this by posting an internal note on the ticket. (Internal notes are invisible to customers, so only you and your team will see them.)
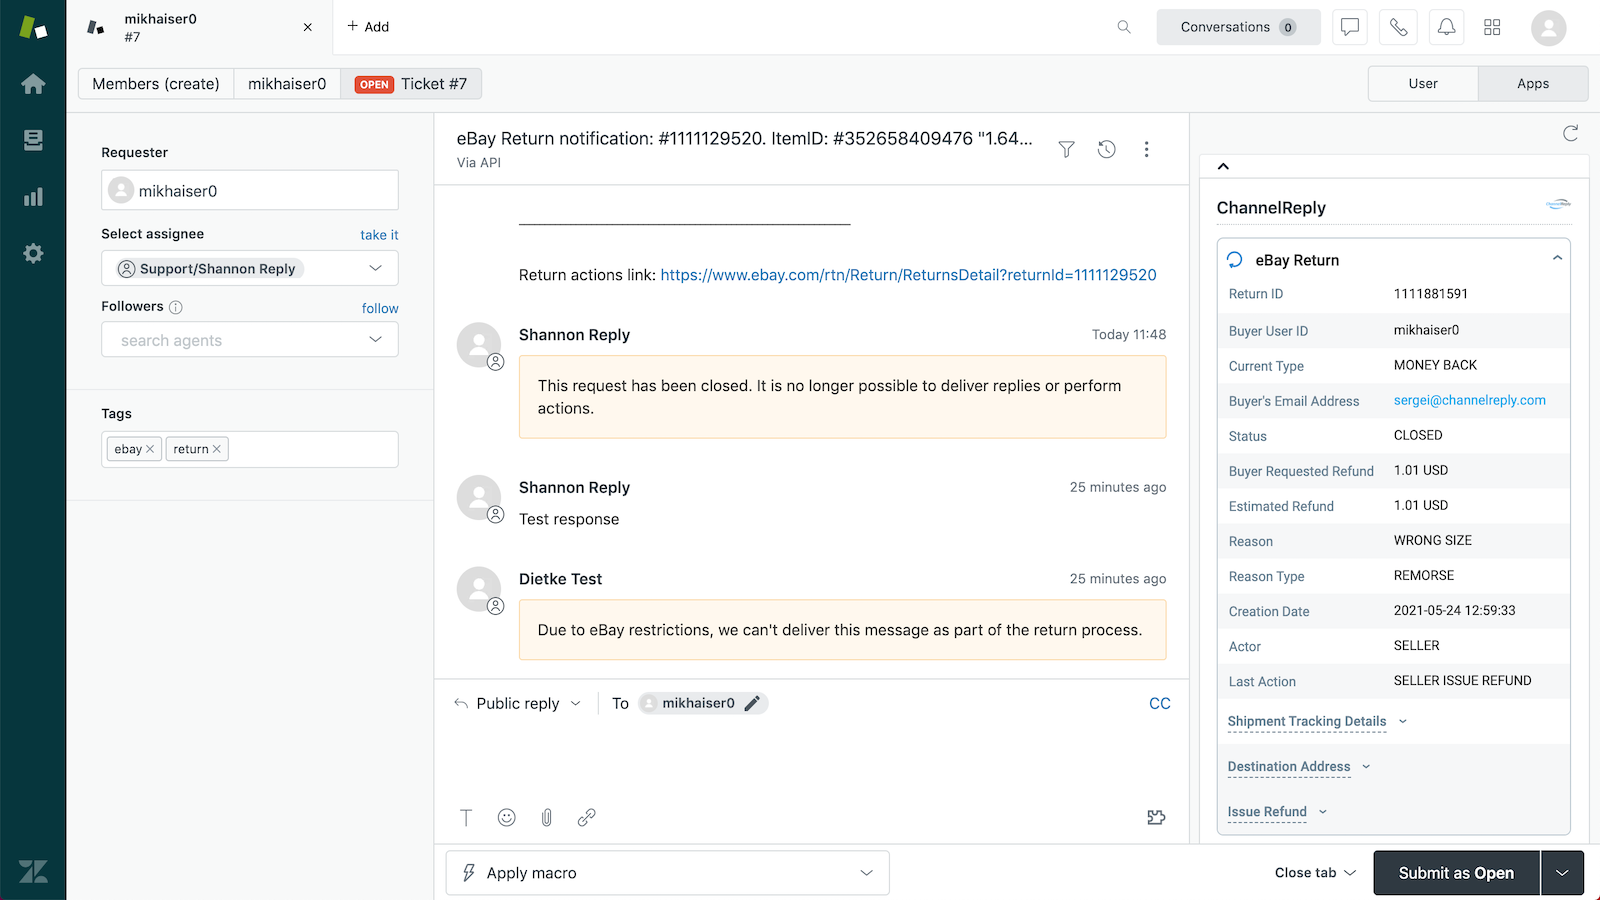
In all the helpdesks we support, only agents can post internal replies. So instead of posting these notes as ChannelReply, we post them as the agent listed inside your ChannelReply account. Here’s an example in Zendesk:

You might see the same notification in your helpdesk. If you do, it will not be attributed to Sergey or ChannelReply. In fact, it will probably look like you posted it yourself.
This sometimes causes confusion. People write to us asking things like “Why is Zendesk saying I posted an internal note that I never wrote?” and “How do I change which agent it shows?” We’ve just answered the first question, but the answer to the second is a bit more complicated.
How Do I Change Which Agent Posts Internal ChannelReply Notifications?
Usually, all you need to do is update all agent-specific info in ChannelReply. Any agent with full admin permissions can be used. Click on your helpdesk to jump to detailed instructions:
Zendesk · Freshdesk · Help Scout · Gorgias · Re:amaze
Zendesk
For Zendesk users, the agent used for internal notifications is also the agent who sends replies in ChannelReply-powered autoresponders.
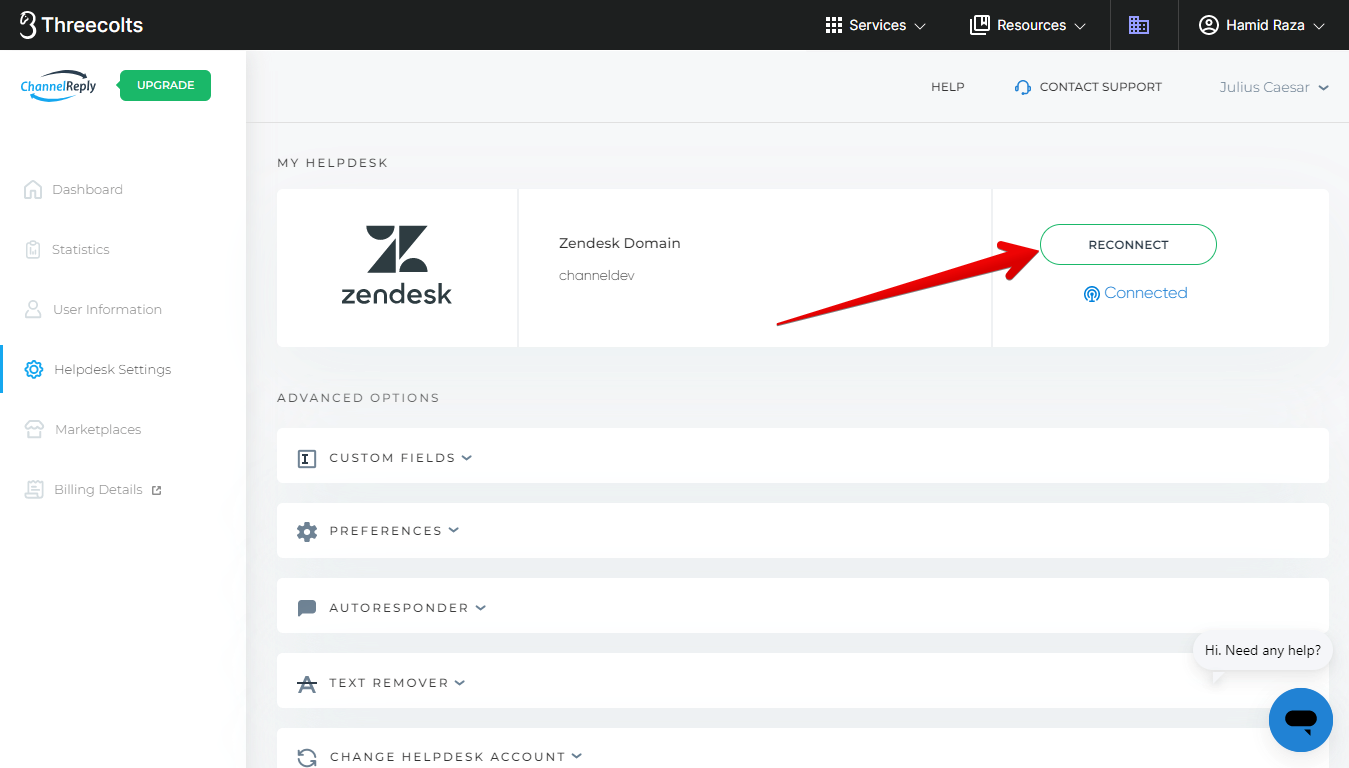
First things first, let’s determine if you are using the classic token-based setup or the OAuth-based setup. To find out which one you have, sign in to ChannelReply, then click Helpdesk Settings from your dashboard.
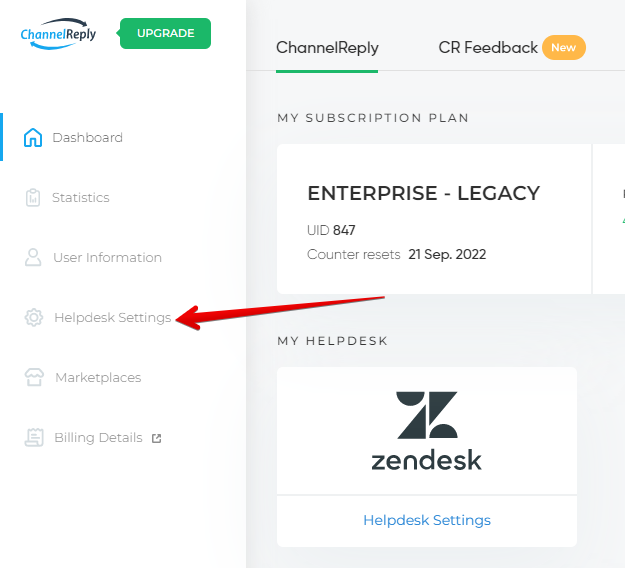
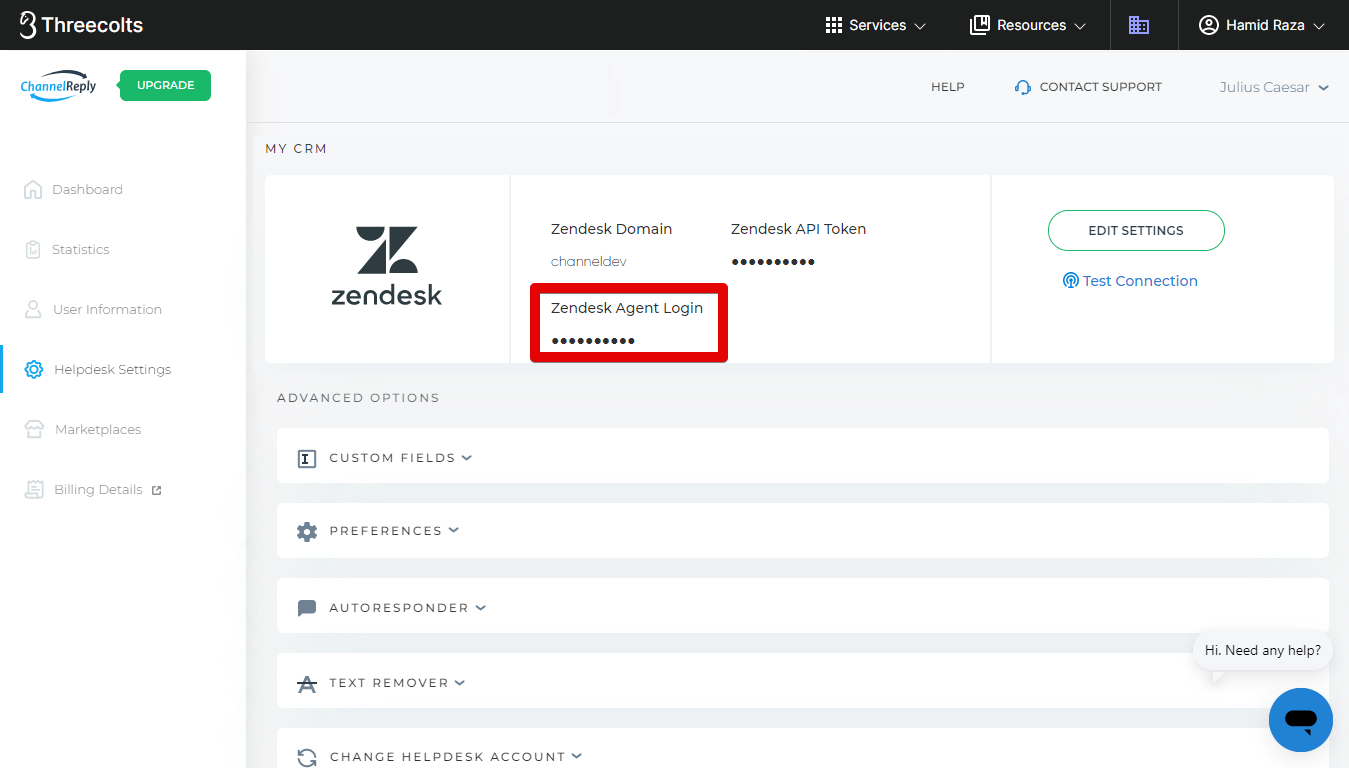
If you see “Zendesk Agent Login” in Helpdesk Settings, that’s the classic token-based setup.
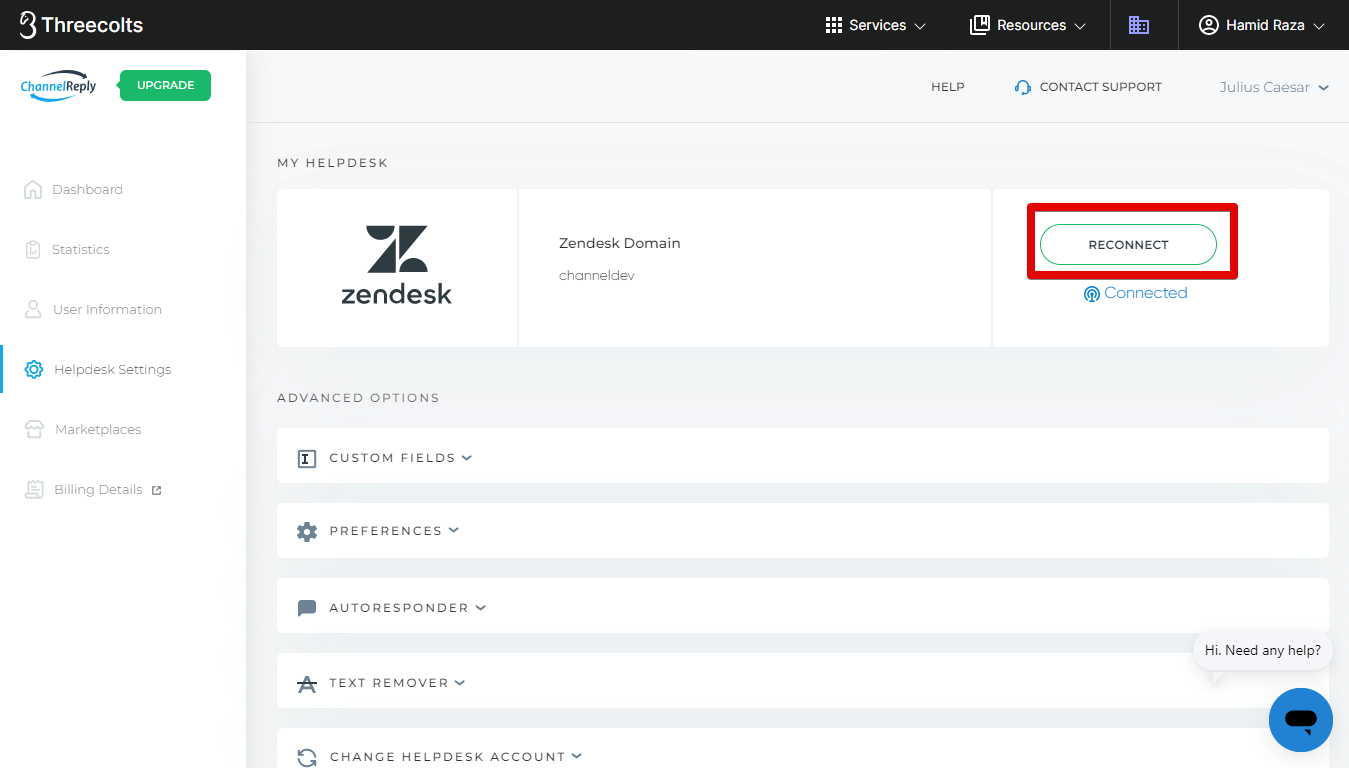
If you see the “RECONNECT” button in Helpdesk Settings, you have the OAuth-based setup.
Classic Token-Based Setup
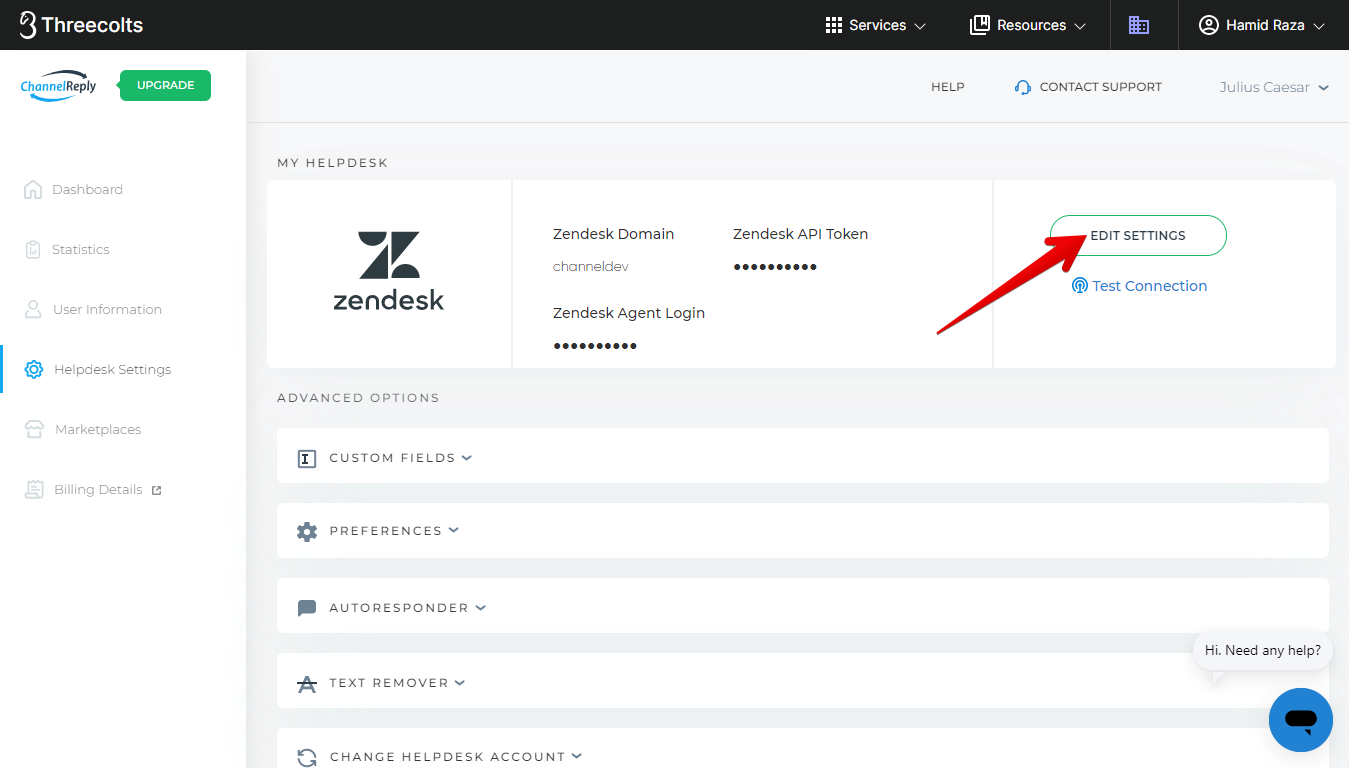
If you have the classic token-based setup, click “EDIT SETTINGS.”
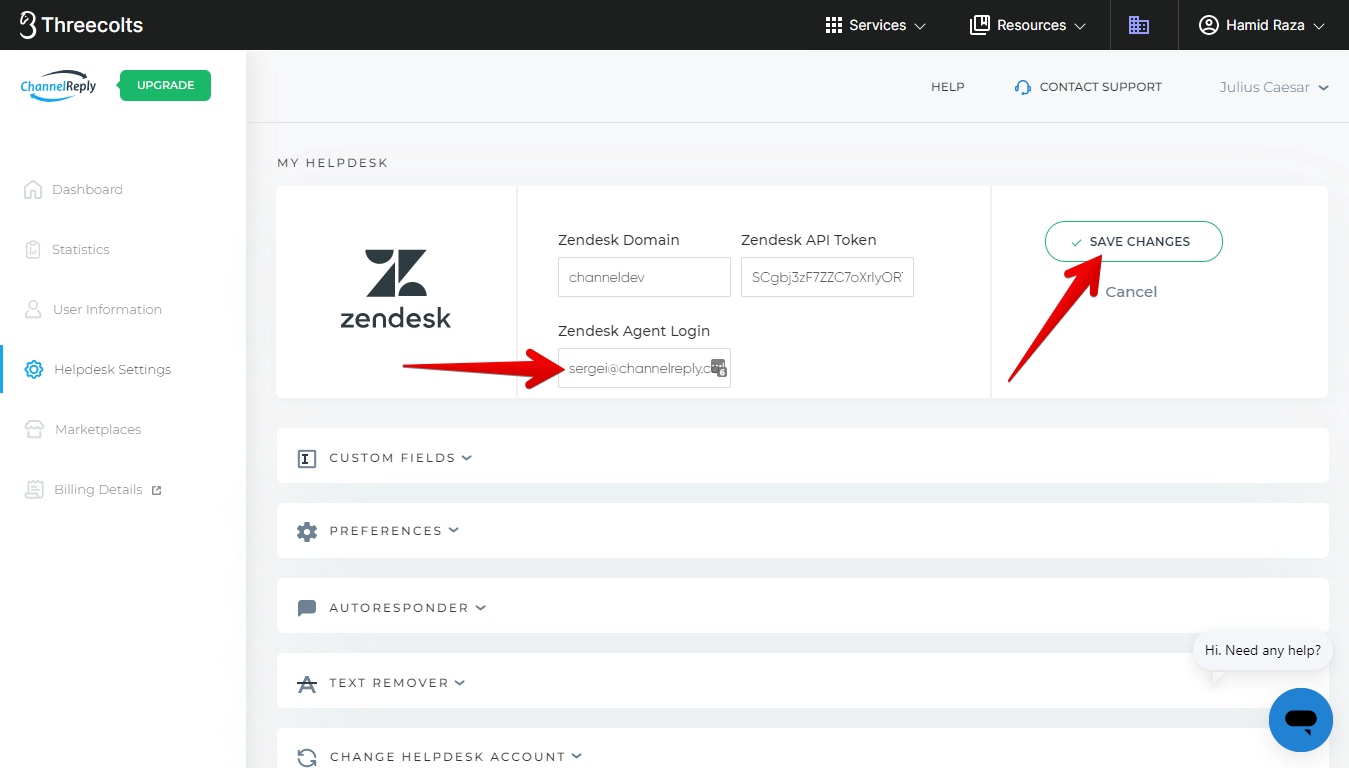
Enter the desired agent’s email address in the Zendesk Agent Login field, then click “SAVE CHANGES.”
That’s all there is to it! All internal notifications from ChannelReply will now be posted as that agent.
OAuth-Based Setup
If you have the OAuth-based setup, follow the steps below:
- Make sure you are logged in to Zendesk as the agent whom you want to post internal notifications. Also make sure that this is an admin-level account so you can complete the reconnection process.
- Click “RECONNECT.”
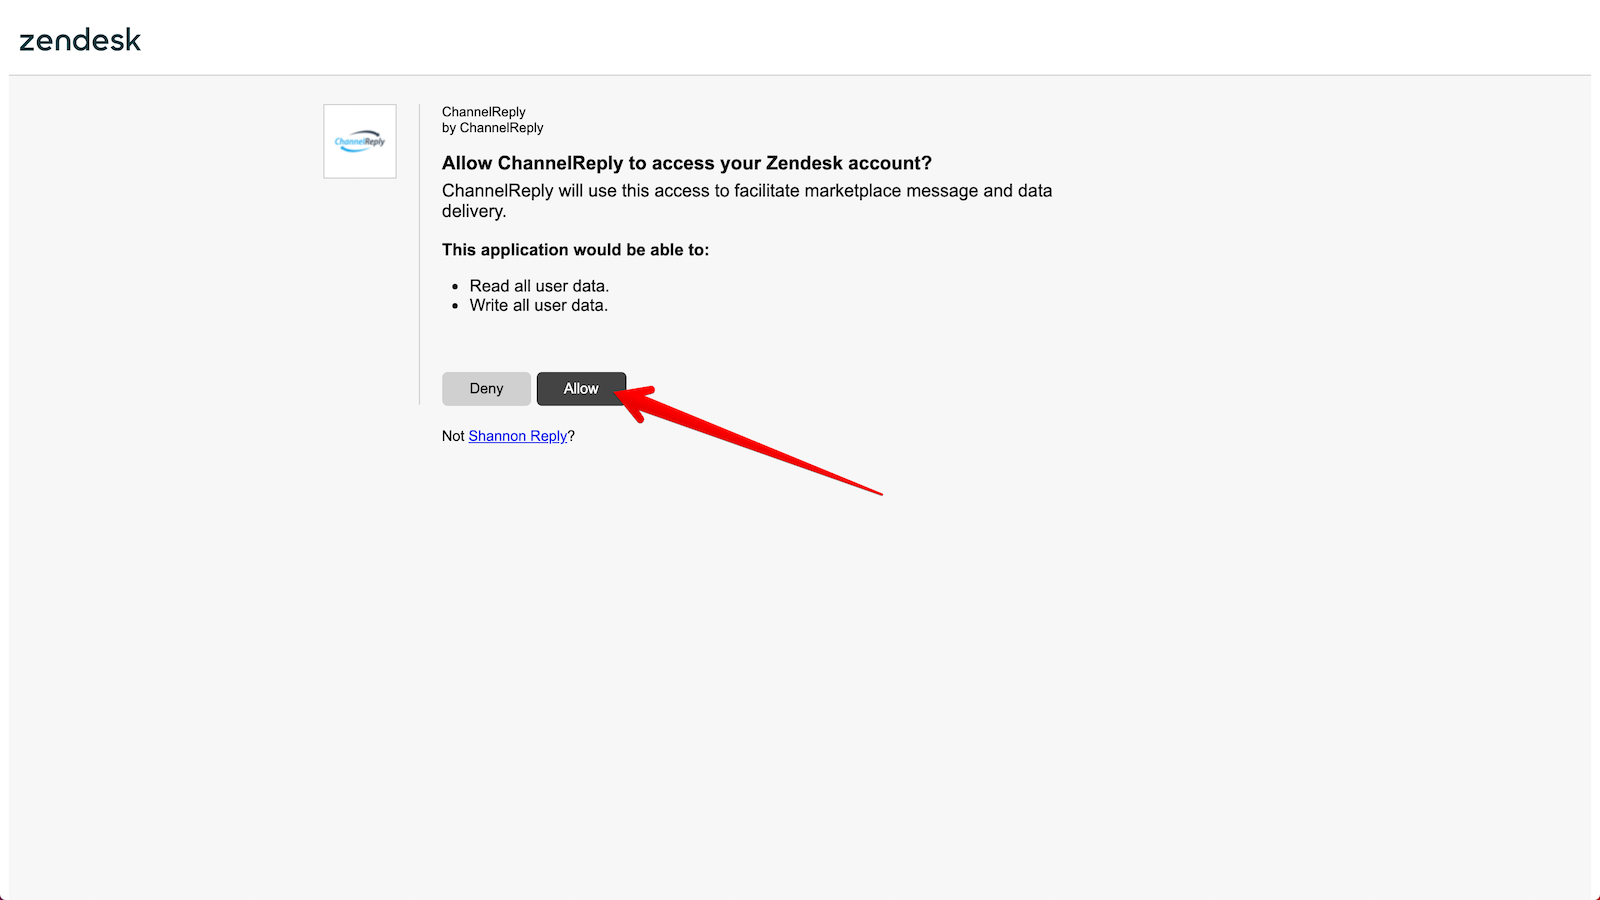
- Click “Allow” to grant ChannelReply access to your Zendesk account. (Note: You’ll see the name of the agent you’re logged in as just below the “Allow” button.)
That’s all there is to it! All internal notifications from ChannelReply will now be posted as the agent you used for the reconnection.
Here’s an example on a ticket in Zendesk. The notification from Shannon Reply came first. We then reconnected as Dietke Test before triggering the second notification.
Freshdesk
You can change the agent used for internal notifications in Freshdesk by changing the API key you use for ChannelReply. This needs to be done in two places: the ChannelReply Freshdesk app and your ChannelReply account.
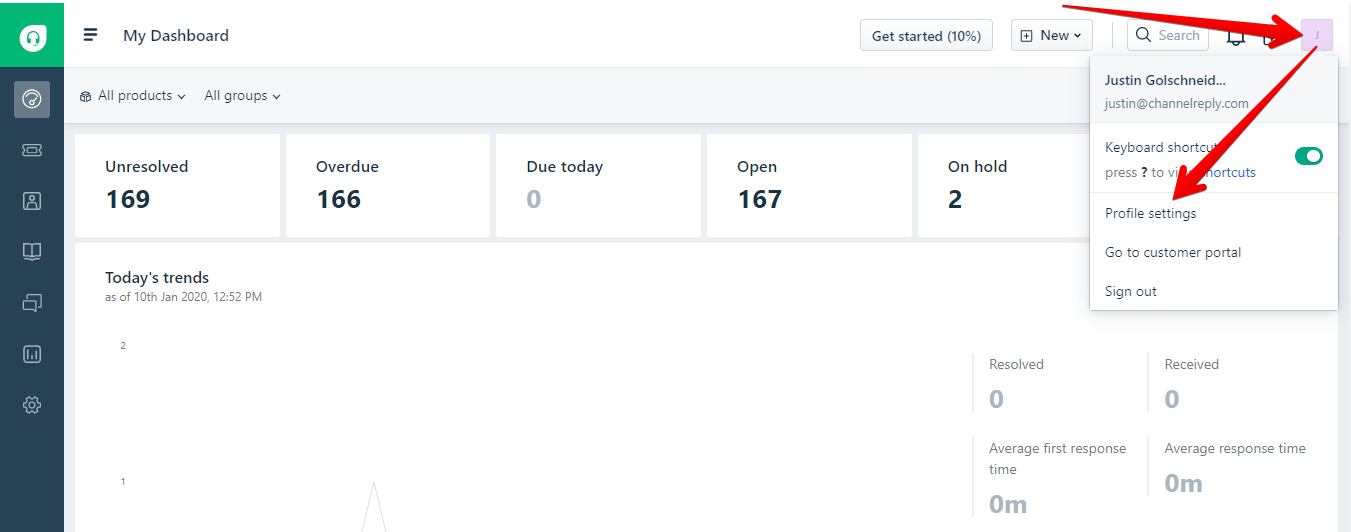
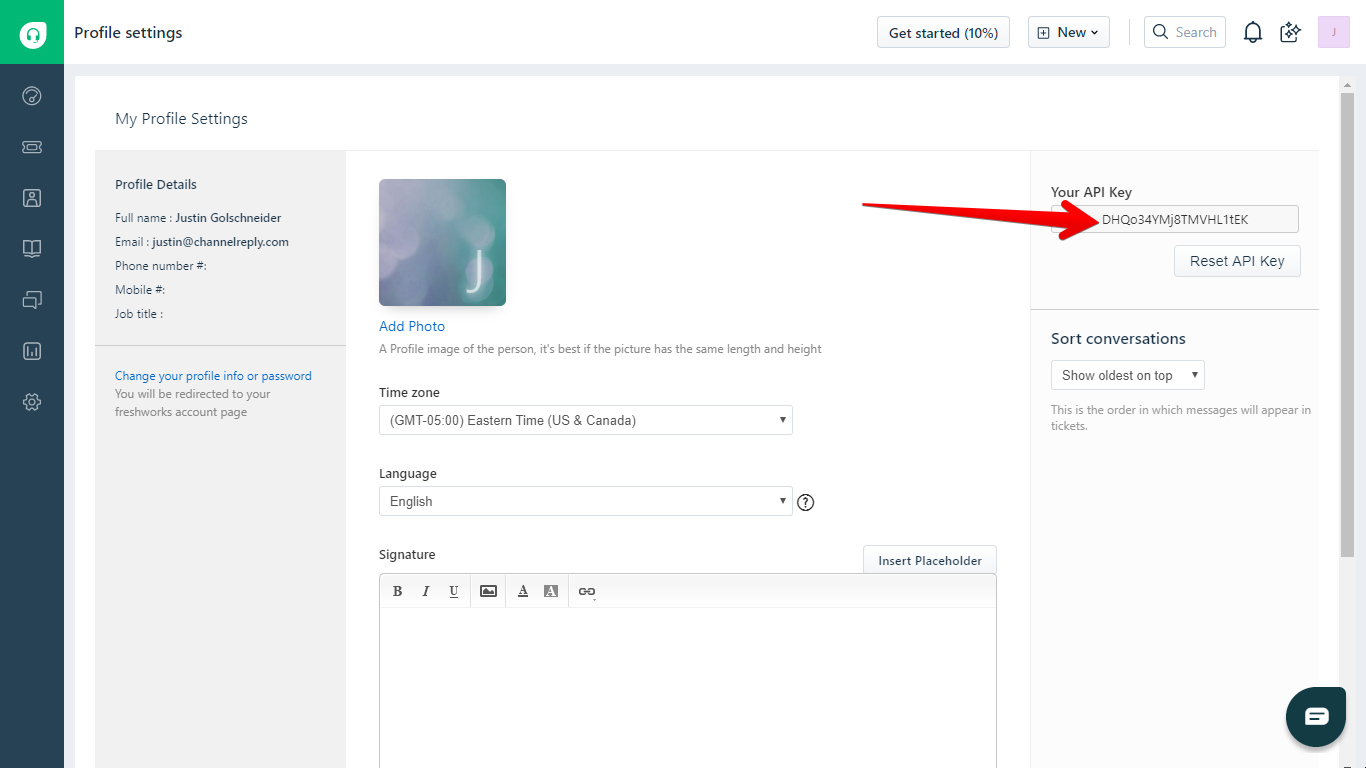
Log in to Freshdesk as the agent who should post internal notifications. Then click on your picture/icon in the upper right and choose “Profile settings.”
Copy your API key.
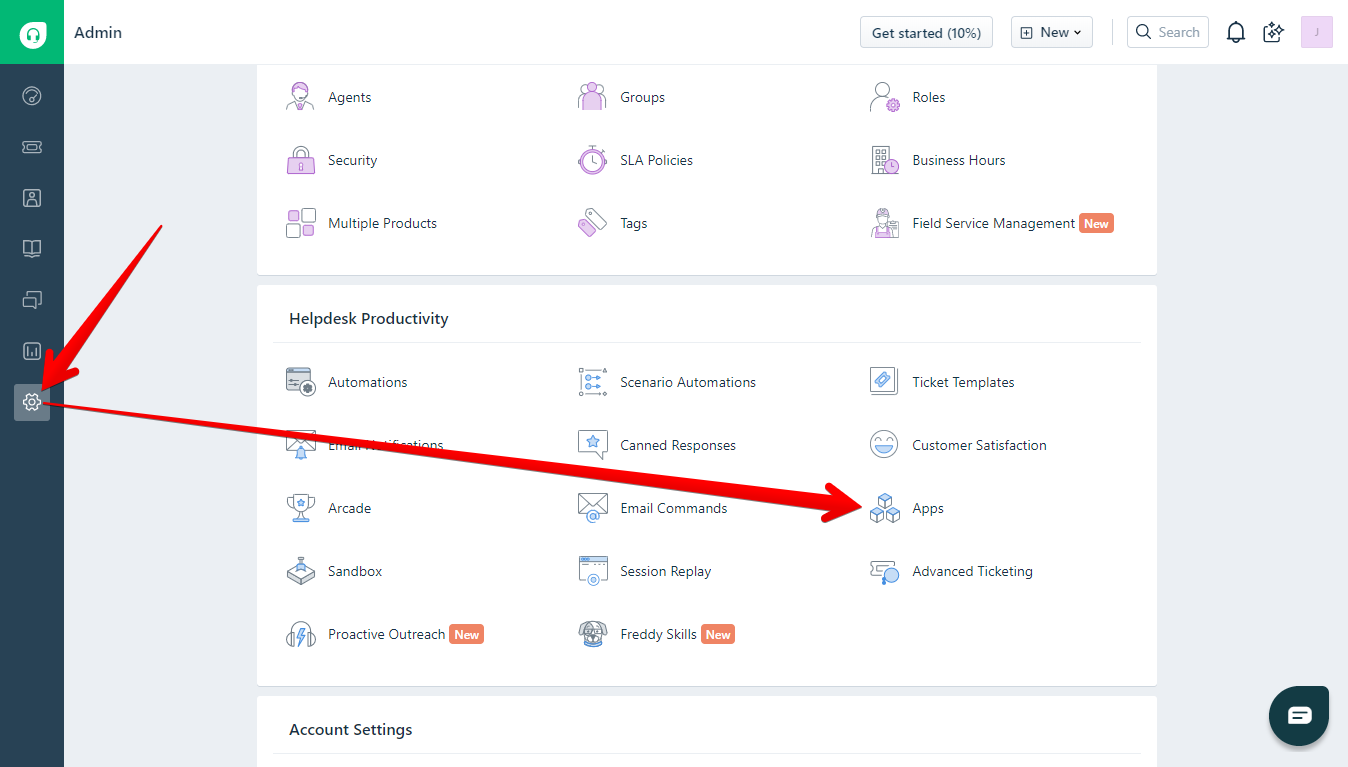
Go to Admin > Apps.
Click the Settings icon next to ChannelReply.
Enter your API key, then click Save.
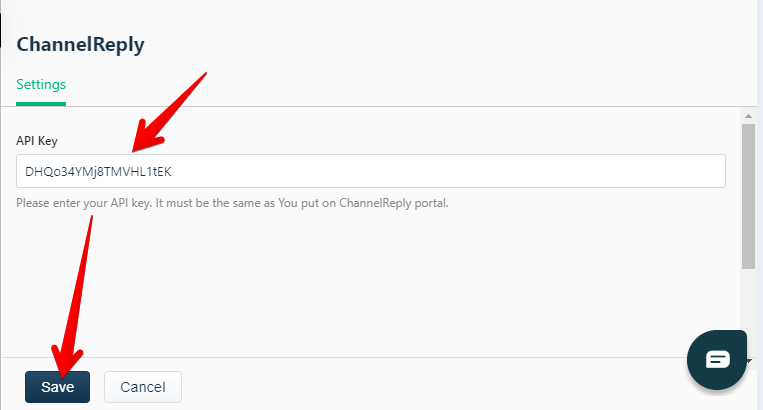
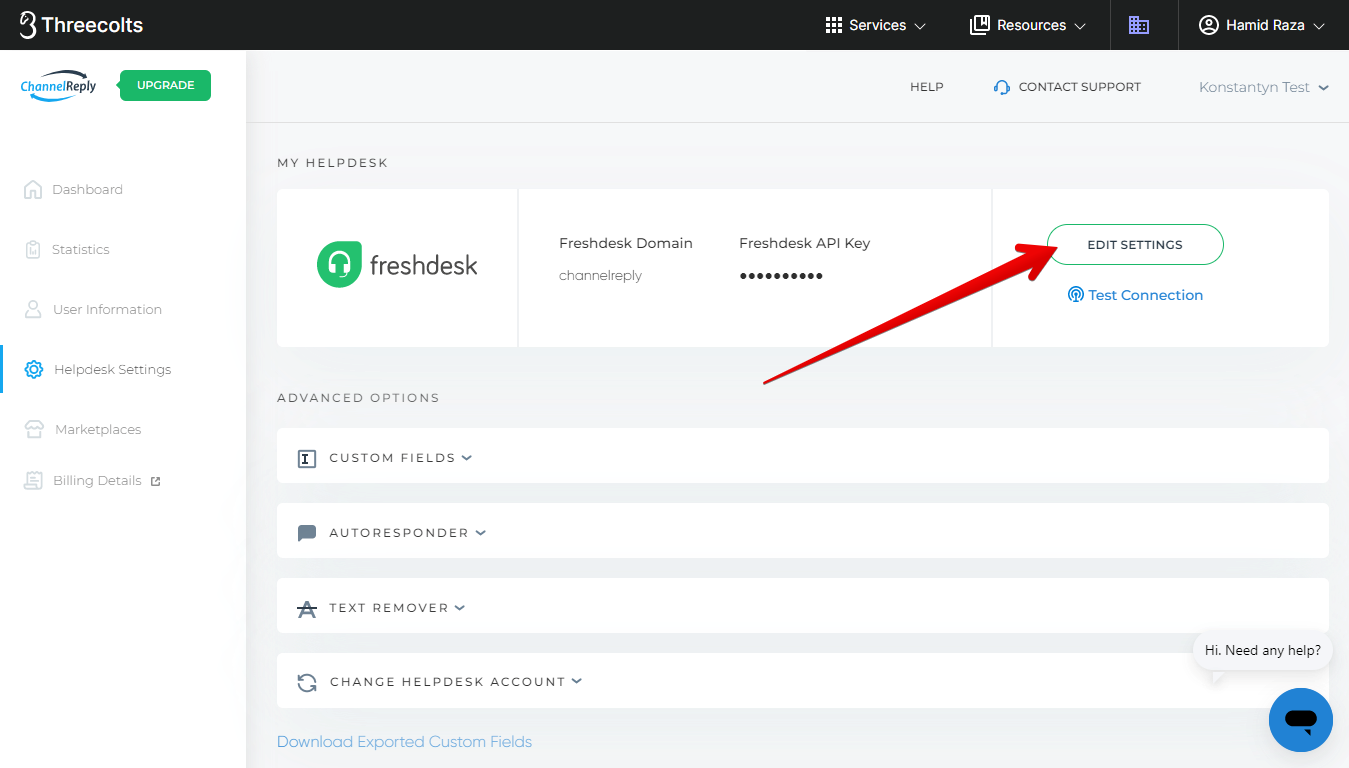
Next, sign in to ChannelReply. Then go to Helpdesk Settings.

Click “EDIT SETTINGS.”
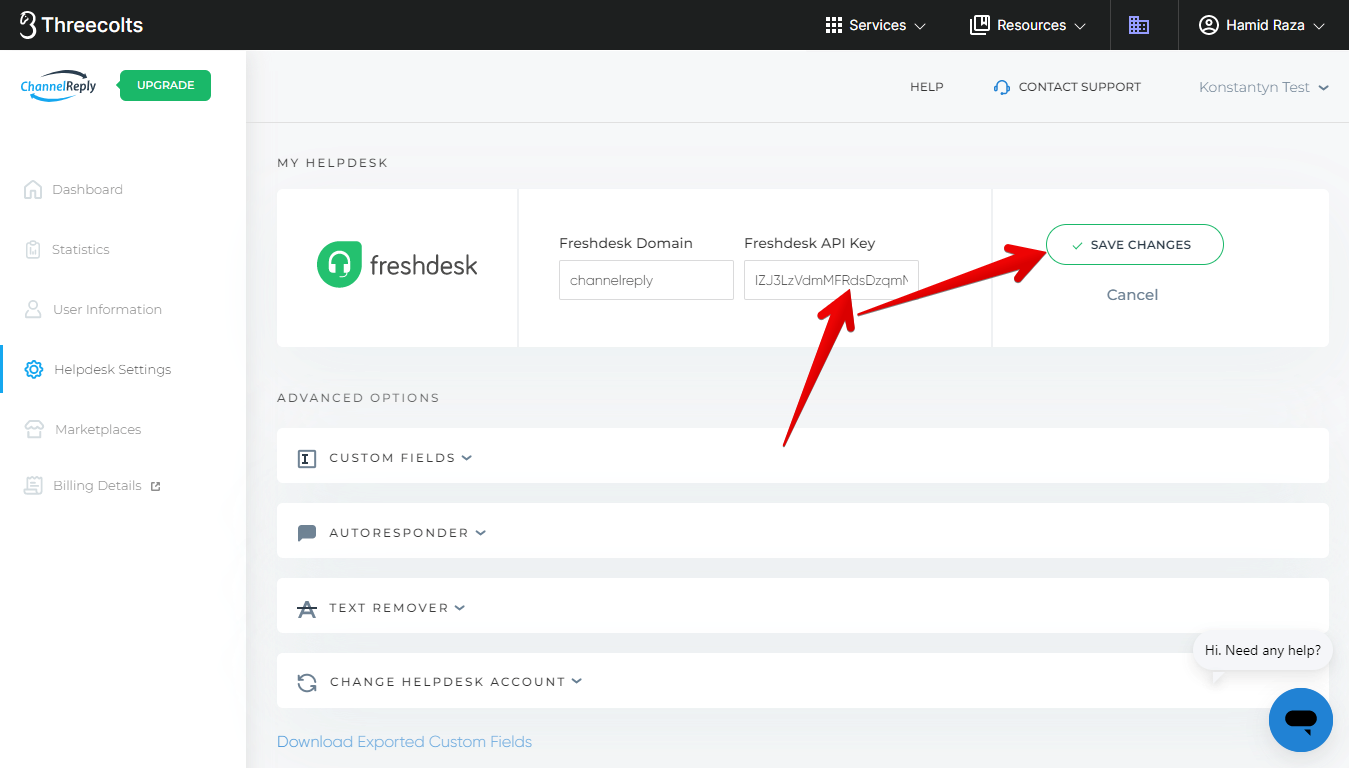
Paste the same API key into the Freshdesk API Key field, then click Save Changes.
You’re done! The new agent will now be used to post internal notifications.
Help Scout
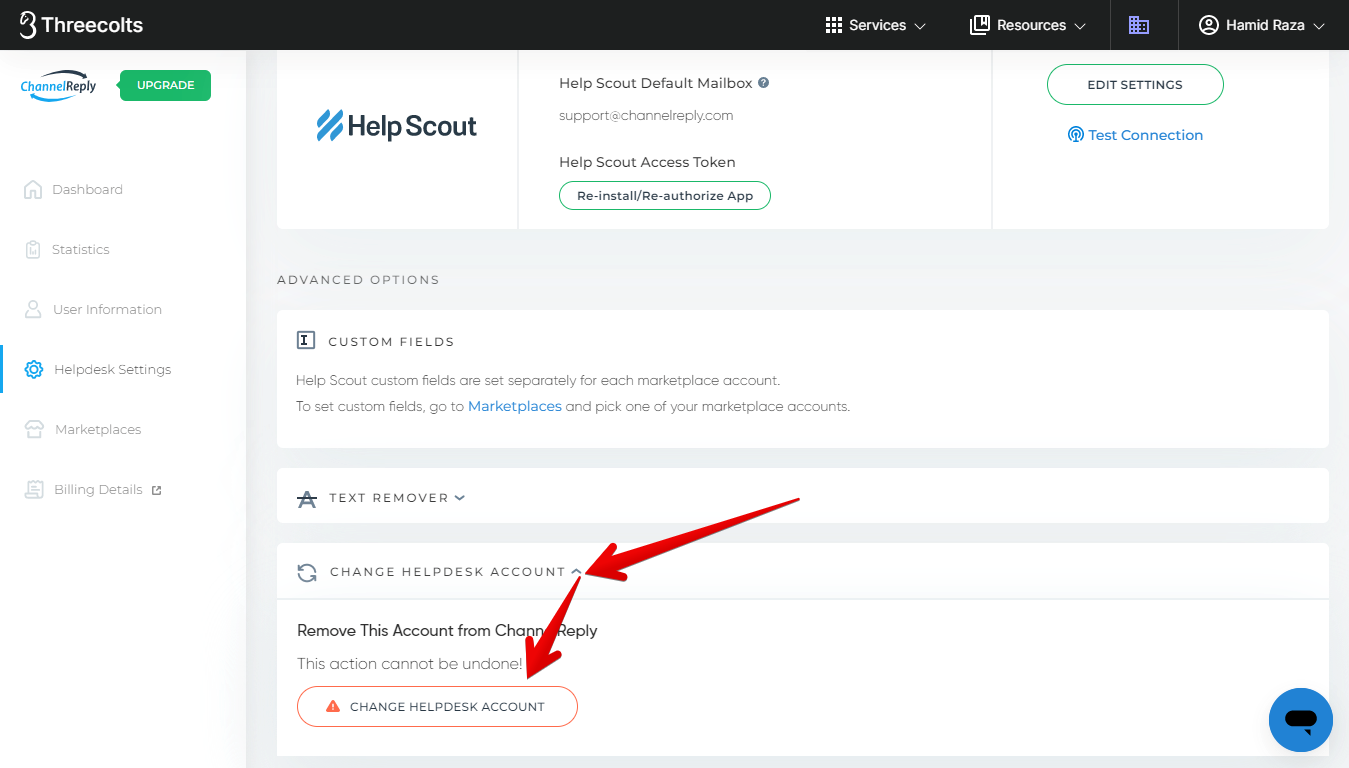
To change the agent for Help Scout, you will need to disconnect Help Scout from ChannelReply, then re-integrate it. We don’t recommend doing this, as it will interrupt messaging and could result in some settings being lost. But if you need to do it, here’s how:
Sign in to ChannelReply and go to Helpdesk Settings.

Click “CHANGE HELPDESK ACCOUNT.” This will delete your Help Scout info from ChannelReply and disconnect your account.
Sign in to Help Scout as the agent who should post internal notifications. Then follow our instructions for integrating ChannelReply with Help Scout.
Once you’re done, the agent you were signed in as will be the one to post all new internal notifications from ChannelReply. Be sure to review the settings for each of your marketplace accounts in ChannelReply to make sure they still have the desired settings.
Gorgias
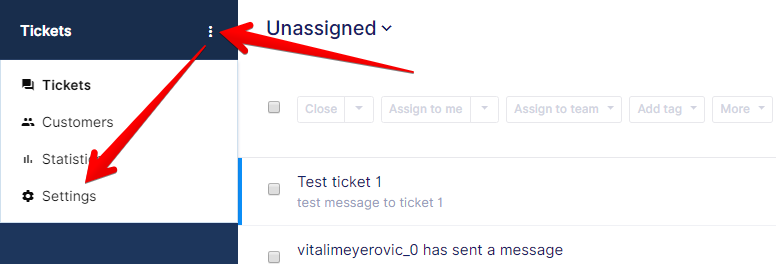
Sign in to Gorgias as the agent who should post internal notifications. Then go to Settings.
Choose “REST API.”
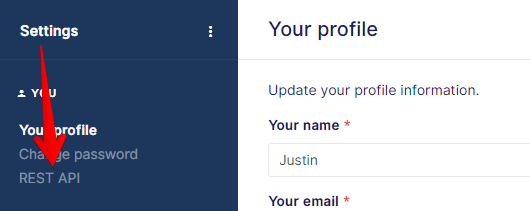
Find “Password (API Key)” and click “Copy.”
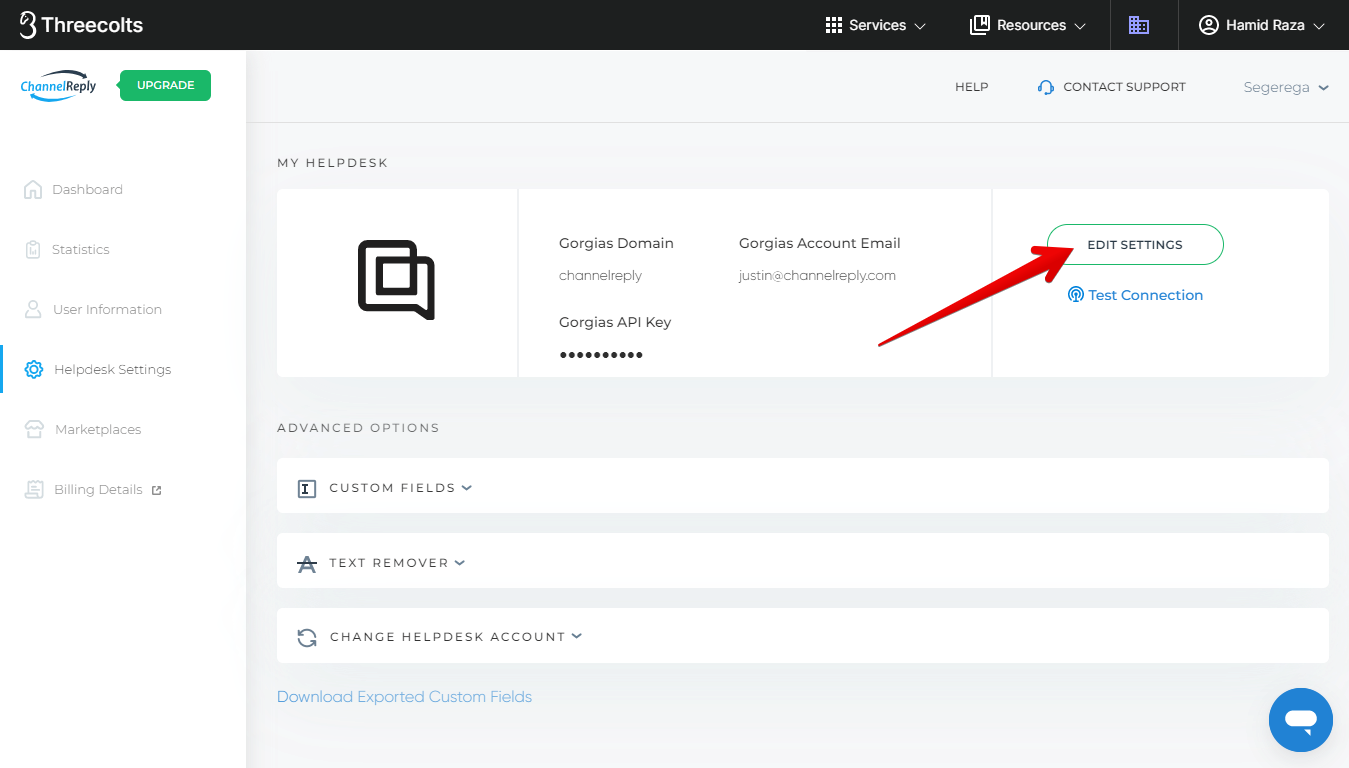
Sign in to ChannelReply and go to Helpdesk Settings.

Click “EDIT SETTINGS.”
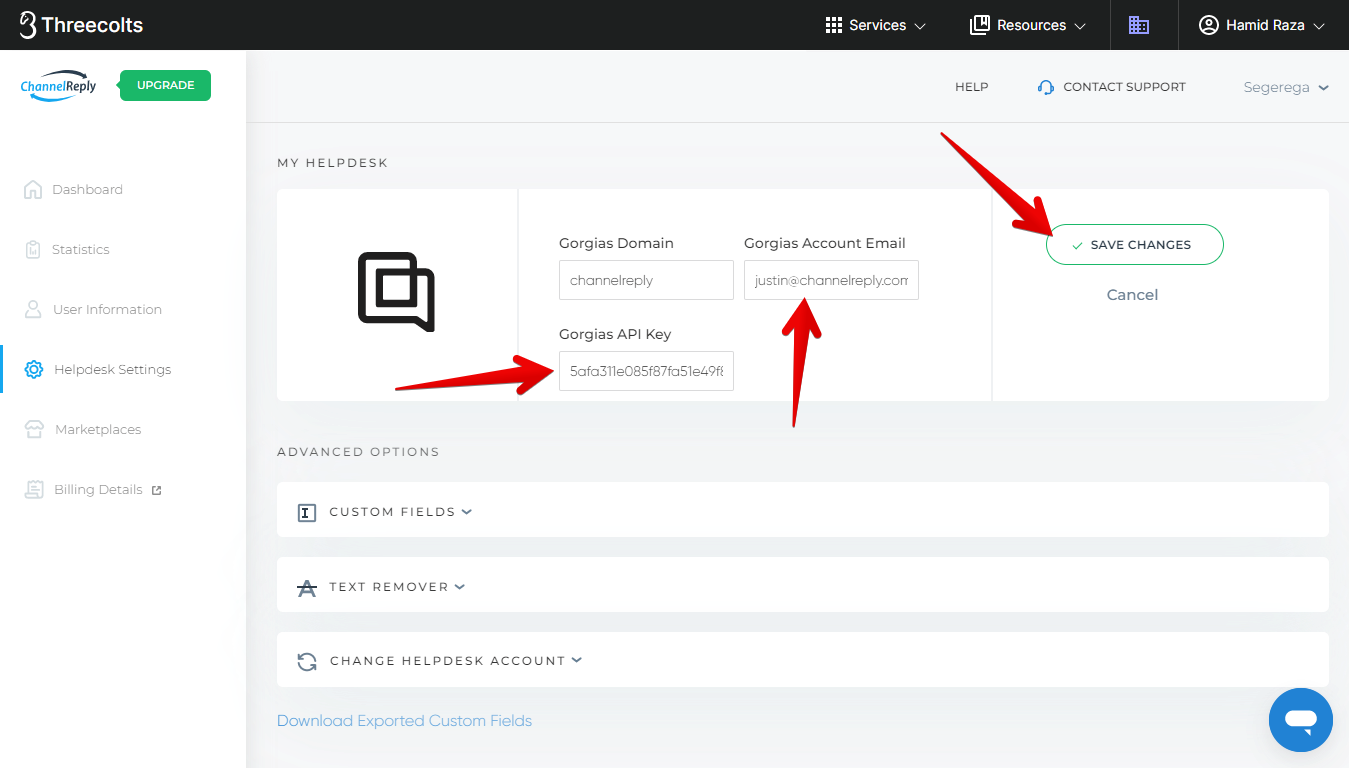
Paste your API key into the Gorgias API Key field. Then enter the agent’s email address in the Gorgias Account Email field. Finally, click “SAVE CHANGES.”
That’s it! All internal notifications from ChannelReply will now be shown as being posted by this agent.
Re:amaze
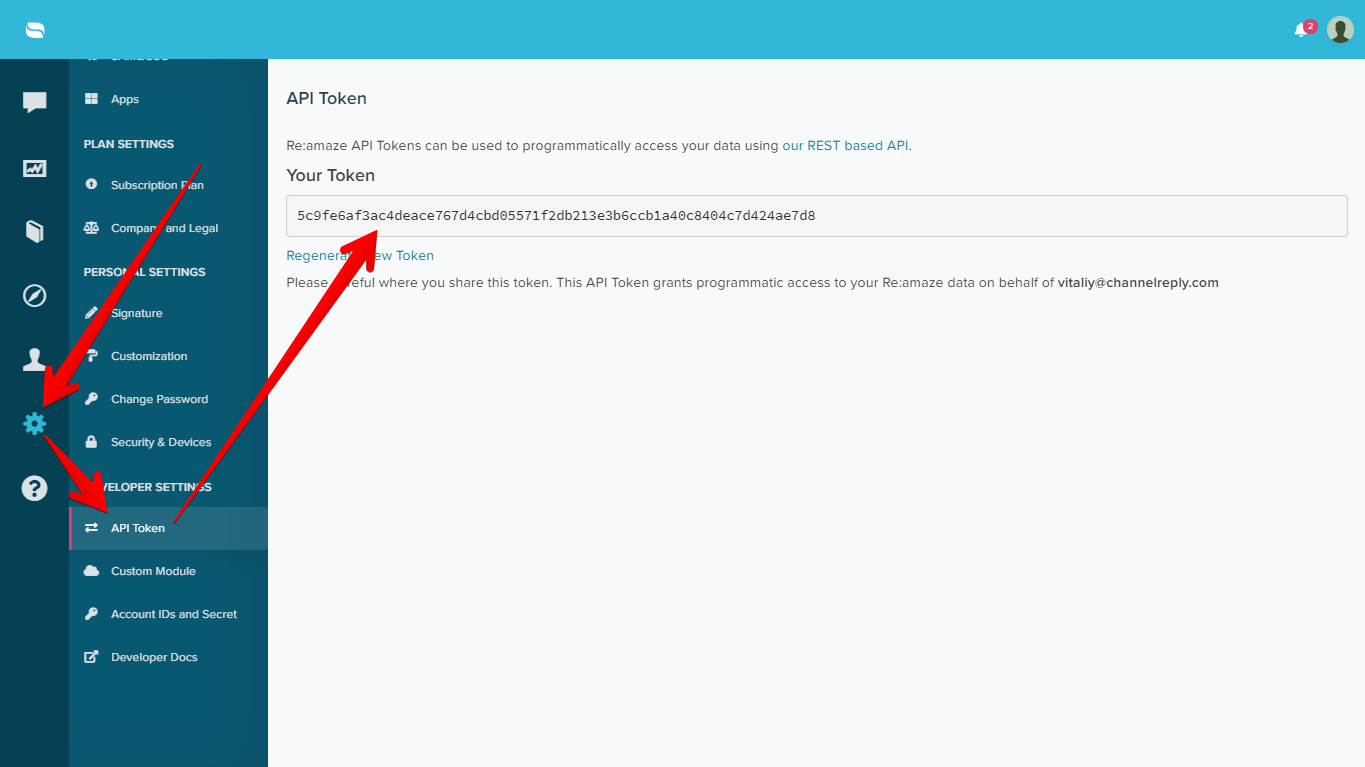
Log in to Re:amaze as the agent who should post internal notifications. Then go to Settings > API Token. Copy your existing token or create and copy a new one.
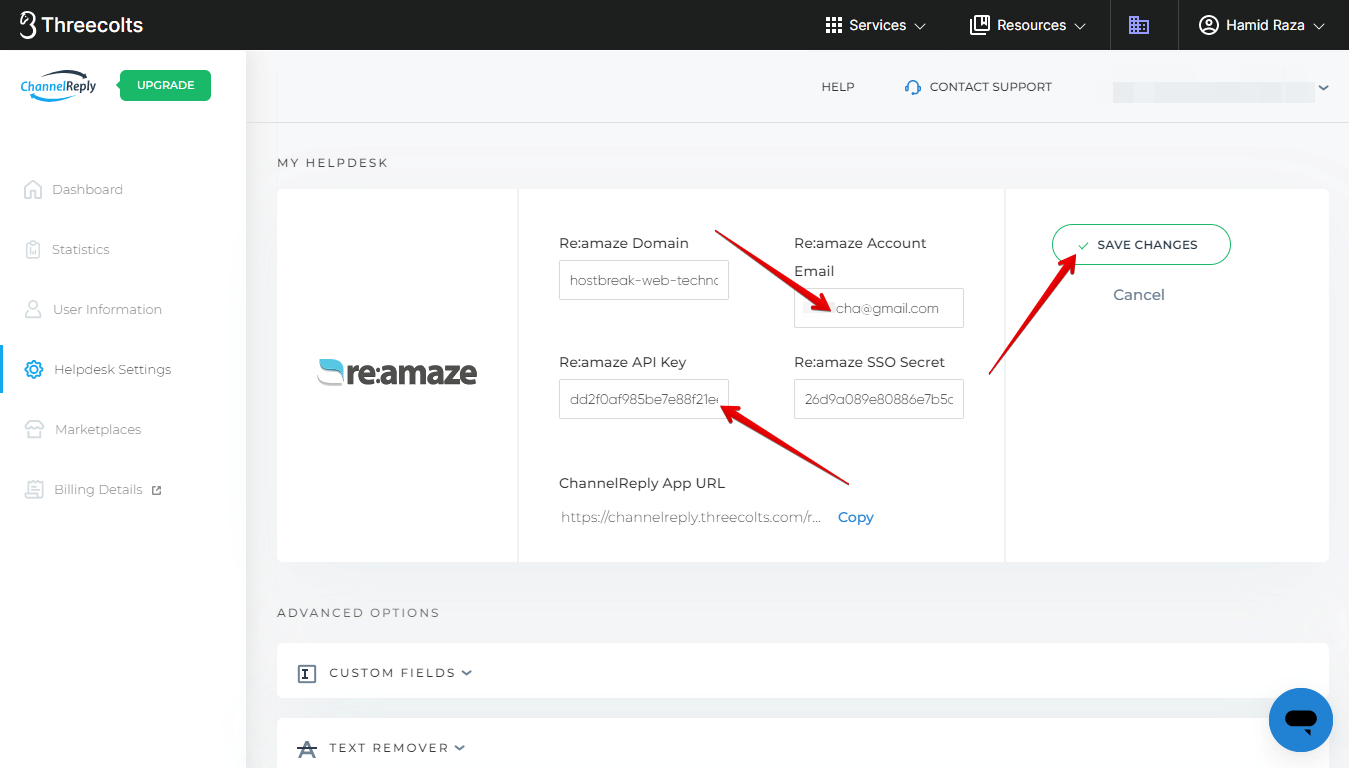
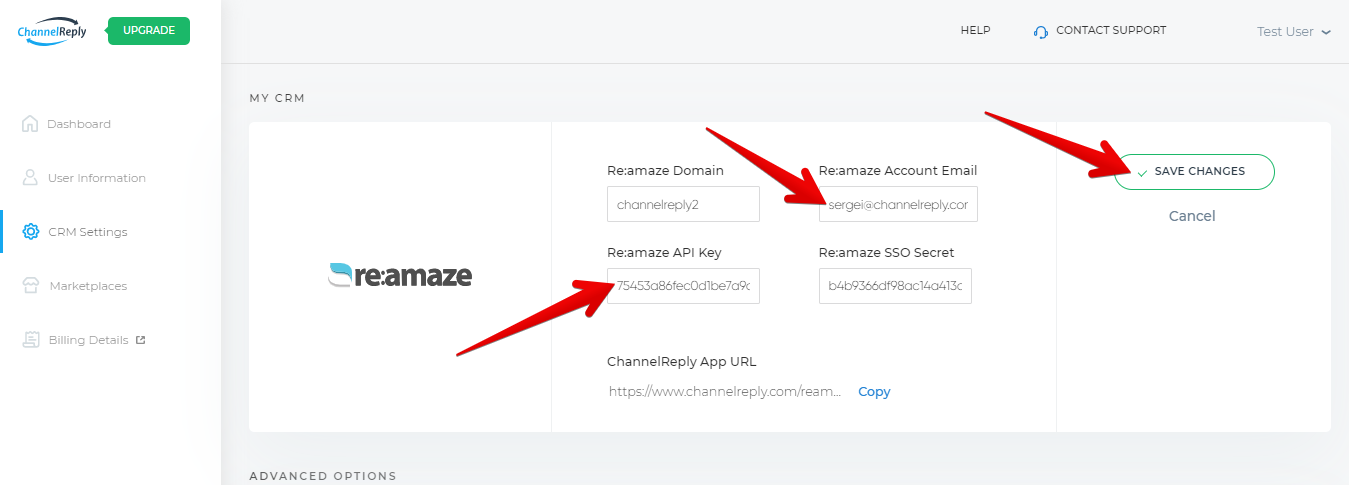
Sign in to ChannelReply and go to Helpdesk Settings.

Click "EDIT SETTINGS."
Paste the token into the Re:amaze API Key field. Then enter the new agent's email as the Re:amaze Account Email. Finally, click "SAVE CHANGES."
Afterward, all new internal notifications from ChannelReply will appear as coming from the new agent.
Lost? Contact us and we’ll get back to you soon!


