Are you not getting messages from Amazon, eBay, Walmart or other marketplaces in Zendesk? Or is customer and order info missing from the ChannelReply app? It might be that there’s a connection error with your ChannelReply-Zendesk integration.
Follow the steps below to check for and resolve the most common Zendesk connection issues.
Table of Contents
- 1. Test Your Zendesk Connection
- 2. Determine Whether You Used Classic or OAuth Setup
- 3A. Troubleshoot Errors on OAuth Setup
- 3B. Switch from Classic Authorization to OAuth
- 3C. Troubleshoot Errors on Classic Setup
- 4. Check the “MESSAGING” Slider
1. Test Your Zendesk Connection
Click any image to view it at full resolution.
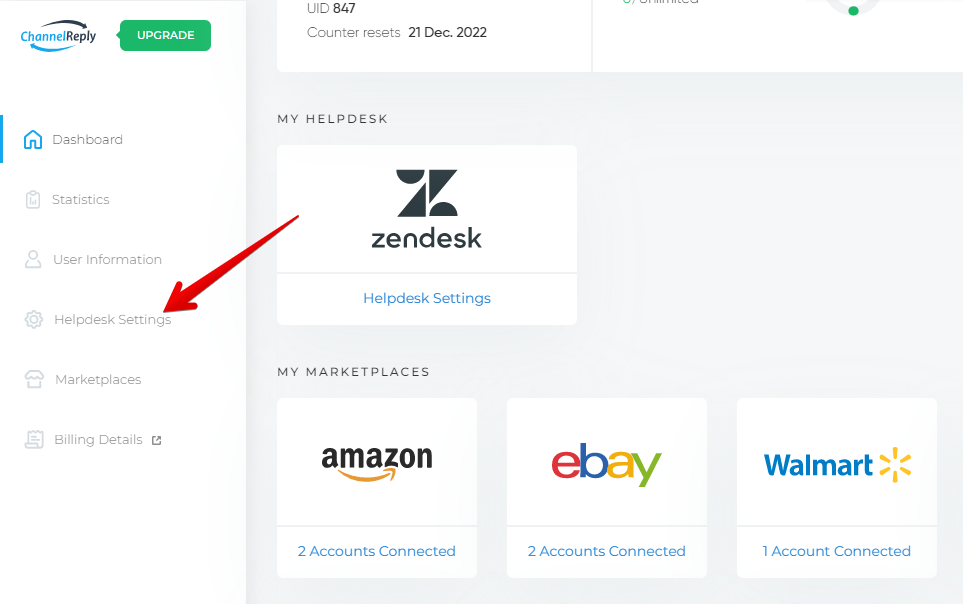
Sign in to ChannelReply and go to Helpdesk Settings.
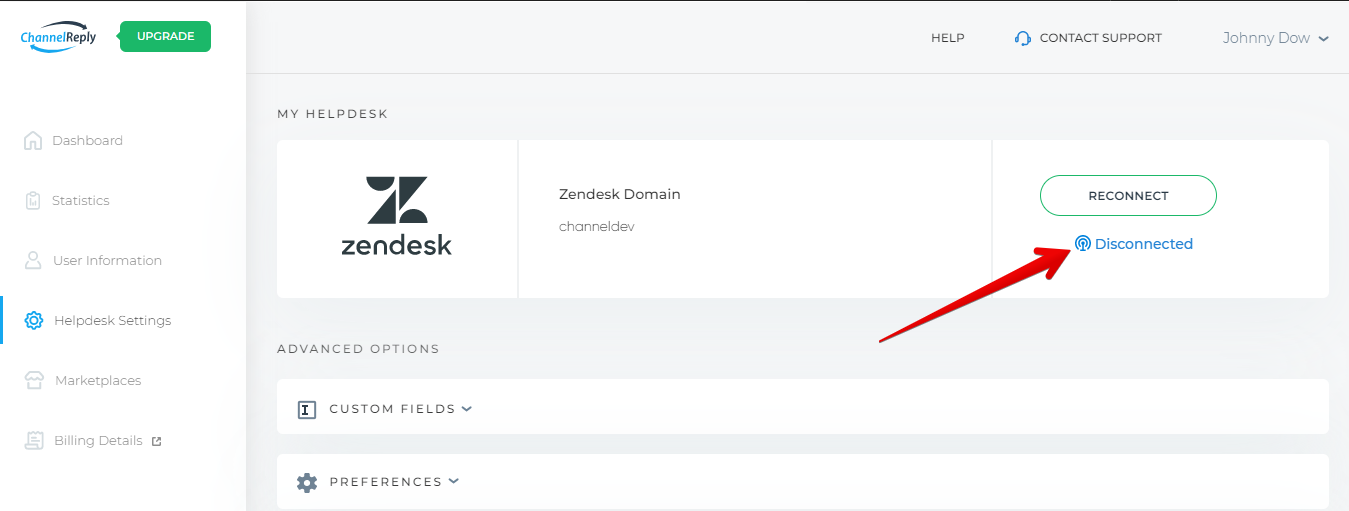
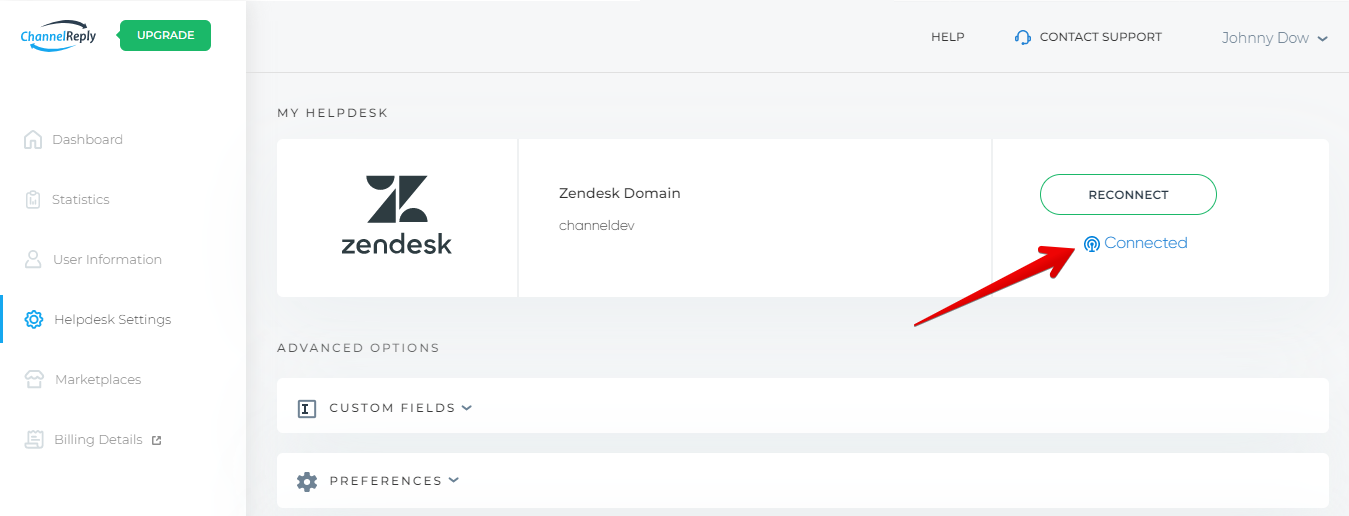
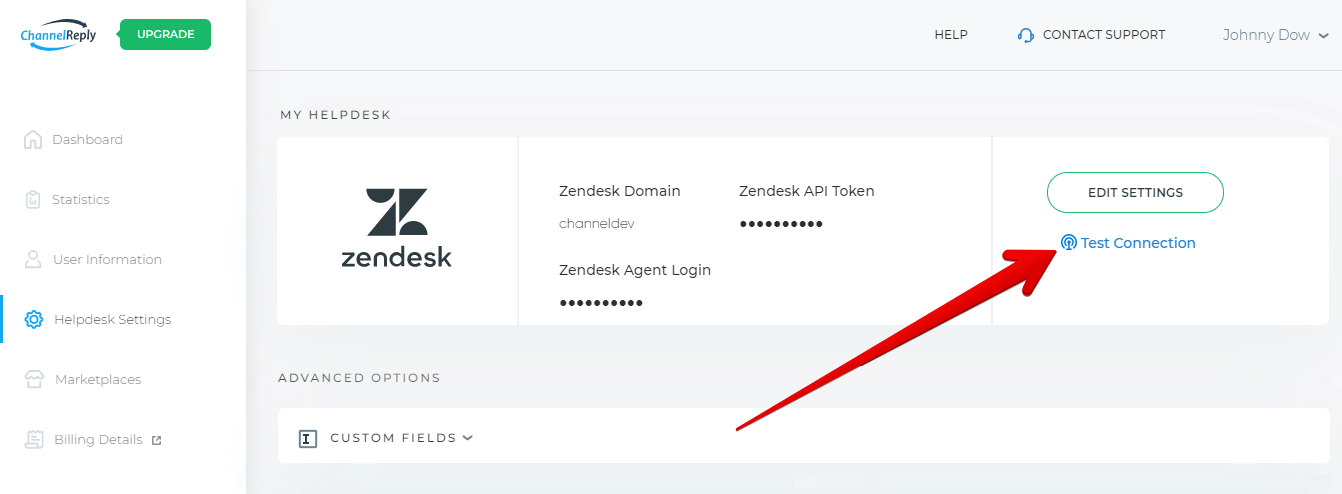
What you see on this screen may vary.
If you see “Disconnected,” you’ll know right away that there’s an error with your Zendesk integration and you should skip to step 2.
If you see “Connected,” your Zendesk integration is in good shape, but there could be other problems. Skip to step 4 instead.
If you see “Test Connection,” hit it now.
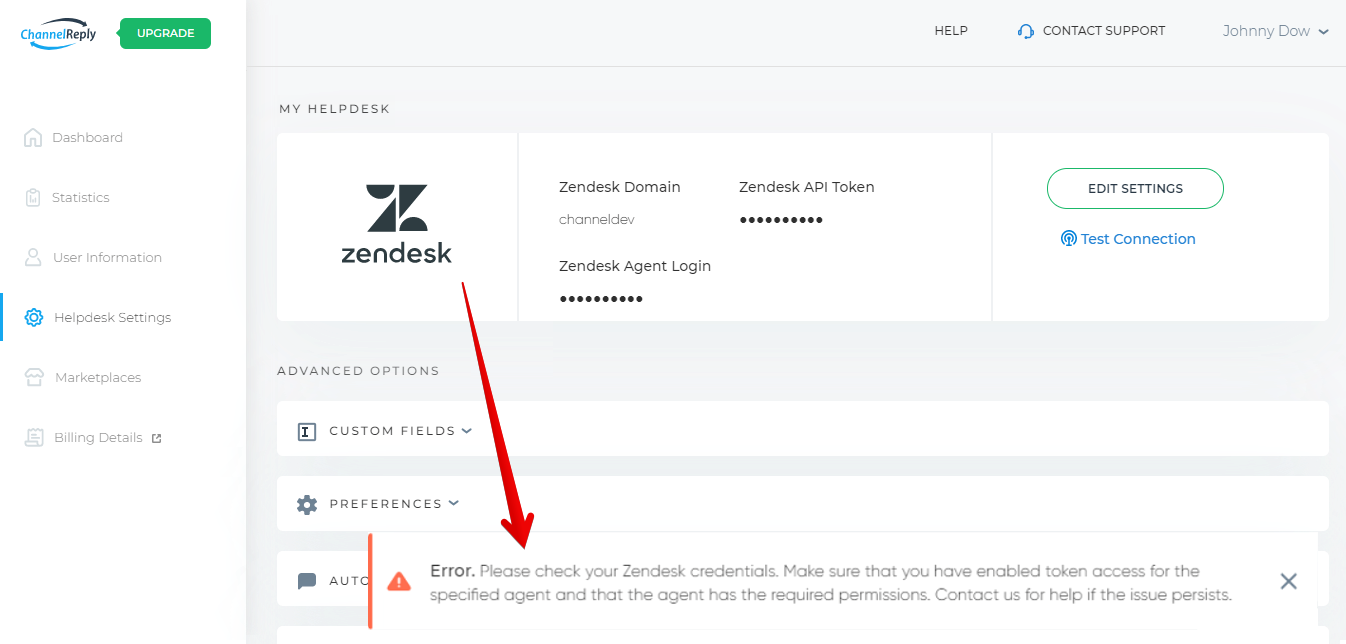
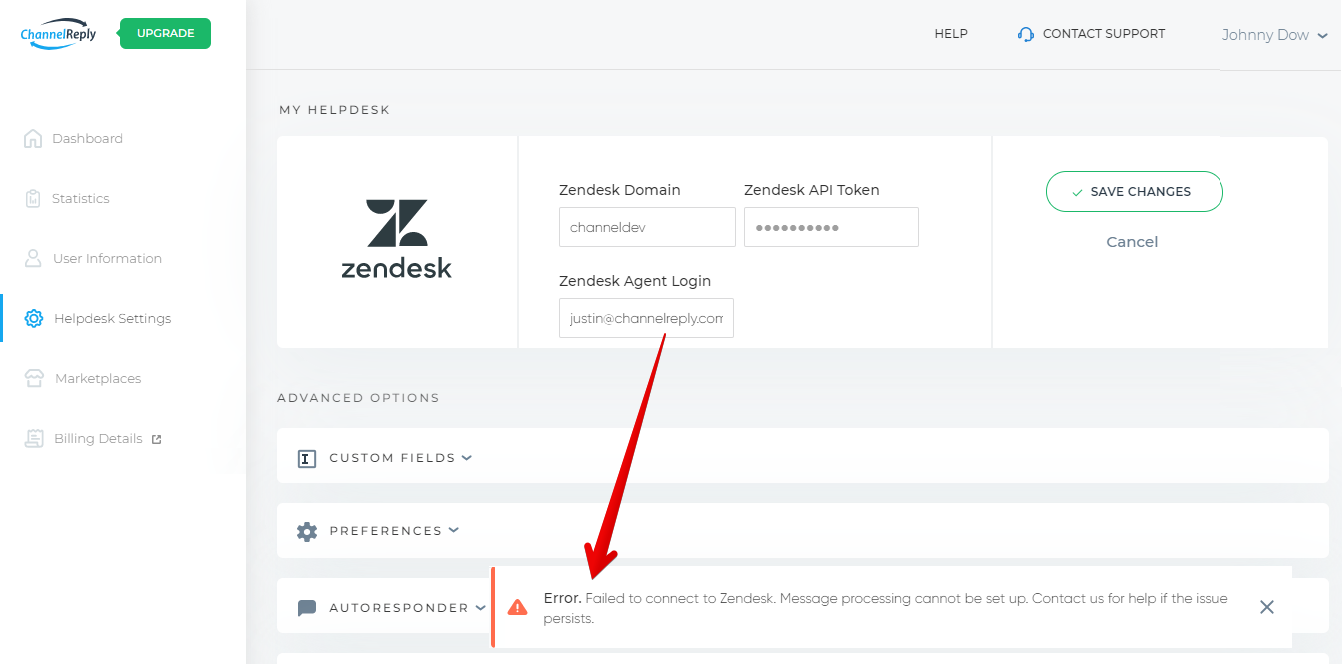
You’ll see an error message if there are any issues with the integration. Some error message examples include:
- “The Zendesk Agent Login email does not have administrator permissions in Zendesk. Please enter the email address of an administrator, or upgrade this user’s permissions in Zendesk under Admin Center > People > Team members.”
- “Please check your Zendesk credentials. Make sure that you have enabled token access for the specified agent and that the agent has the required permissions. Contact us for help if the issue persists.”
If you have any connection errors with your Zendesk integration, jump to step 2 now.
If “Test Connection” shows only a success message, your Zendesk integration is in good working order, but there could be other issues. Skip to step 4 instead.
2. Determine Whether You Used Classic or OAuth Setup
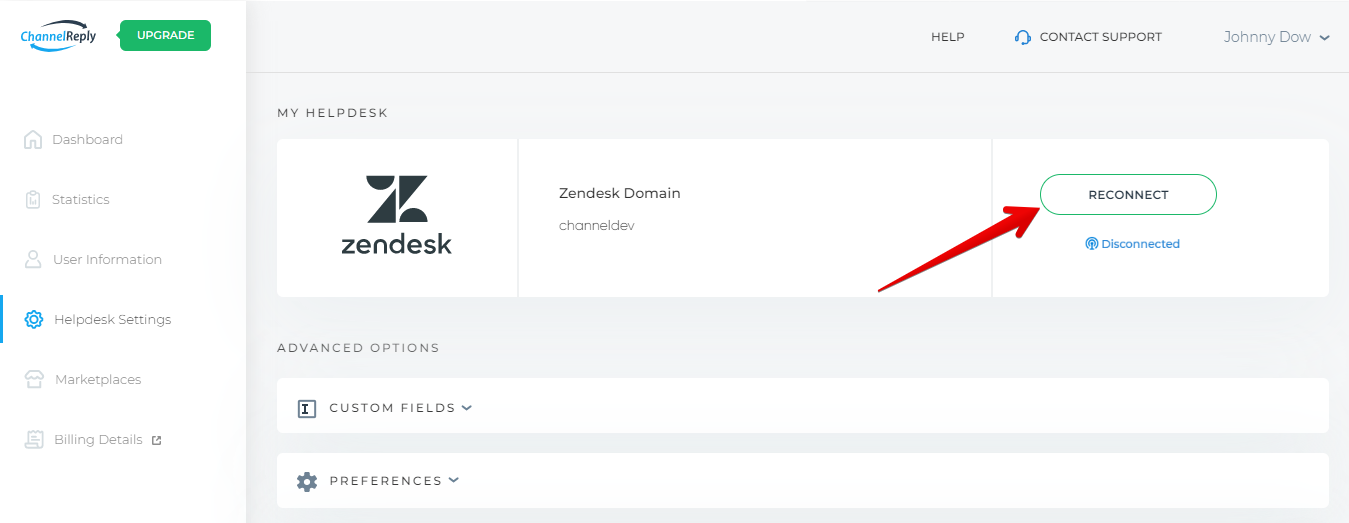
If you see a “RECONNECT” button in Helpdesk Settings, then you have the new Zendesk OAuth setup. We’ll refer to this as “OAuth.” Skip to step 3A now.
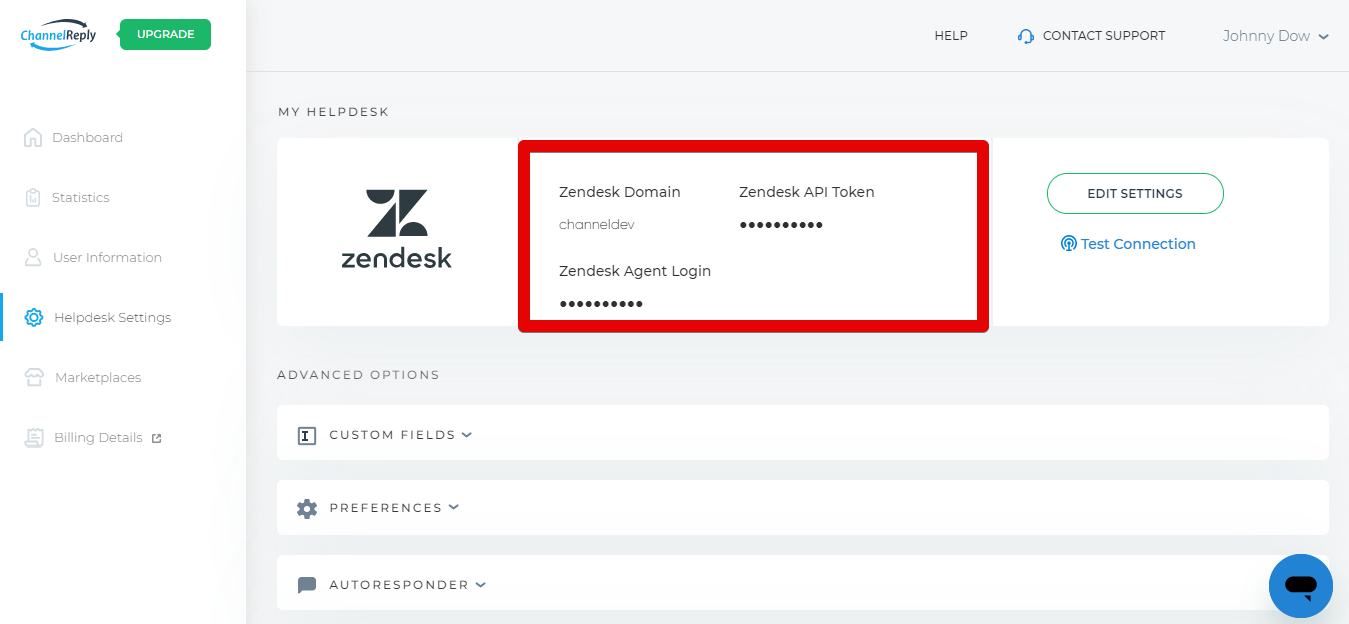
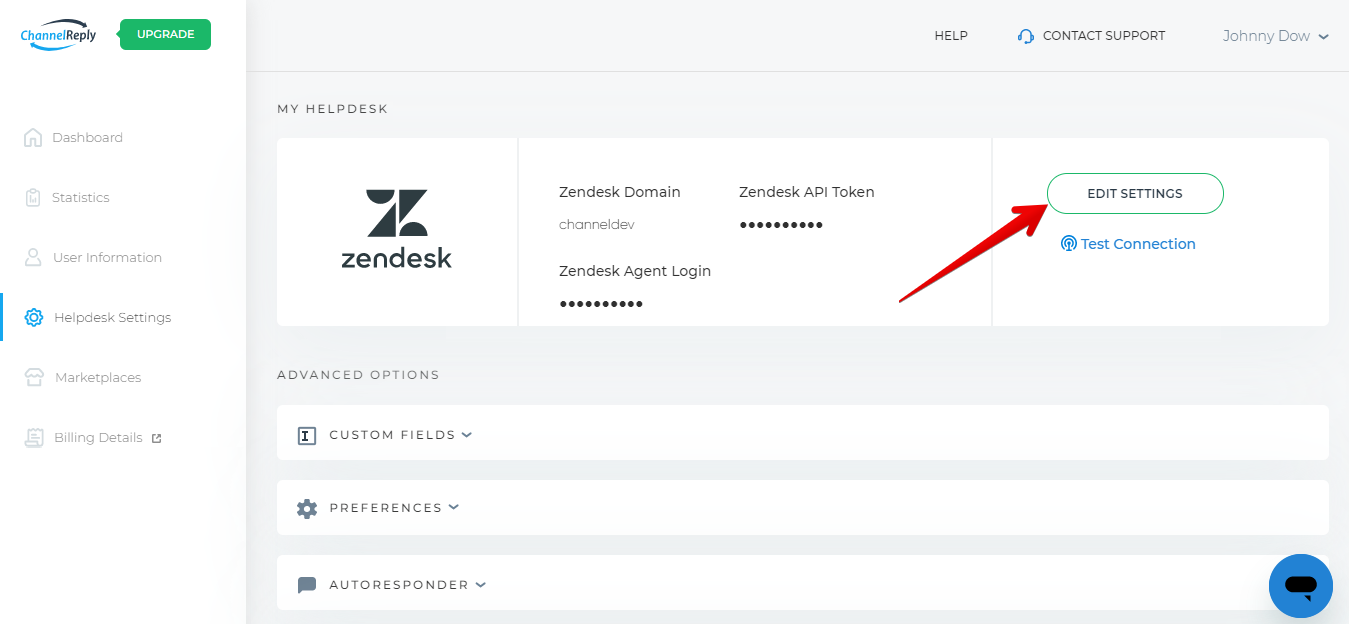
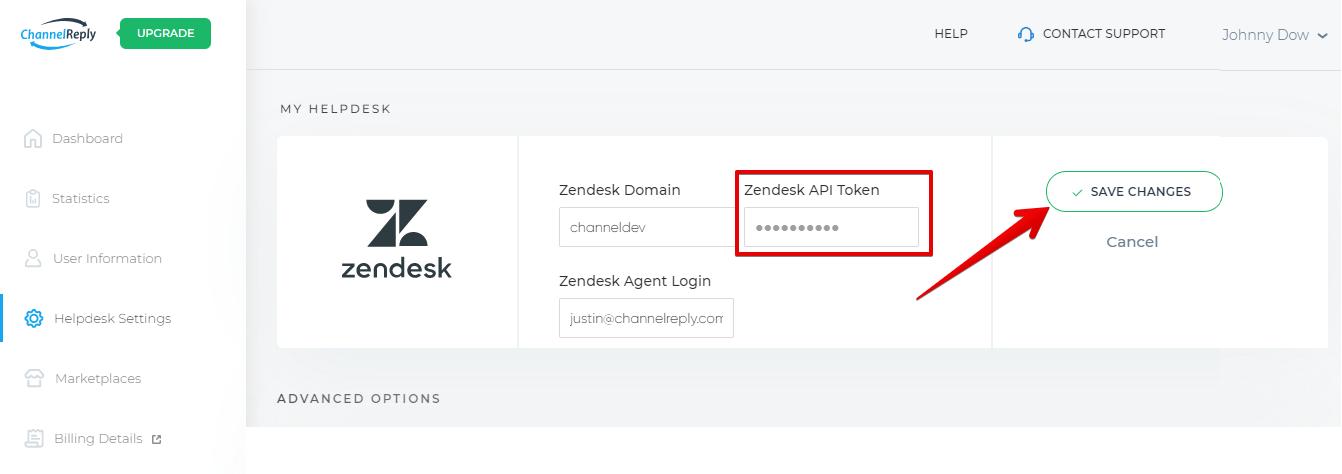
If you see “Zendesk API Token” in Helpdesk Settings, you have the classic token-based setup. We’ll call this “classic setup” for the rest of this article.
If you have the classic setup, skip to step 3B to switch to the new OAuth-based setup and permanently solve all common connection errors. Or, if you’d prefer to keep the classic setup and just fix the specific connection error, you can jump to step 3C instead.
3A. Troubleshoot Errors on OAuth Setup
If you see “Disconnected” here, then simply click the “RECONNECT” button
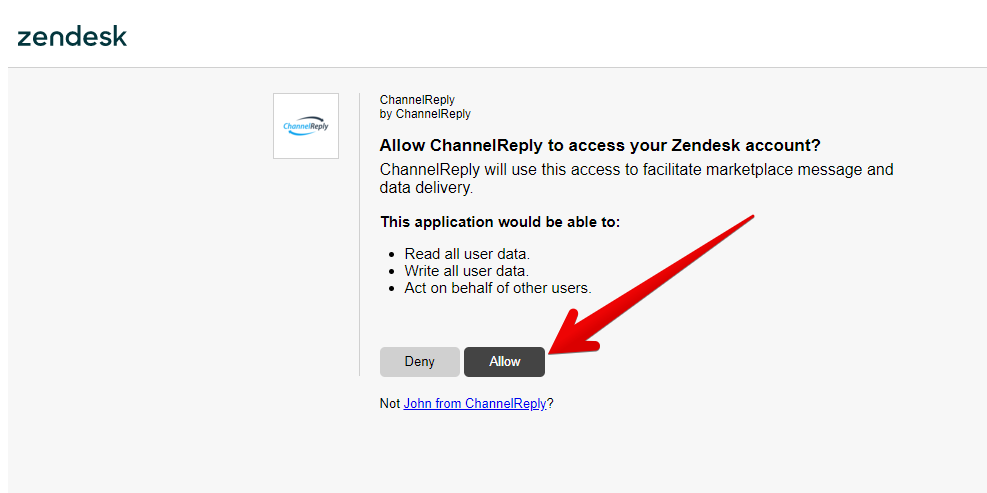
When the page loads, click “Allow.”
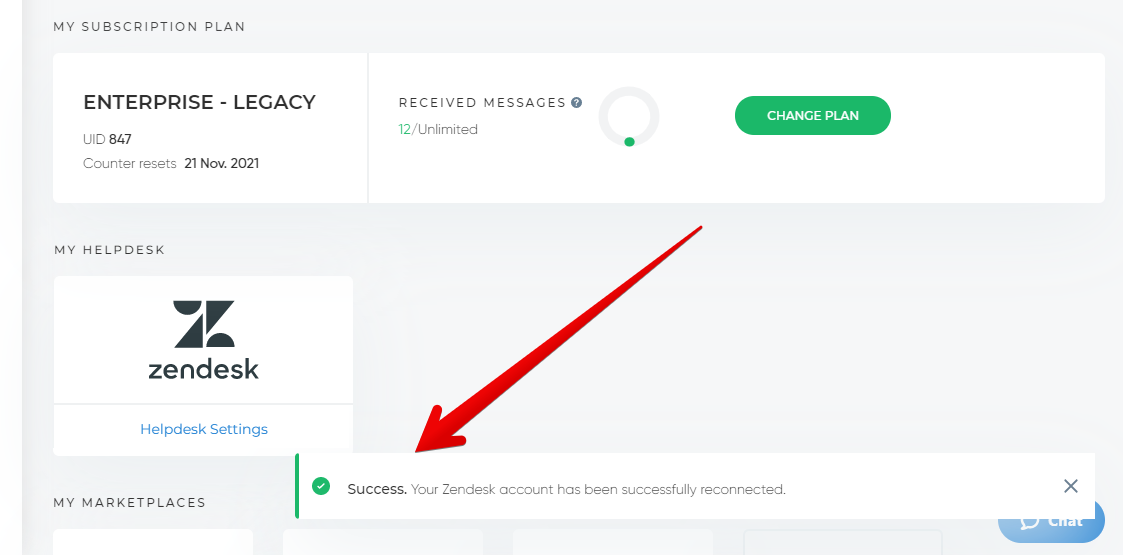
You should see a success notification confirming that Zendesk has reconnected with ChannelReply.
Your Zendesk integration is now fixed! Jump to step 4 to finish troubleshooting.
3B. Switch from Classic Authorization to OAuth
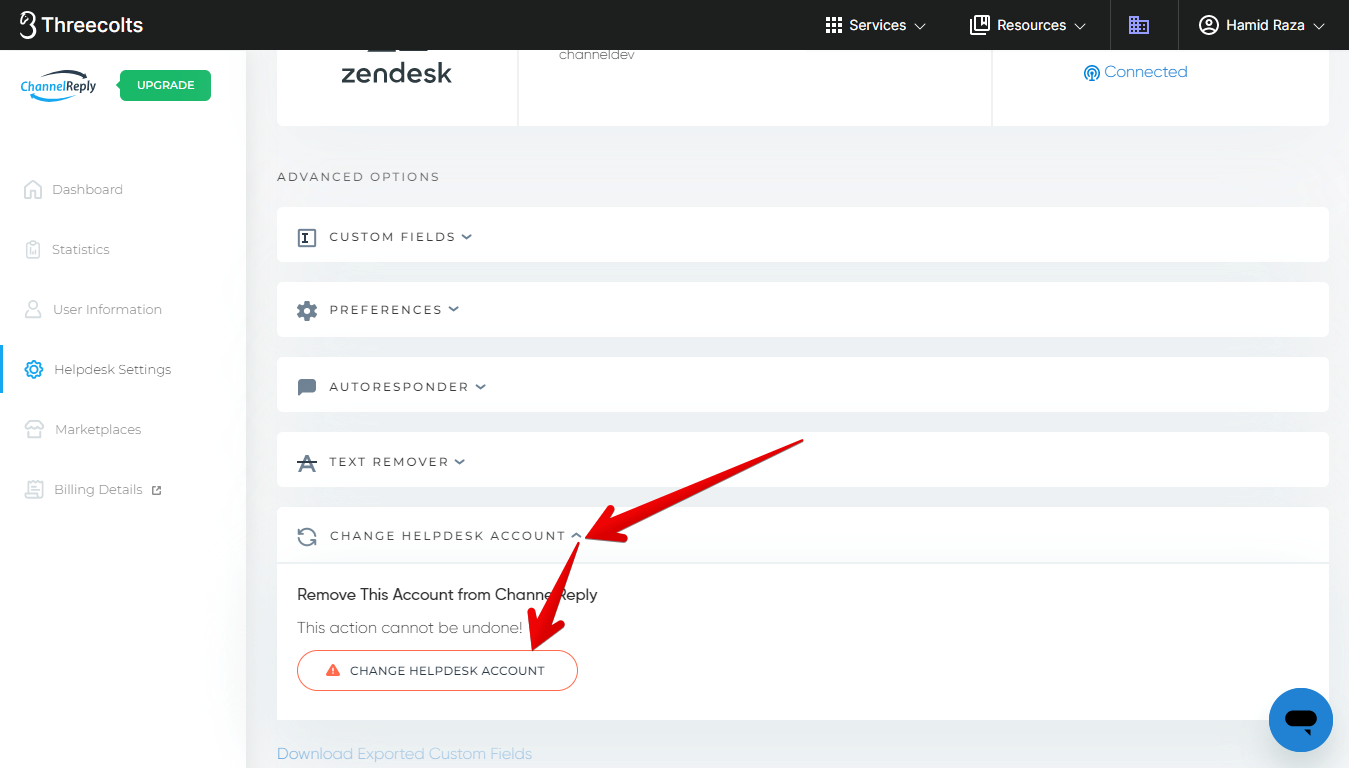
Switching to the new OAuth integration is easy. Scroll to the bottom of your Helpdesk Settings page and click “CHANGE HELPDESK ACCOUNT.”
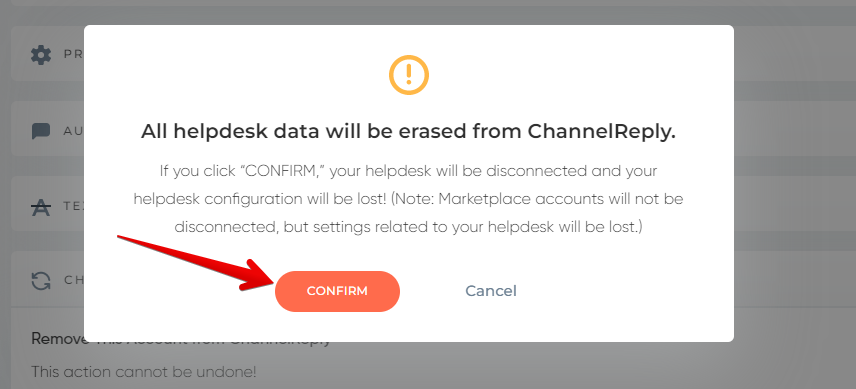
A warning message will appear. Click “CONFIRM” to disconnect your Zendesk account from ChannelReply.
Once disconnected, reintegrate your Zendesk using our Zendesk integration guide. Your account will be reconnected using the OAuth setup, fixing all common connection issues.
When you’ve finished reconnecting your account, jump to step 4 to finish troubleshooting.
3C. Troubleshoot Errors on Classic Setup
The classic Zendesk setup can break down if there are any issues with your domain, agent login email, or API token, among other things. Switching to the new OAuth setup is the fastest and easiest way to solve these problems and prevent them from happening again.
If you prefer to keep the classic setup, you can follow the steps below to solve the problem.
Fix Domain Errors
Click the “Edit Settings” button.
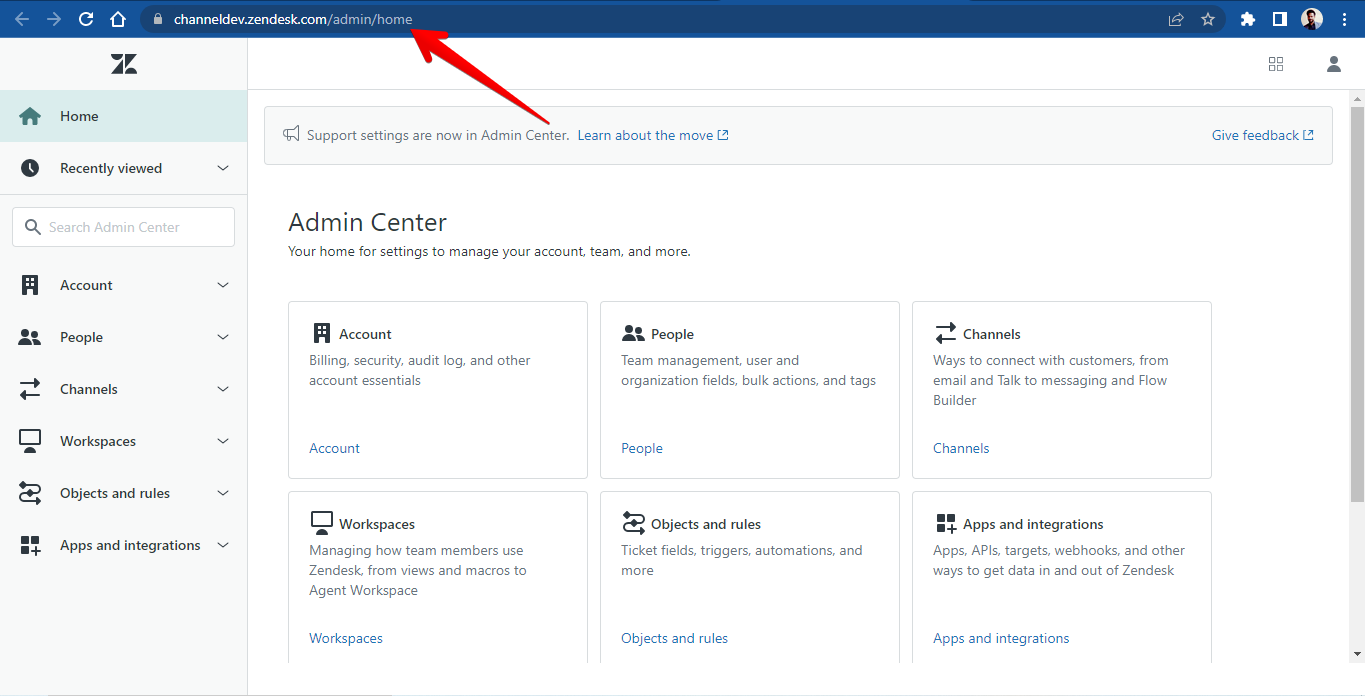
Open your Zendesk account in a separate window. Copy the URL on any page.
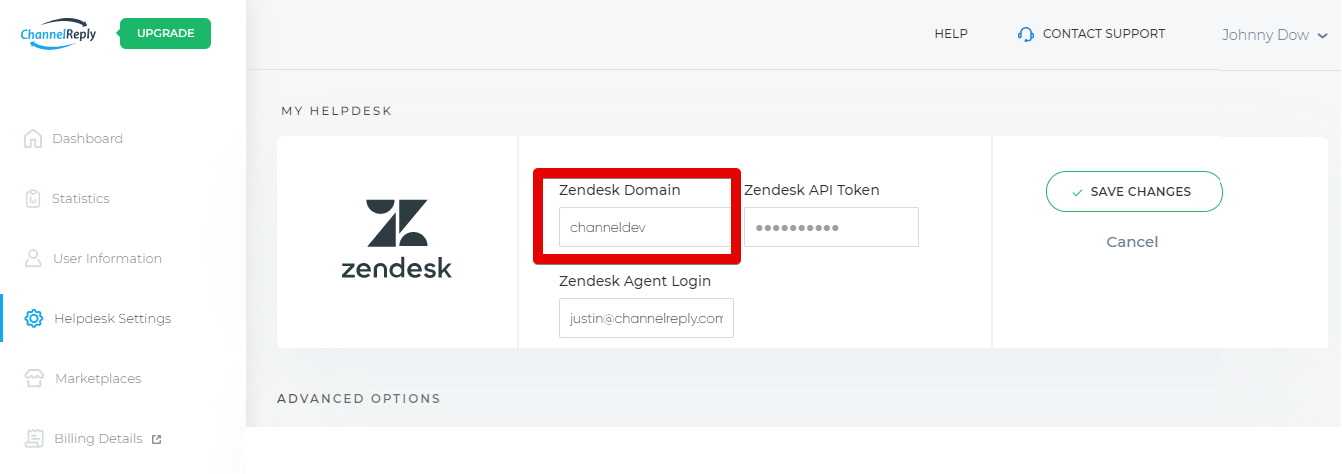
Paste the URL into the “Zendesk Domain” box in ChannelReply. Click anywhere outside the box and it’ll truncate the link to only your unique Zendesk domain.
Fix Agent Login Errors
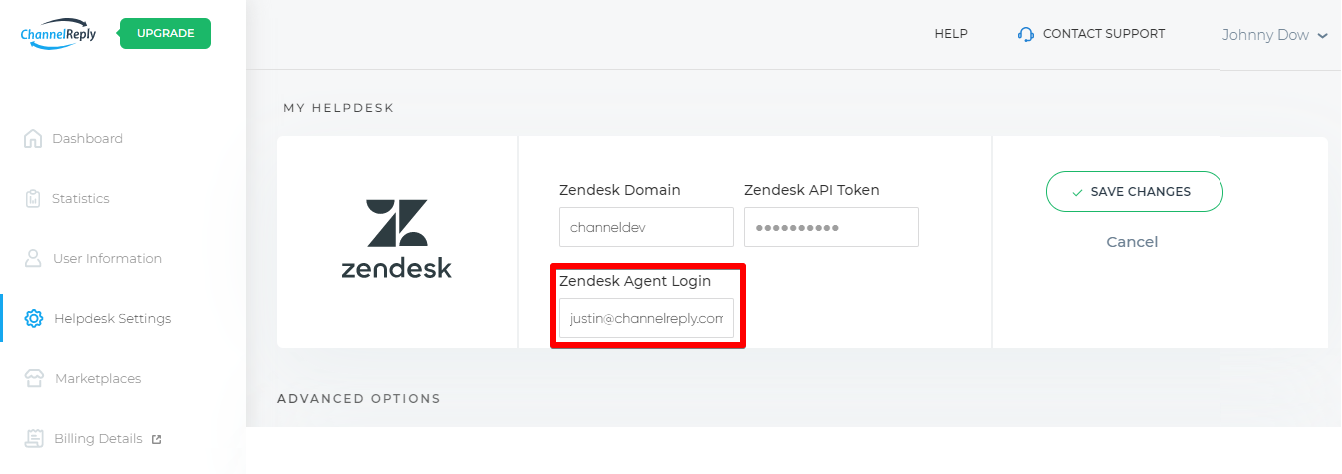
Copy the email address in the “Zendesk Agent Login” field.
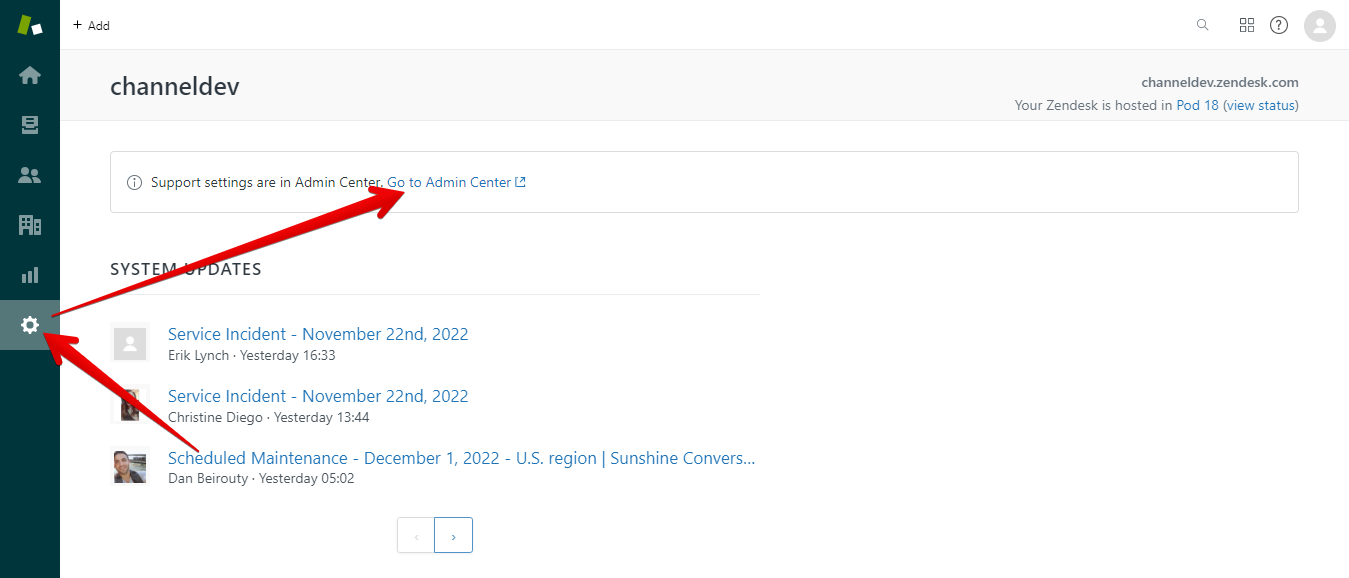
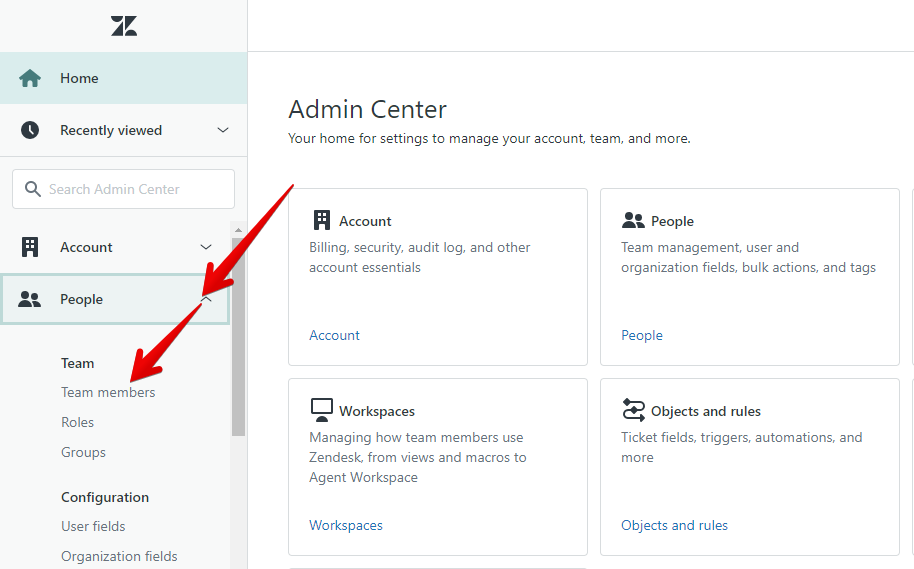
Return to Zendesk. Click the gear (Admin) icon and click “Go to Admin Center.”
Now click “People” and select “Team members.”
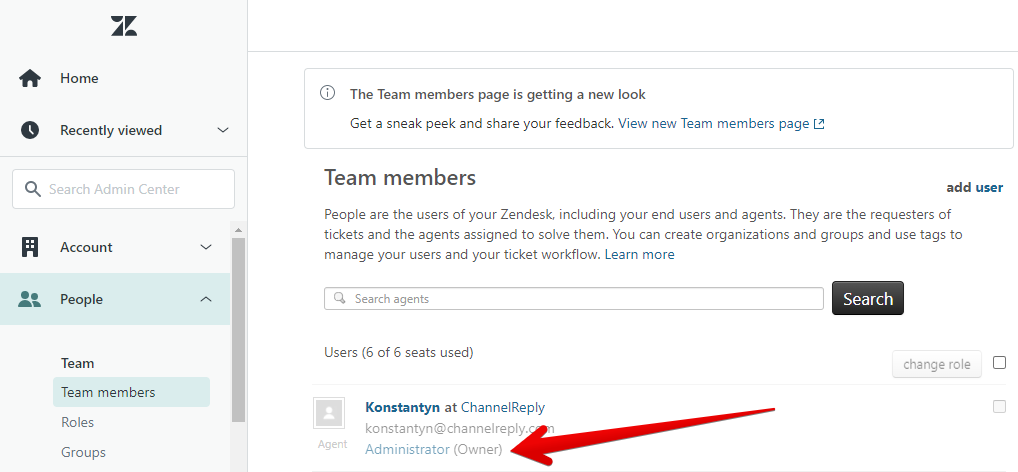
Paste the email address into the Search bar and click “Search.” If the account that appears has “Administrator” beneath their email address, then your Zendesk Agent Login is correct and you can skip to “Fix API Token Errors.”

If no account appears, or if the agent that appears is not an administrator, you must change the Zendesk Agent Login in ChannelReply.
Copy the email address of any administrator from “People” > “Team members.”
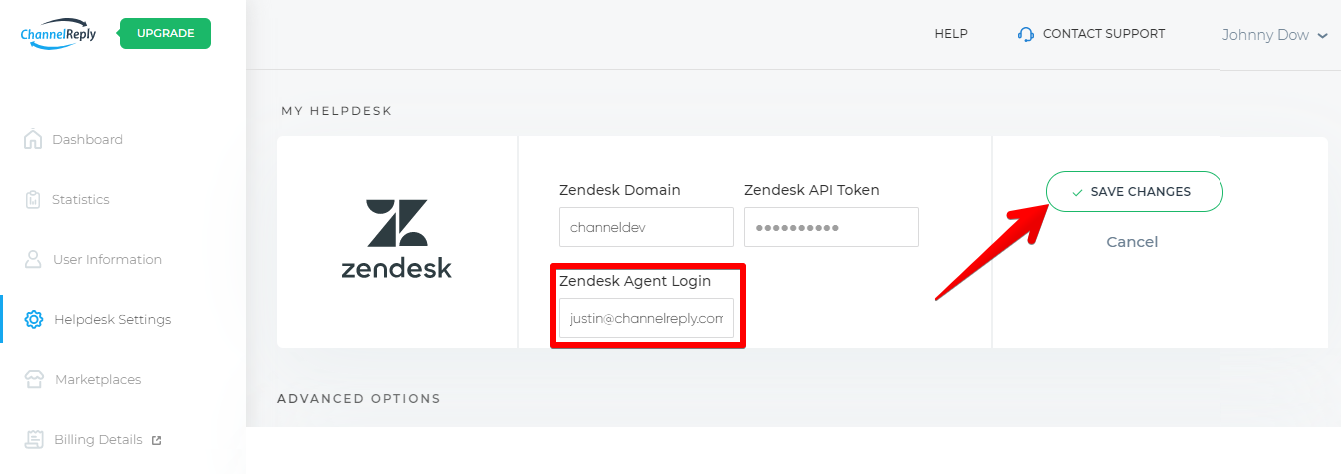
Return to ChannelReply and paste it into the Zendesk Agent Login field. Click “Save Changes.”
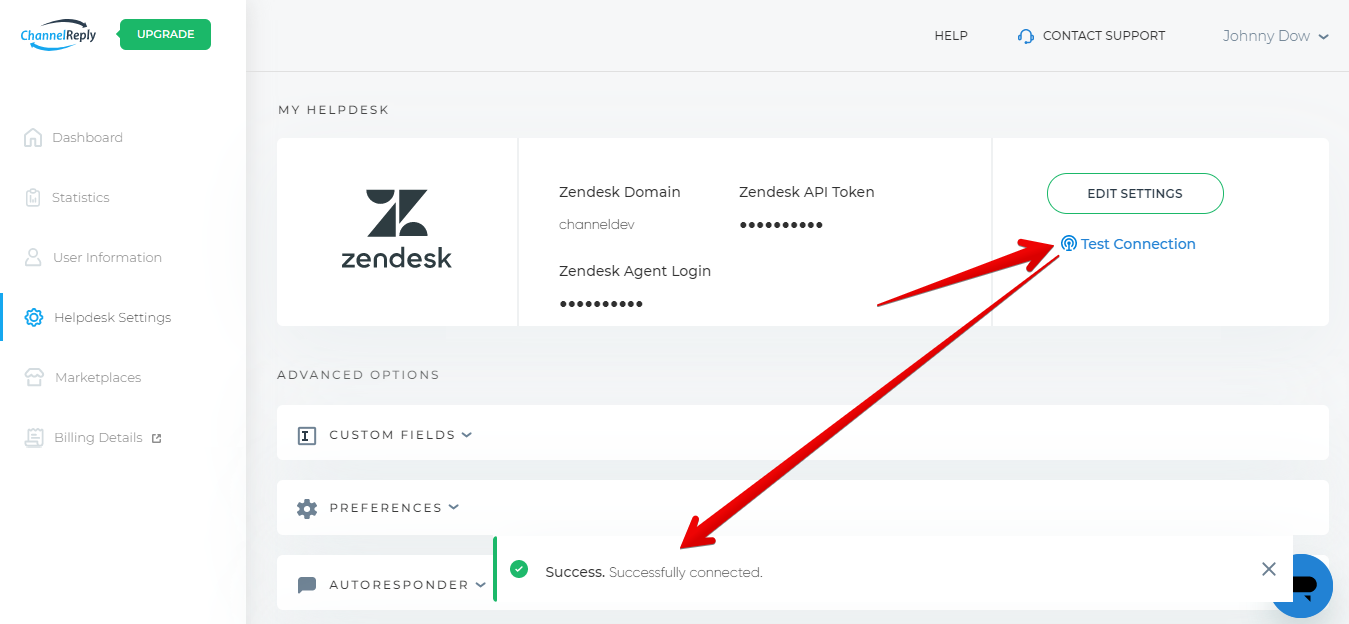
Next, hit “Test Connection.” If you see a success notification, you’re good to go and can skip to step 4.
If you still see an error message, you’ll have to generate a new API token.
Fix API Token Errors
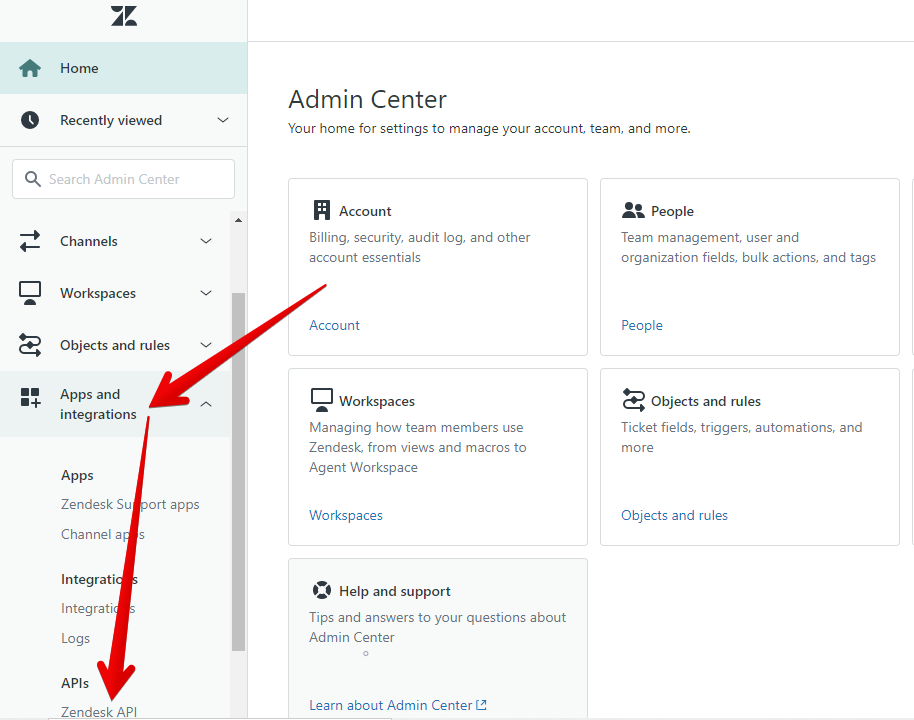
Return to your Zendesk Admin Center. Click on “Apps and integrations” and select “Zendesk API.”
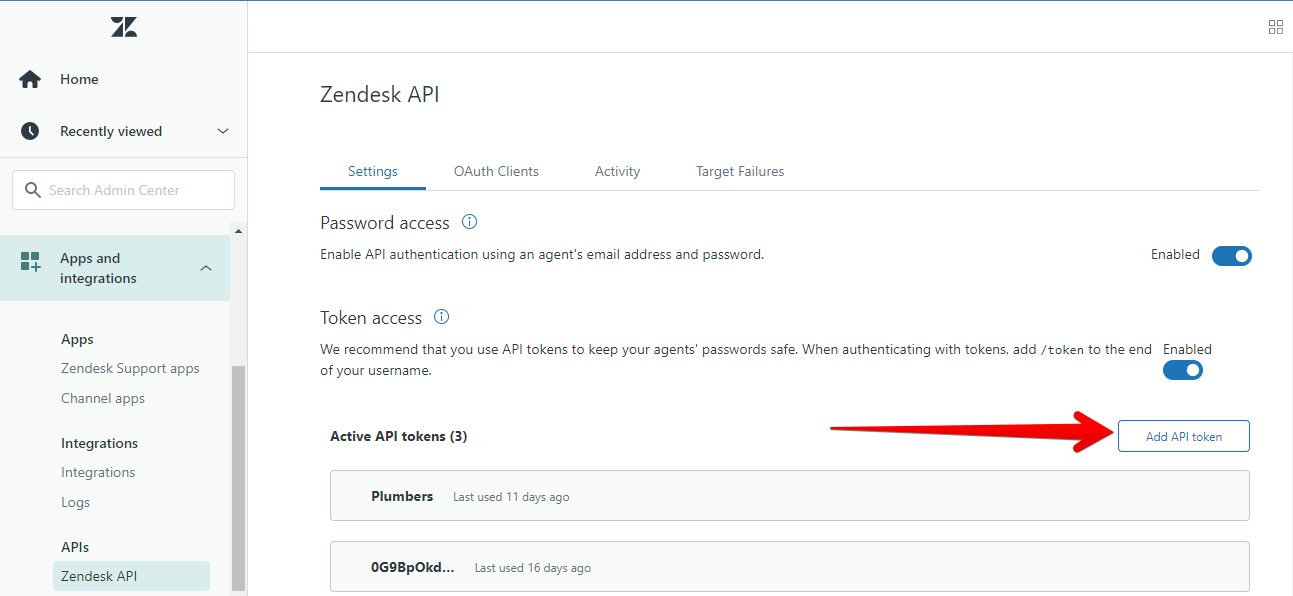
Click "Add API Token" on the far right.
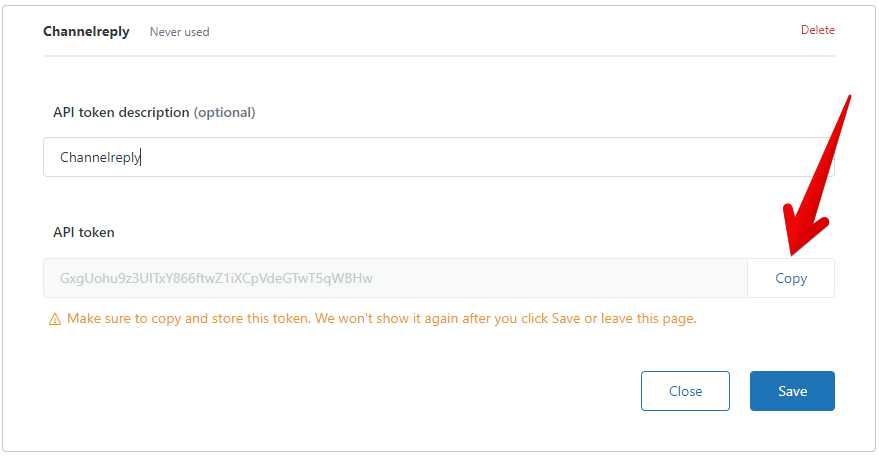
Give the token a name that makes it easy to identify, like “ChannelReply.” Then click “Copy.” Be sure to save it somewhere safe, as you’ll never be able to view this API token in Zendesk again.
When you’re ready, click “Save.”
Return to ChannelReply. Paste the API token into the “Zendesk API Token” field, then click “Save Changes.”
Hit “Test Connection.” You should see a success notification now.
Your Zendesk connection errors are now completely solved! Continue to step 4 below to finish troubleshooting.
4. Check the “MESSAGING” Slider
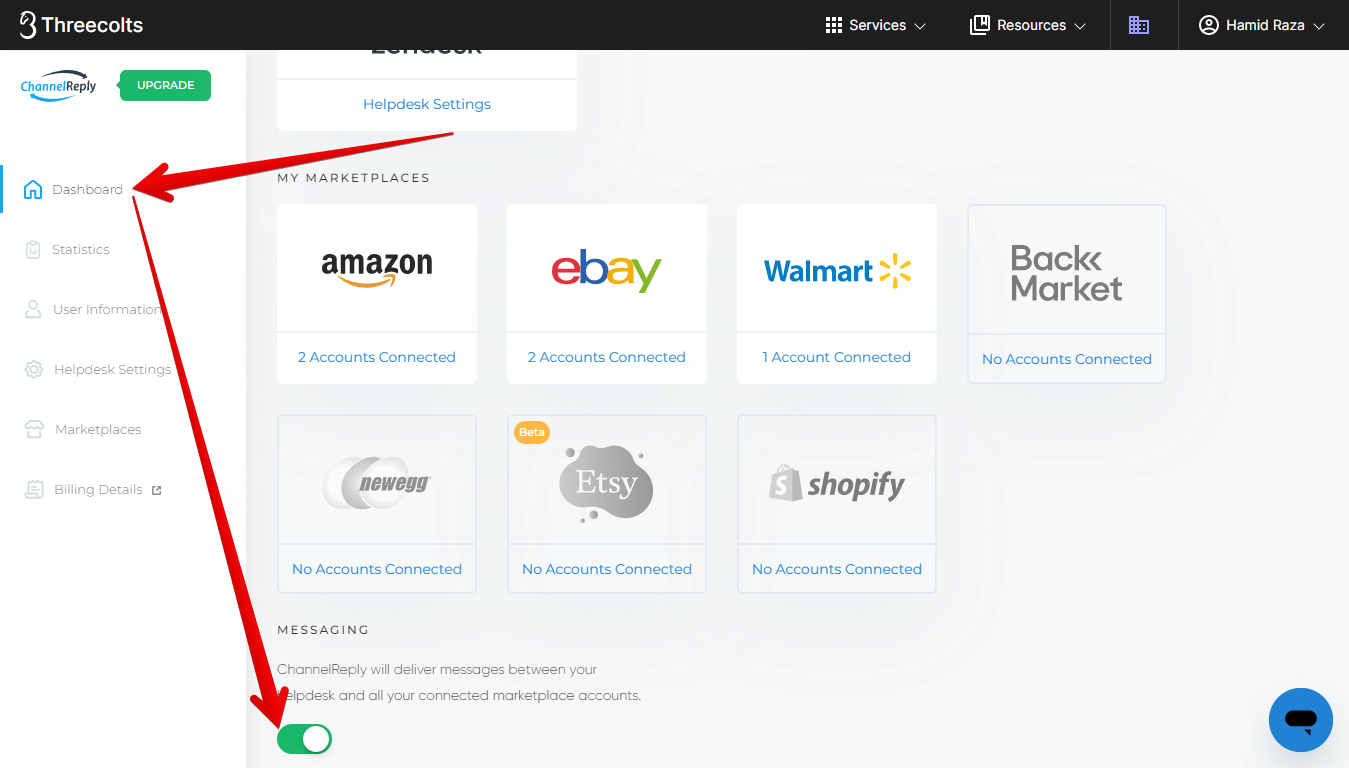
Return to your ChannelReply dashboard. Check that the messaging slider at the very bottom of the page is turned on (green and with the knob on the right, as displayed below). Even with a perfectly all right Zendesk integration, ChannelReply won’t deliver messages if this slider is turned off.
Still have issues with your Zendesk integration? Contact us and we’ll be happy to help!


