With ChannelReply, it’s super easy to tag all tickets from a Shopify store. But what if you want to create a unique tag for each Shopify contact form?
No sweat. All you have to do is enter any tag you’d like in ChannelReply, then paste a single line of code into your contact form. It’s easy even if you’ve never worked with code before.
1. Create Your Tag & Custom Code
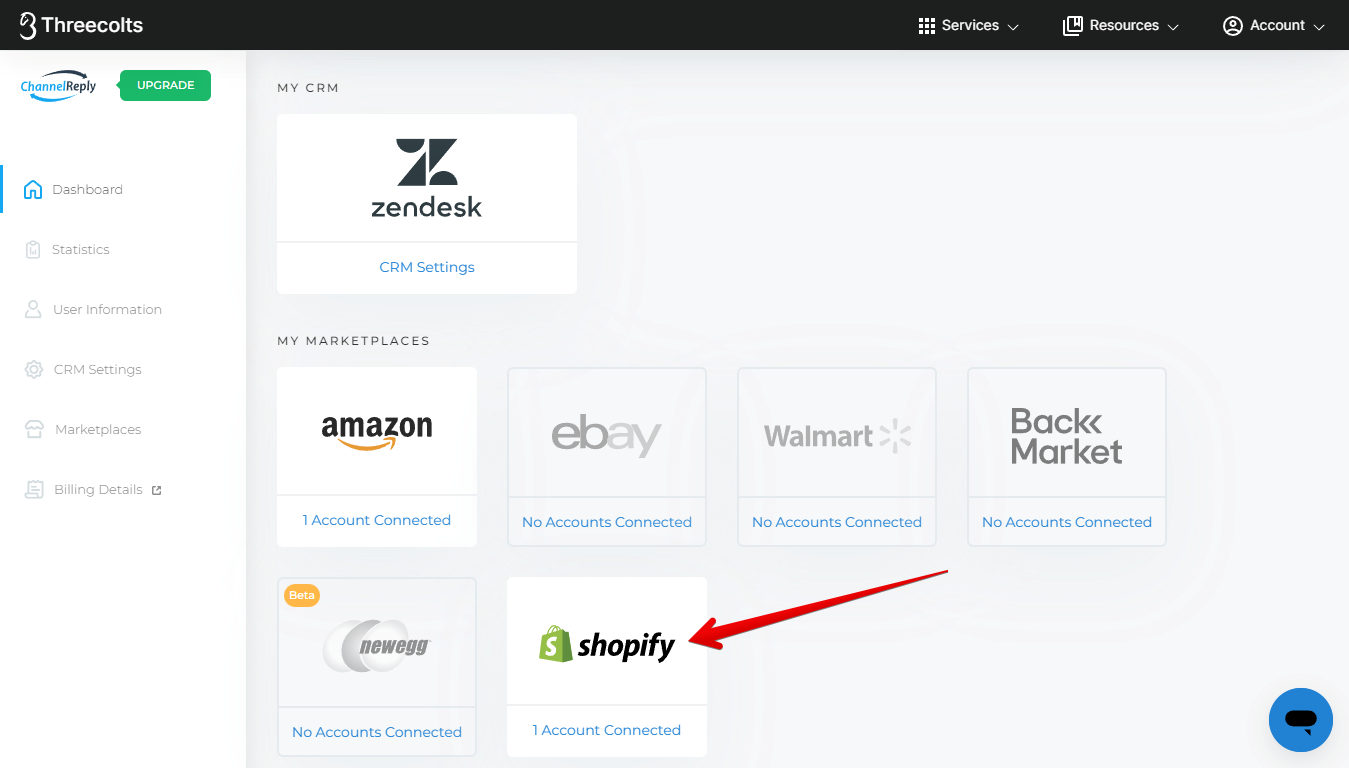
Log in to ChannelReply. Then click on Shopify on your dashboard.
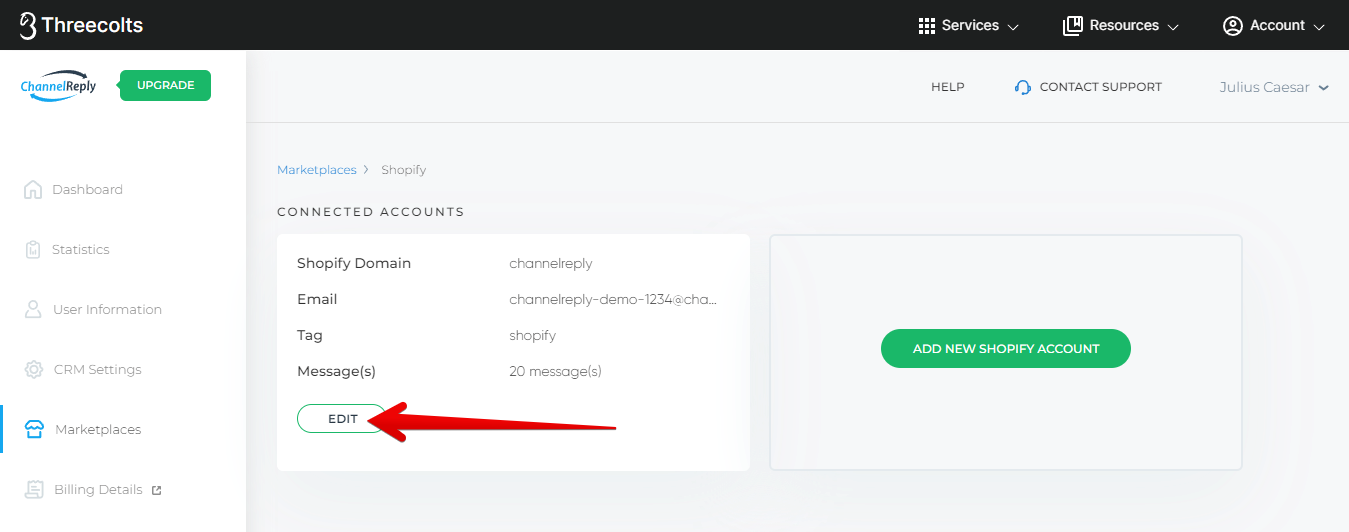
Click “EDIT” under the account for which you want to create contact form tags.
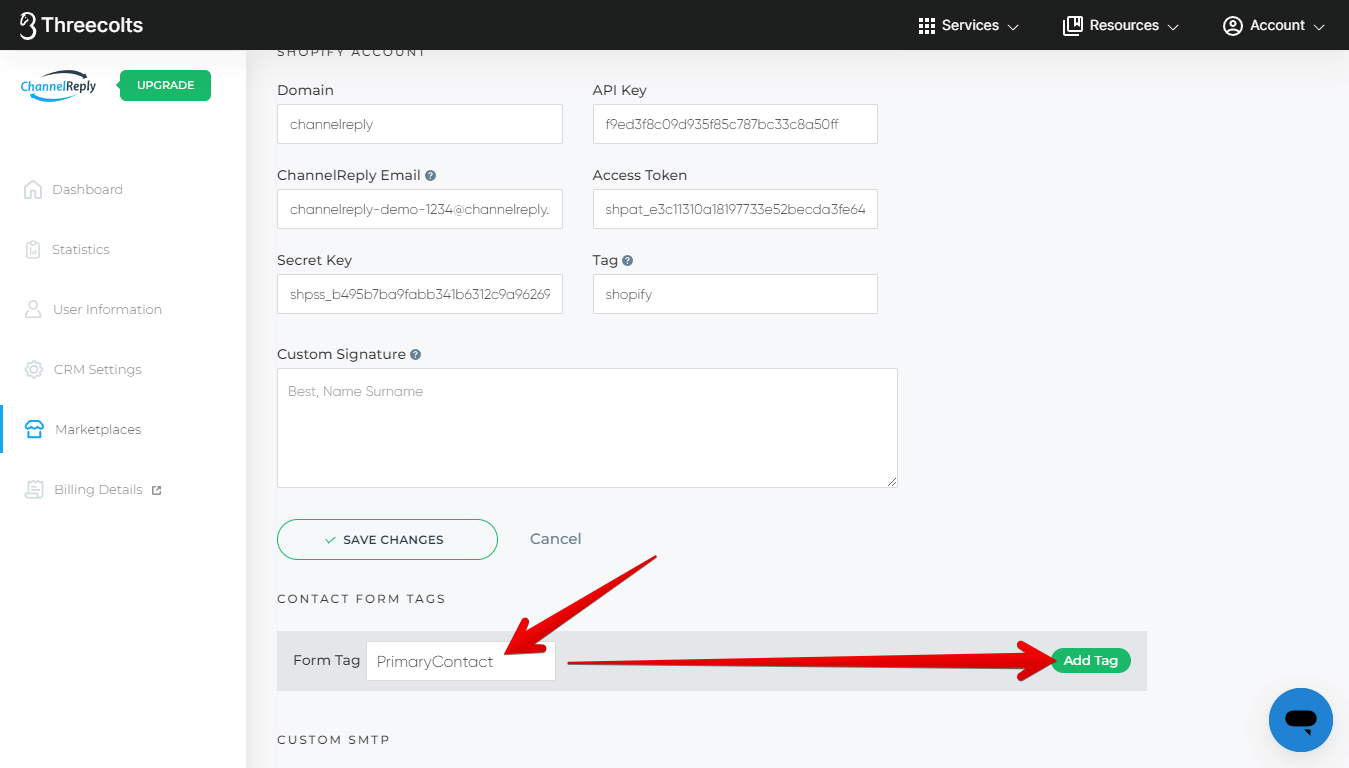
Scroll down to “CONTACT FORM TAGS.” Enter the tag you want for your contact form in the “Form Tag” field, then click “Add Tag.”
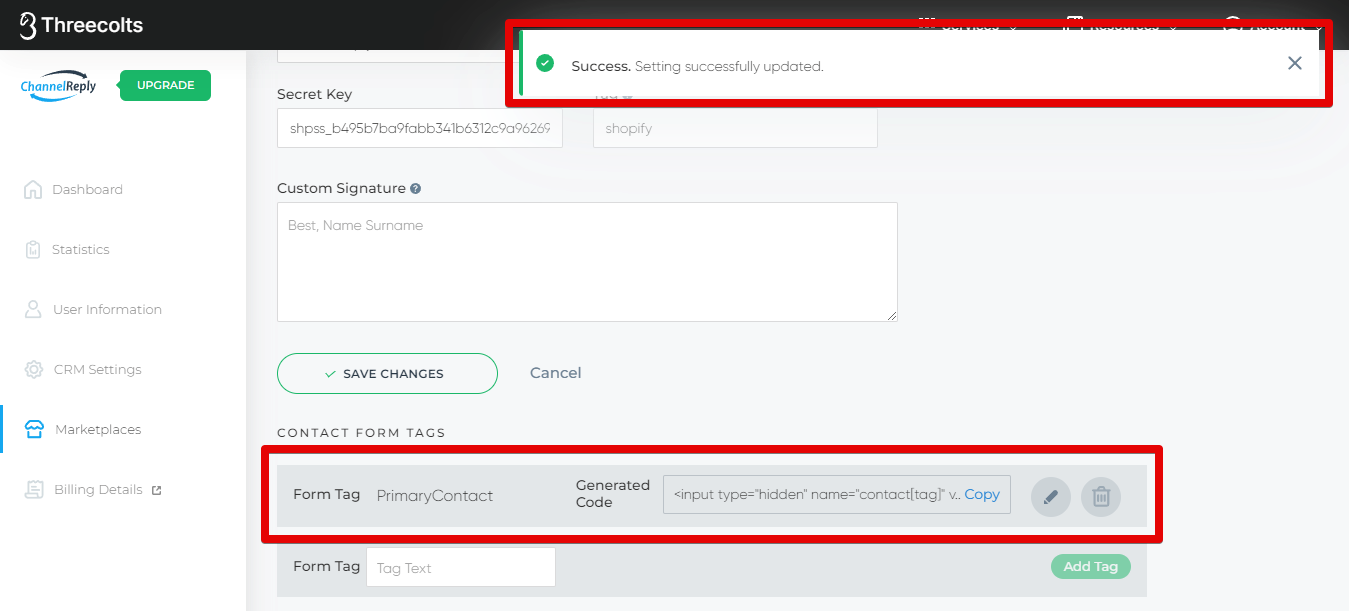
Your code will be generated, and a success notification will appear.
2. Add Your Custom Code to Your Contact Form
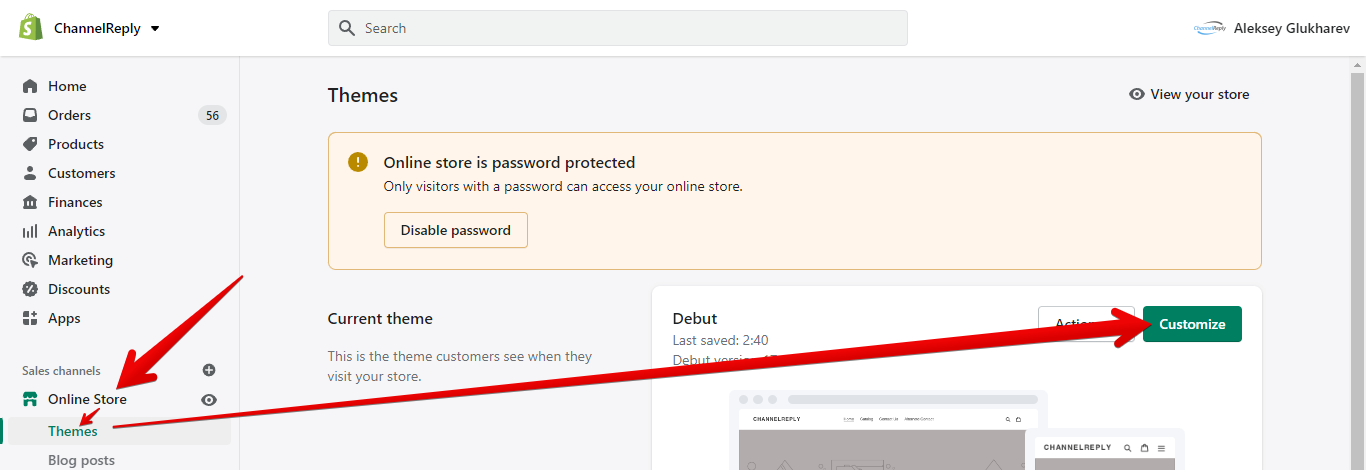
Go to your Shopify store and click “Online Store” on the left. You should be taken to the “Themes” page automatically. In the “Current theme” section, hit “Customize.”
Click the row of three dots in the upper left, then select “Edit code” from the menu that appears.
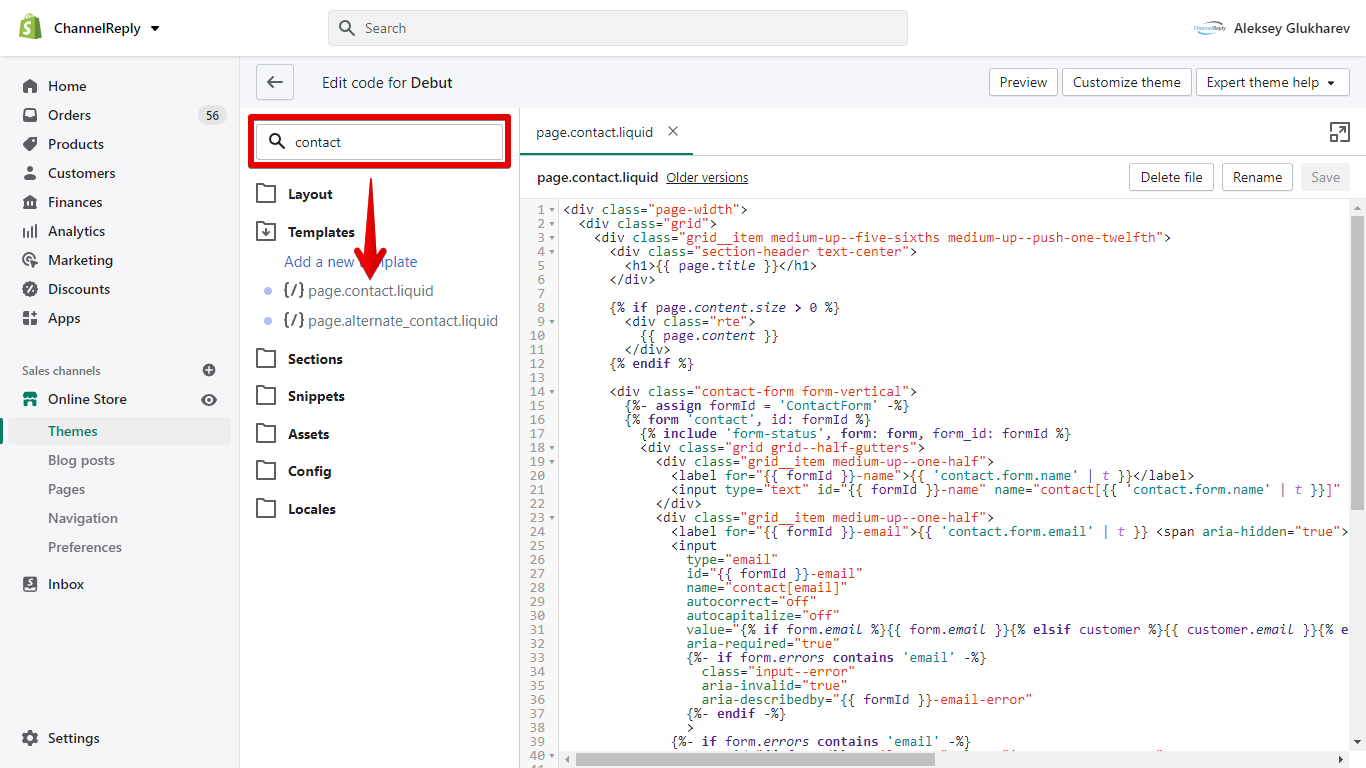
Choose your contact form from the list under “Templates.” (Searching for “contact” may help you find it faster.)
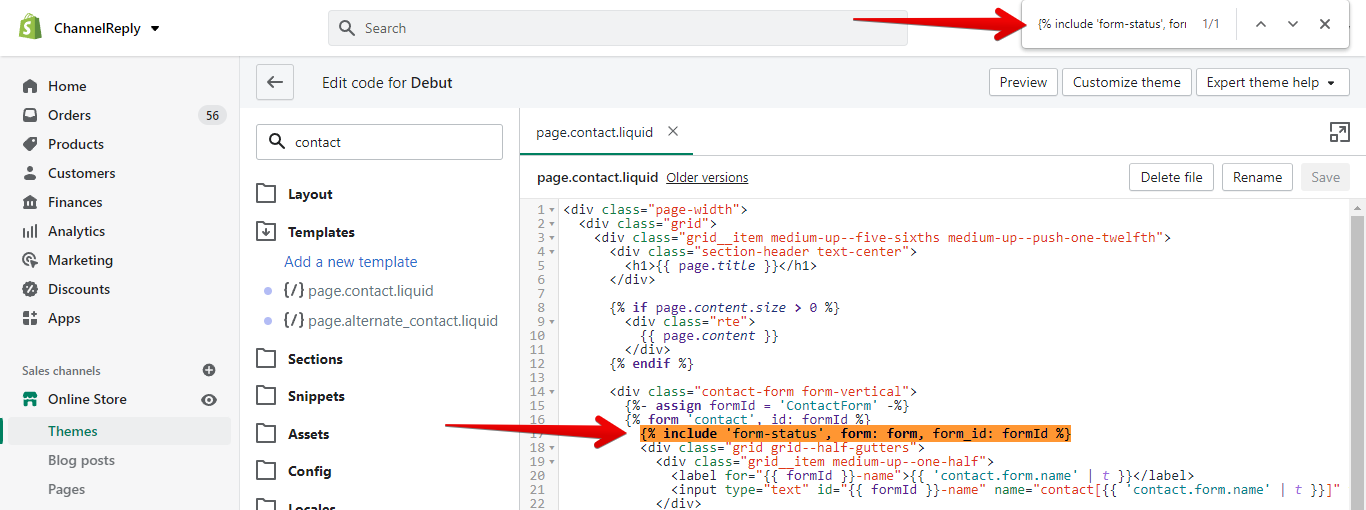
Find the following line of code: {% include 'form-status', form: form, form_id: formId %}
(An easy way to find this line in Google Chrome is to hit Ctrl + F and then search for it, as shown below.)
Add a new blank line below it. (Simply click to the right of the closing bracket and hit “Enter.”)
Return to ChannelReply. Click the blue “Copy” text to copy your tag’s custom code.
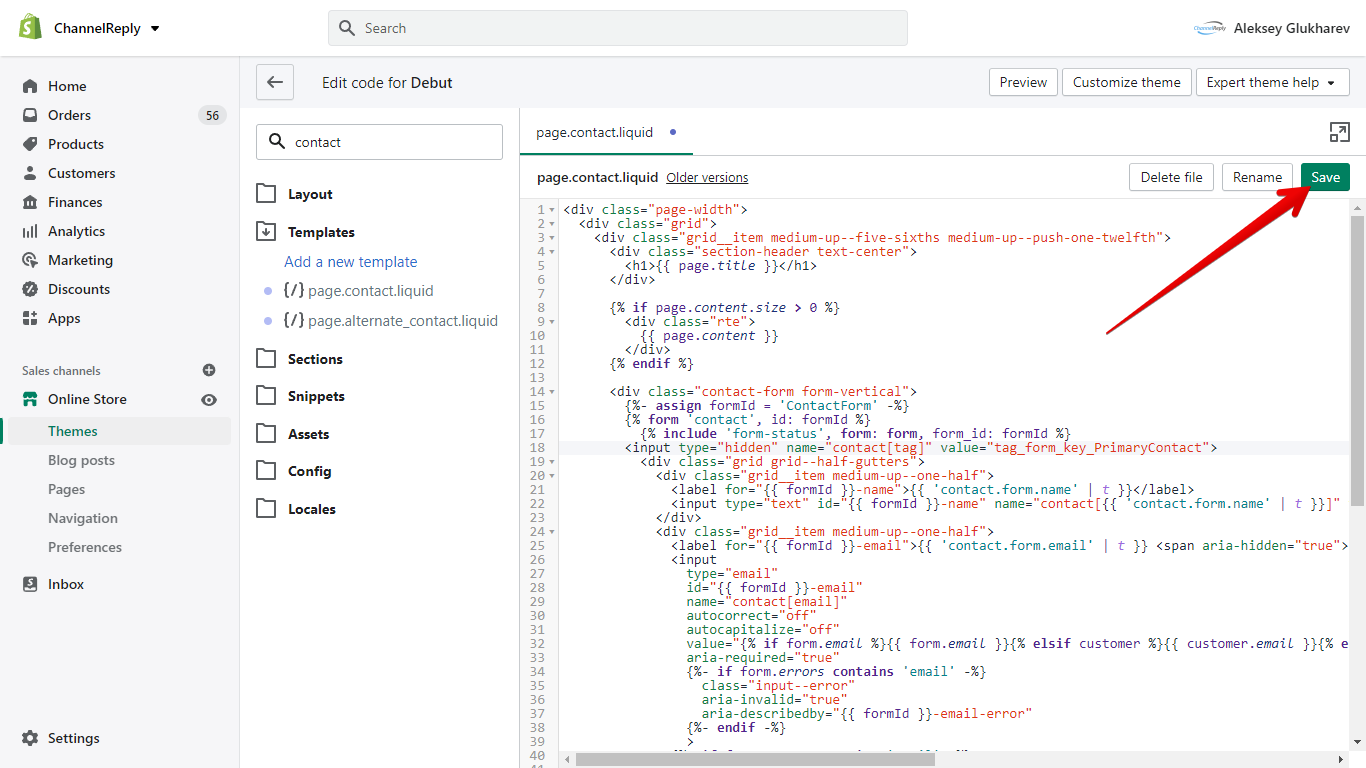
Then, return to Shopify and paste the code from ChannelReply into the blank line.
Finally, hit “Save.”
You’re finished! The tag you created in ChannelReply will now appear on all messages from this specific contact form.
FAQs
Can I Create Multiple Shopify Contact Form Tags?
Yes! You can create different tags for all your contact forms. Simply repeat the steps above to set up additional tags.
Can I Use One Tag for Multiple Contact Forms?
Yes, if you enter the same code snippet in multiple forms, they will all arrive with the same tag.
Can I Use Multiple Tags in One Contact Form?
Yes, it’s possible if you enter multiple tags for one code snippet. Simply separate the tags with spaces when creating them in ChannelReply. For example, if you wanted the tags “AltContact” and “FAQ,” you would enter “AltContact FAQ.”
Please note that you cannot use multiple code snippets in one contact form. If you enter multiple code snippets in one form, then only the tag(s) from the first snippet will appear in your helpdesk.
Will I Still See My Regular ChannelReply Tag for This Shopify Store?
Yes. This tag will appear in addition to your standard ChannelReply tag for your Shopify store.
Can I Edit an Existing Contact Form Tag?
Yes. To edit an existing tag, click the pencil icon on its right in ChannelReply.
Edit the tag, then click “Save changes.”
You’ll see the new tag on all messages you receive from this contact form in the future. No need to make any changes to your existing contact forms—you’re all done!
Note that the code will not change, though. If you want to change the code as well, you should first delete the old code snippet from your contact form. Then, delete it in ChannelReply by clicking the trash can icon.
Create the desired contact form tag from scratch. The name of the new tag will appear in the new code snippet. Just don’t forget to add it back to your contact form code!
Have questions that aren’t answered here? Use our contact form to get in touch and we’ll be happy to help!


