If you created your ChannelReply account in mid-2019 or later, then it's easy to create a unique tag for each Amazon marketplace. But older accounts face a challenge. They're integrated by region (like North America) rather than by marketplace (like Canada).
So, what if you have the old setup and want to know which tickets came from the UK and which came from the US? What if you want to use Zendesk as a multilingual helpdesk for Amazon and need to tag each marketplace separately?
In that case, you have two options. The first is disconnecting your Amazon accounts and re-integrating them using our new setup. The second option is to follow the steps below.
Last updated 4/7/2020.
Step 1: Create an Organization
All Amazon customers get a unique email address that reveals the country they’re based in. For example, those from France will have the domain "marketplace.amazon.fr" after the @ sign. You can use these domains to create an organization in Zendesk.
Here’s how to set one up using Amazon France as an example:
- Log in to your Zendesk administrator account (agents can’t create organizations).
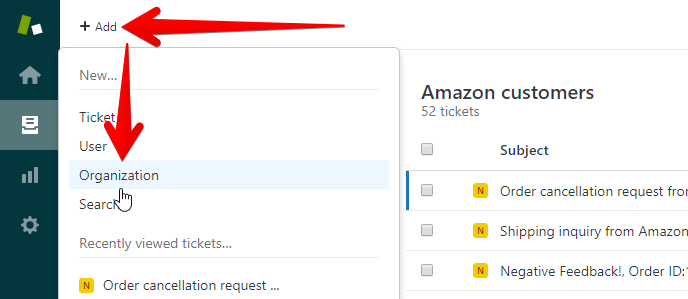
- Hover over “+ Add” in the upper left of your Zendesk screen.
- Click “Organization.”
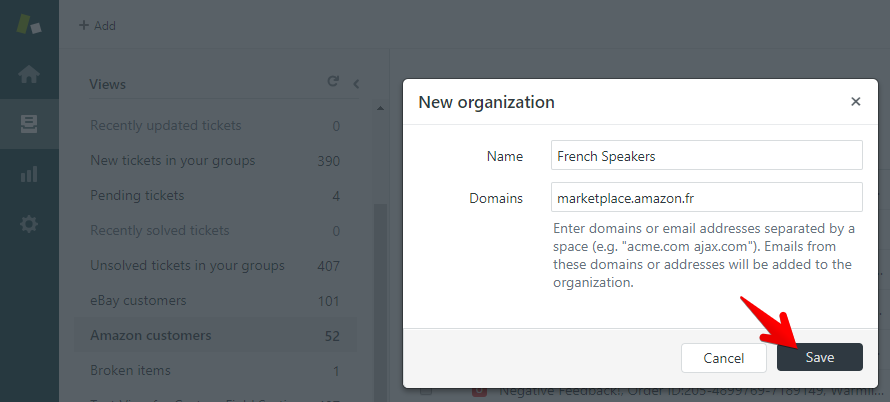
- Enter a unique name for your organization, such as “Amazon France” or “French Speakers.”
- Enter the domain in the Domains field (in this case, marketplace.amazon.fr).
- You can enter more than one domain. For example, if you’re setting up languages and English is not your primary language, you might want to include all English-speaking country domains in one organization. Each domain should be separated by a single space (no commas).
- Click Save.
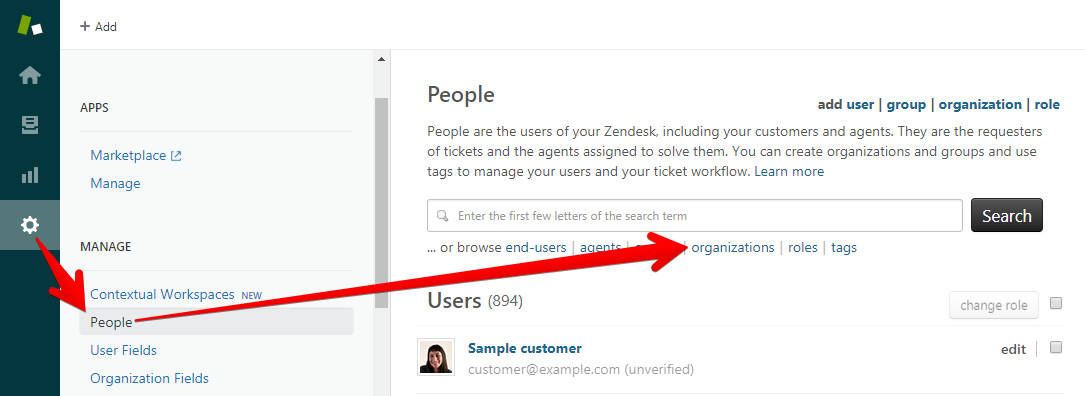
You can edit your organization immediately after creating it. If you navigate away, you can find it again by going to Admin (the gear icon) -> People and then clicking “organizations” below the search bar.
Step 2: Tag Your Organization
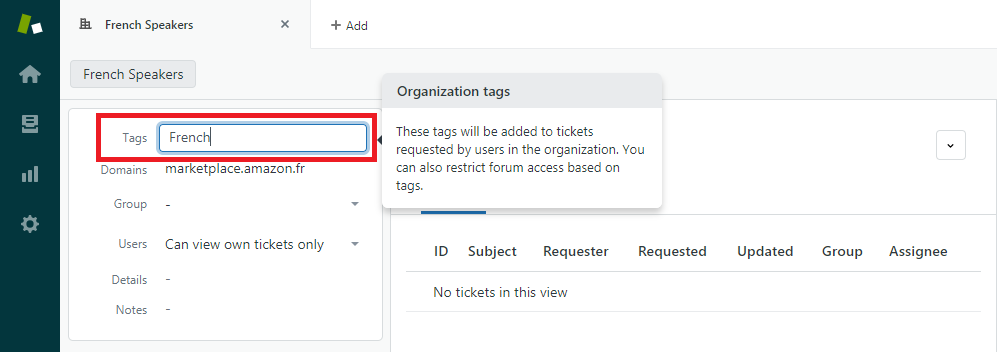
Once you’re on the organization’s page, you should see “Tags” in the upper left. Click on the dash and enter a tag name, such as “Amazon_France” or “French.”
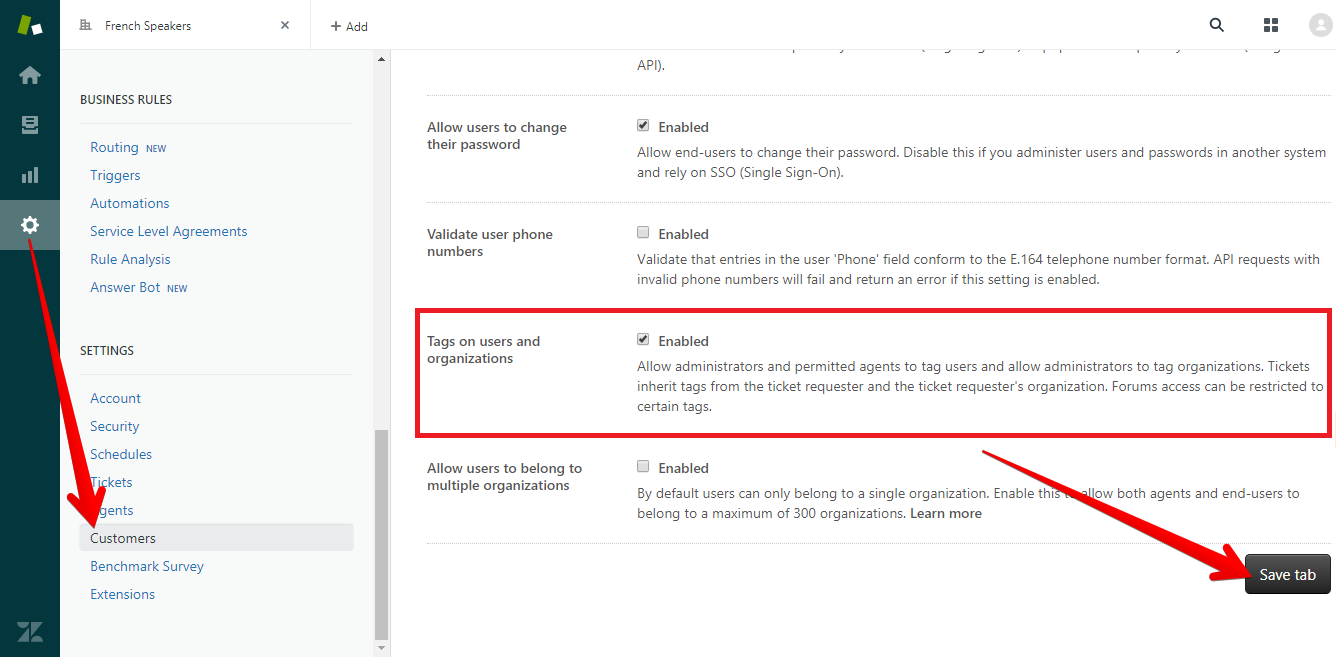
If you don’t see “Tags,” you may need to enable tagging of organizations:
- Click the gear icon in the left-hand menu of your Zendesk screen.
- Scroll down to SETTINGS and click Customers.
- Make sure “Tags on users and organizations” is set to “Enabled.”
- Click “Save tab” if you made any changes.
Then return to the organization page and enter your desired tag.
That’s all there is to it! You can now do things like create Zendesk views for each Amazon marketplace or auto-assign languages based on which country the message came from.
Need help? Contact us and we’ll be happy to assist you.


