ChannelReply makes it easy to get all your Etsy Messages in your helpdesk, complete with order data! Follow the steps below to set up an Etsy integration with Zendesk, Gorgias, Freshdesk, Re:amaze, Help Scout, Zoho Desk, Kustomer or Onsite Support in minutes.
Important Notes on the ChannelReply + Etsy Integration
ChannelReply normally delivers messages between a marketplace’s messaging system and your helpdesk. Etsy is the only exception; they don't allow replies to be posted to Messages from any outside source. That includes apps like ours that integrate directly with their API.
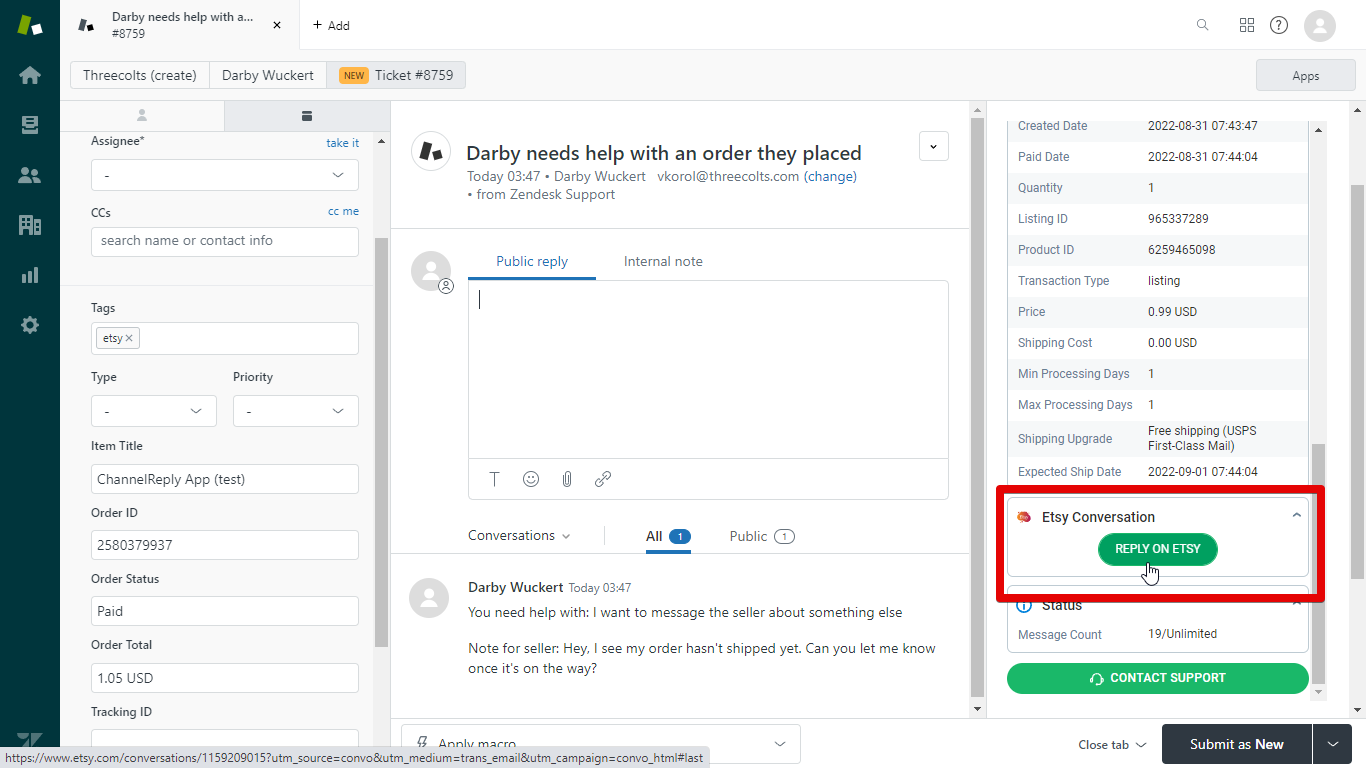
If you want to reply directly on Etsy to protect your Star Seller status, no sweat. Use the "Reply on Etsy" button/link in the ChannelReply app to jump straight to the conversation on Etsy.
The "Reply on Etsy" button on an Etsy listing question in Zendesk.
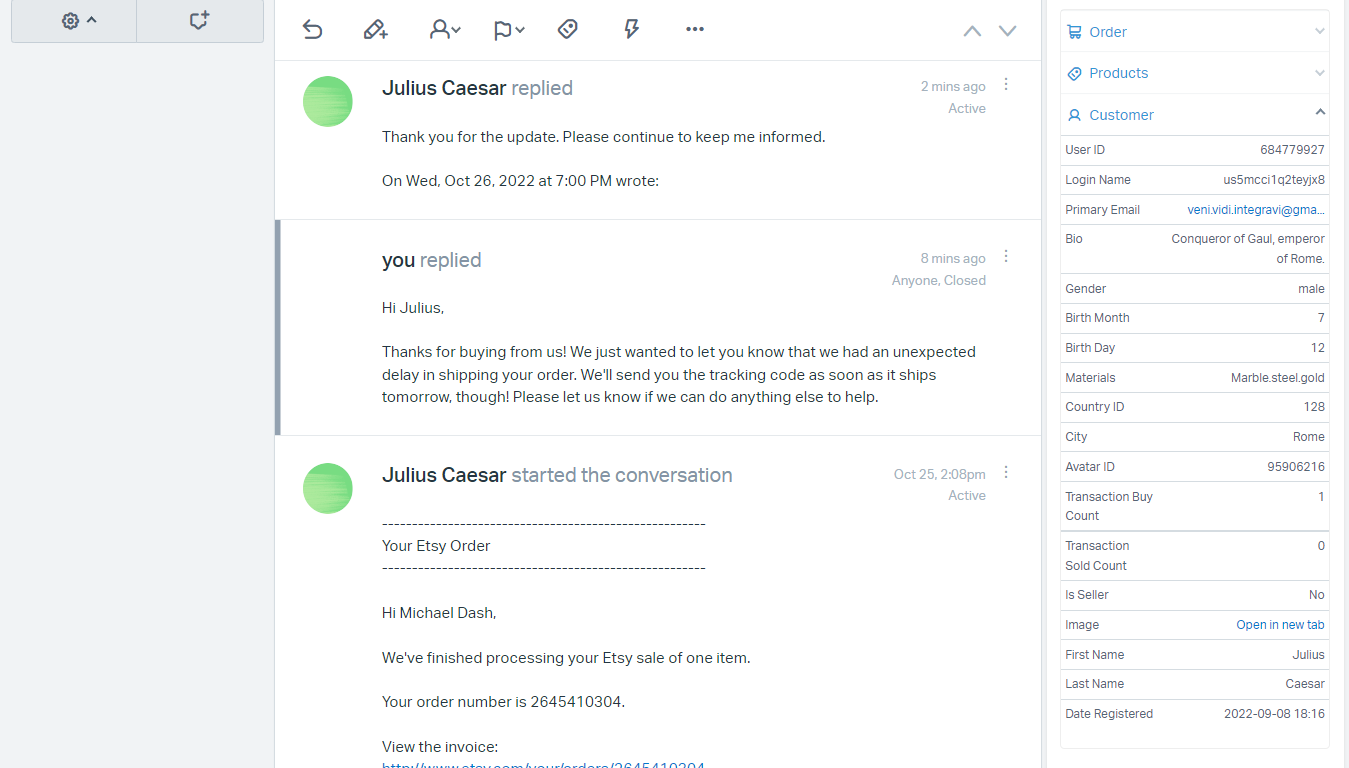
However, using email to communicate with a customer is perfectly acceptable under Etsy’s Seller Policy. You just have to make sure you only discuss Etsy orders and Etsy system transactions. That's why we've made it possible to reply to most Etsy Messages by email!
An email conversation with an Etsy customer from inside Help Scout. The Primary Email field displays the customer's email address.
If the ChannelReply app shows an email address in the Primary Email field, as shown above, then you can respond from inside your helpdesk.
- Remember that replies from your helpdesk will go to the customer’s email address and NOT to their Etsy Messages.
- The customer can then reply via email or Etsy Message; either way, their reply will go to the same ticket in your helpdesk.
Otherwise, Etsy tickets work exactly like all our other tickets! ChannelReply displays detailed info about the order or listing the customer contacted you about. It also lets you pull data into custom fields, threads conversations, and more.
1. Sign in or Sign Up
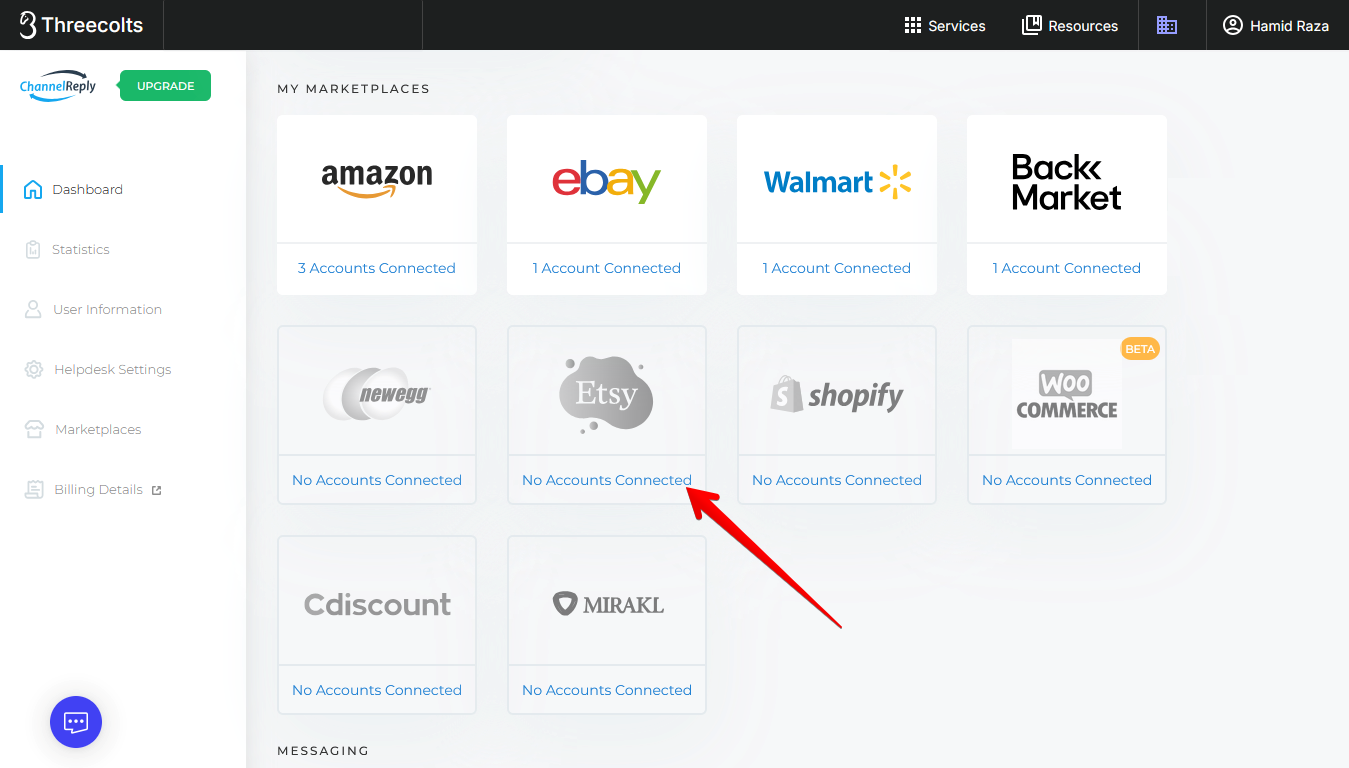
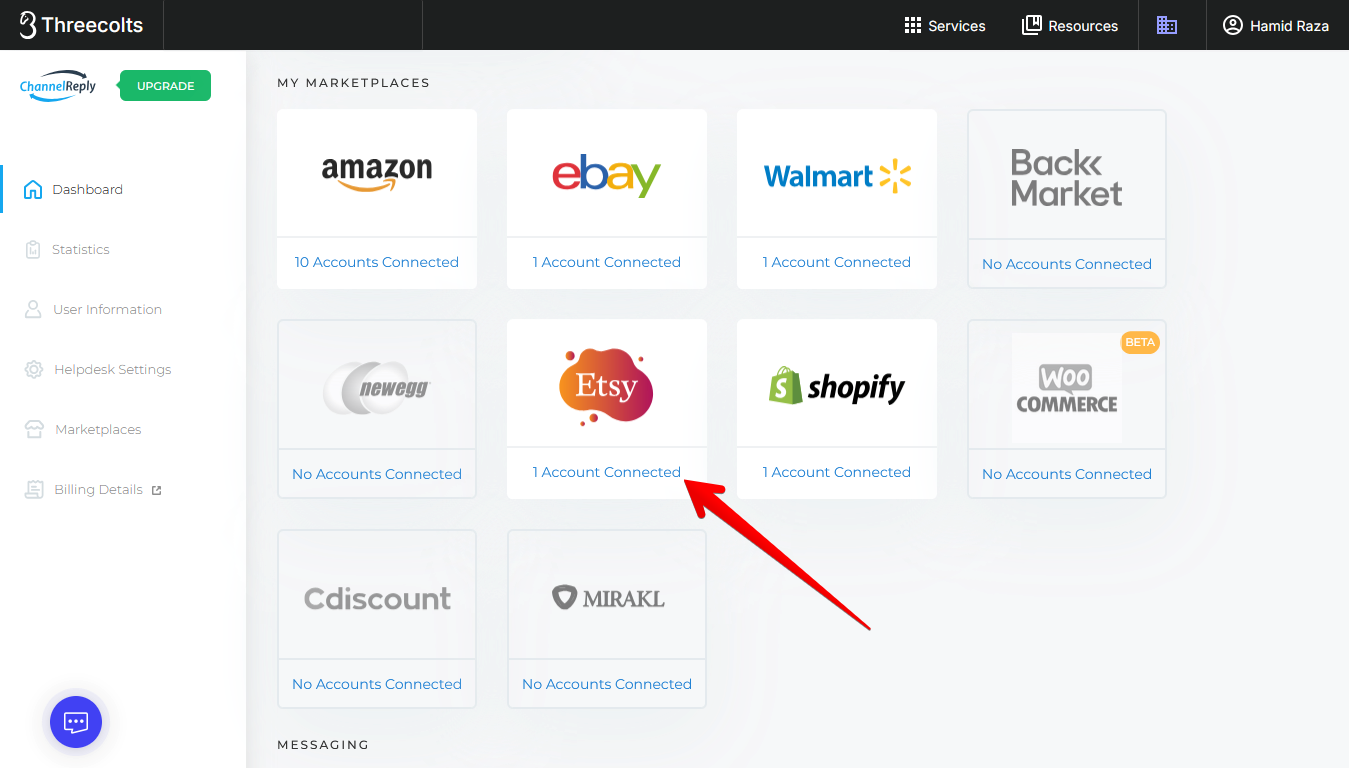
If you already have ChannelReply, sign in here. Choose Etsy on your account dashboard.
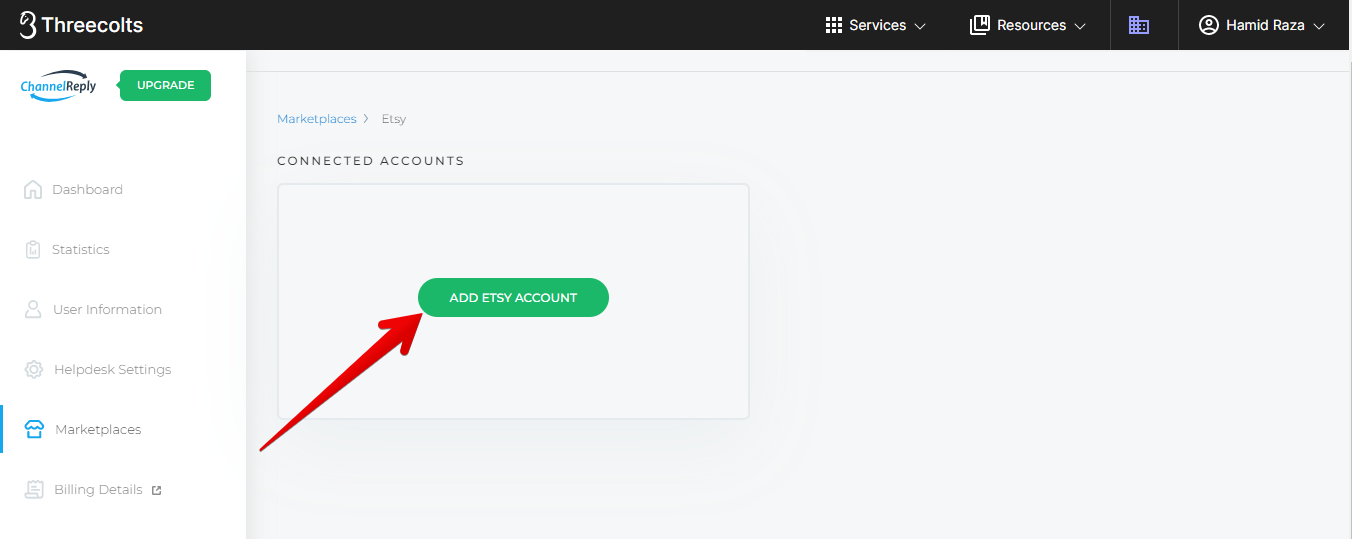
Click “ADD ETSY ACCOUNT.”
Then skip ahead to step 2.
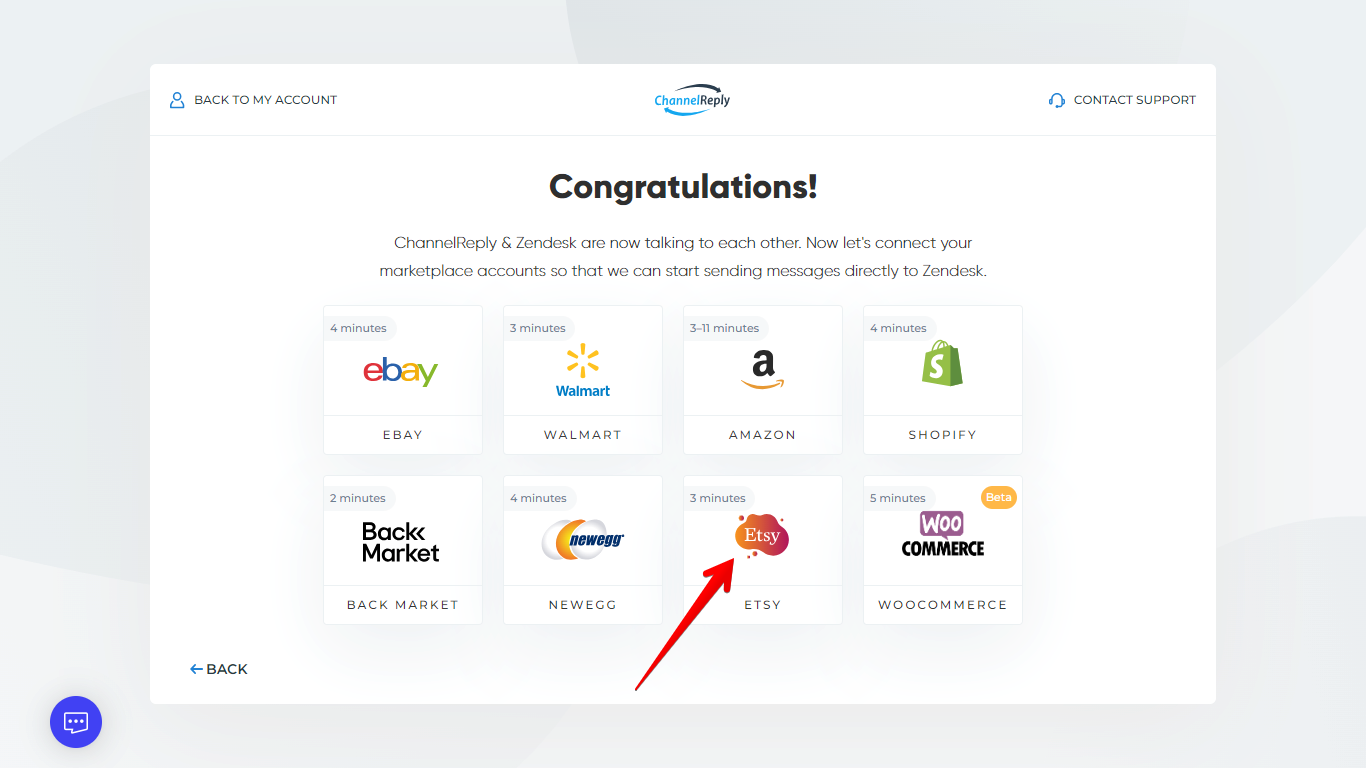
If you don’t have ChannelReply yet, start your free 14-day trial here. Follow the prompts to integrate Zendesk, Freshdesk, Help Scout, Gorgias, Re:amaze, Zoho Desk, Kustomer or Onsite Support. Choose Etsy when you arrive on a screen like the one shown below.
2. Connect Etsy to ChannelReply
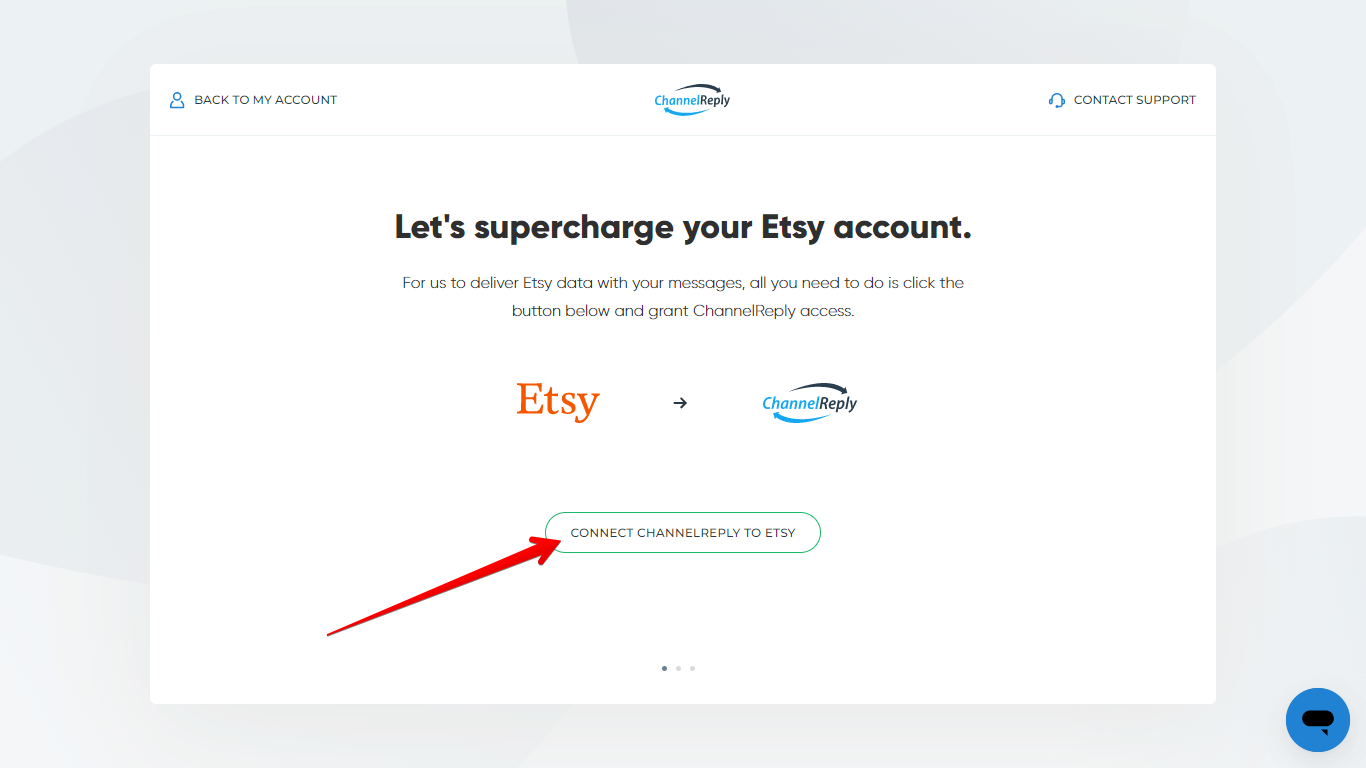
You’ll be taken to the first page of our Etsy setup walkthrough. Click “CONNECT CHANNELREPLY TO ETSY.”
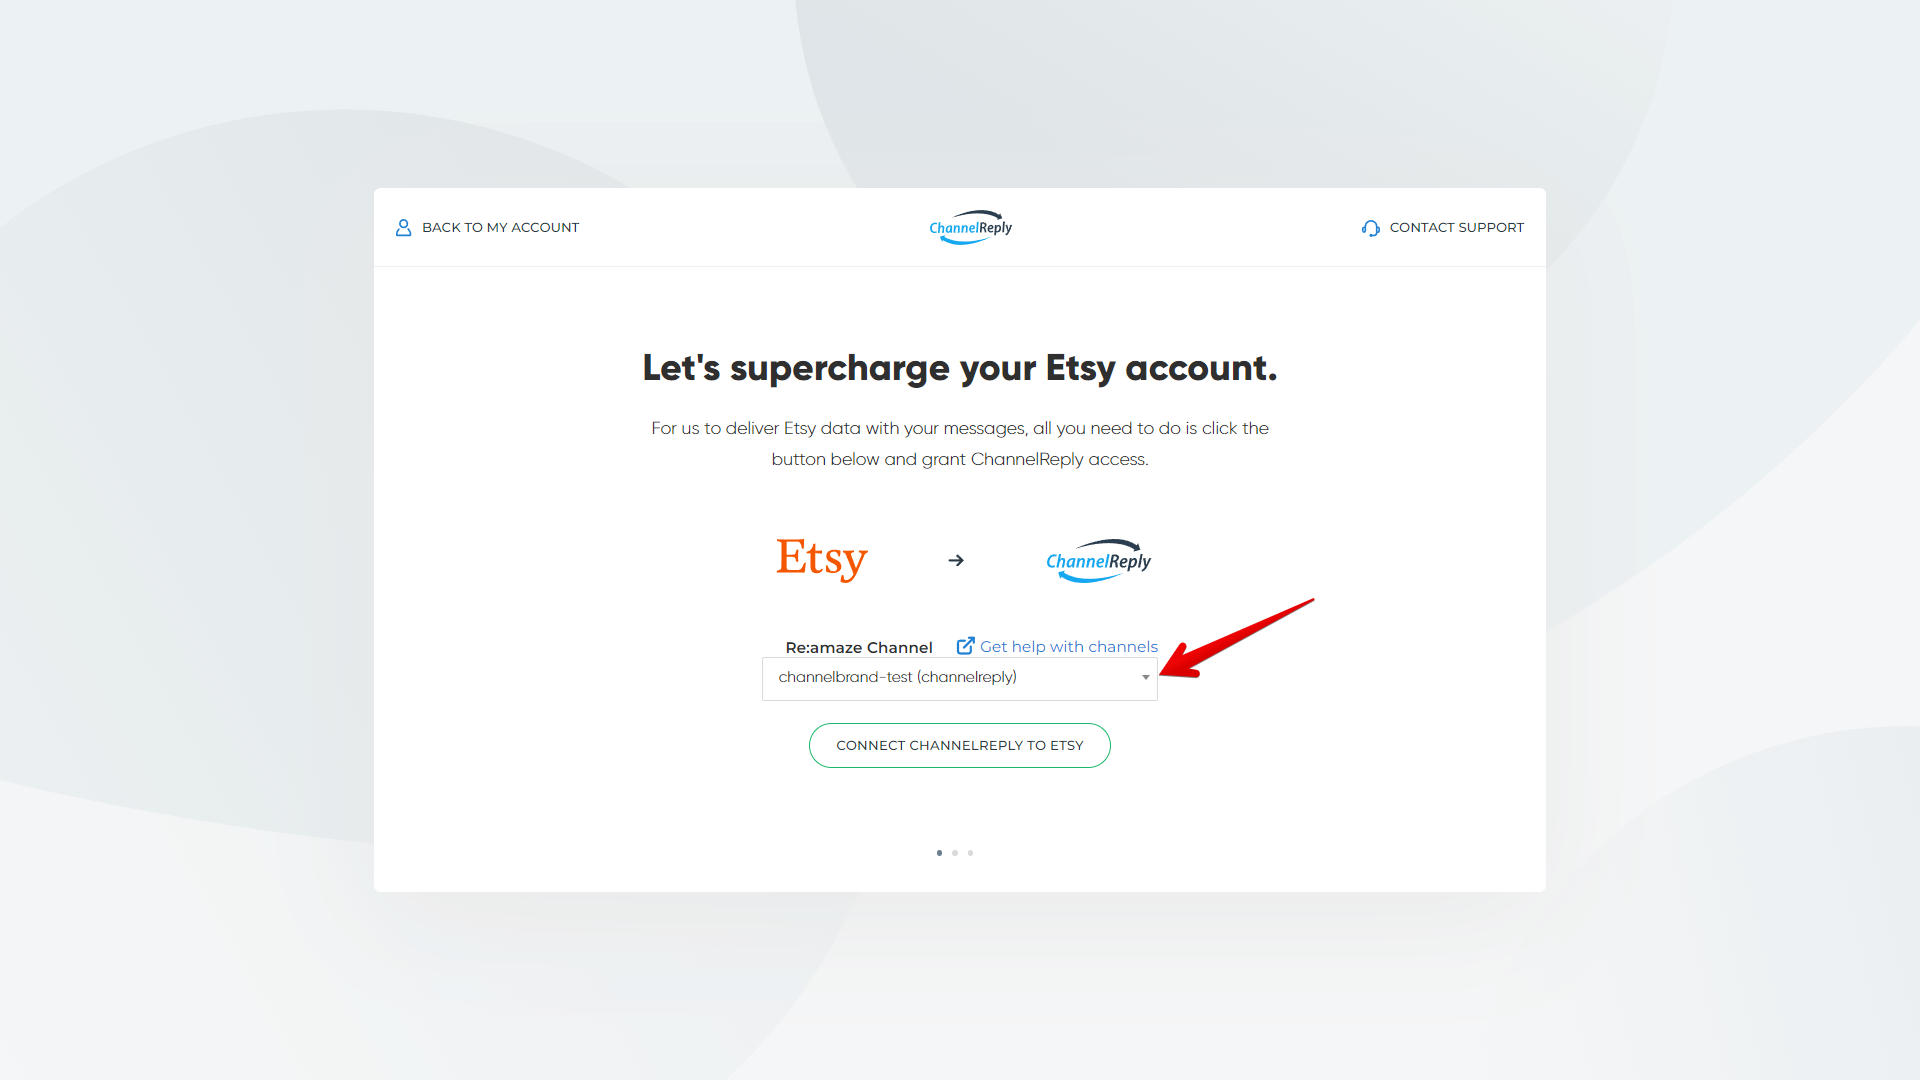
If you use Re:amaze, you may be asked to select a channel/brand here. Choose the best channel for this Etsy account and then click “CONNECT CHANNELREPLY TO ETSY.” If the one you’re looking for isn’t shown in the dropdown, read “Managing Re:amaze Brands & Domains (Channels) in ChannelReply.”
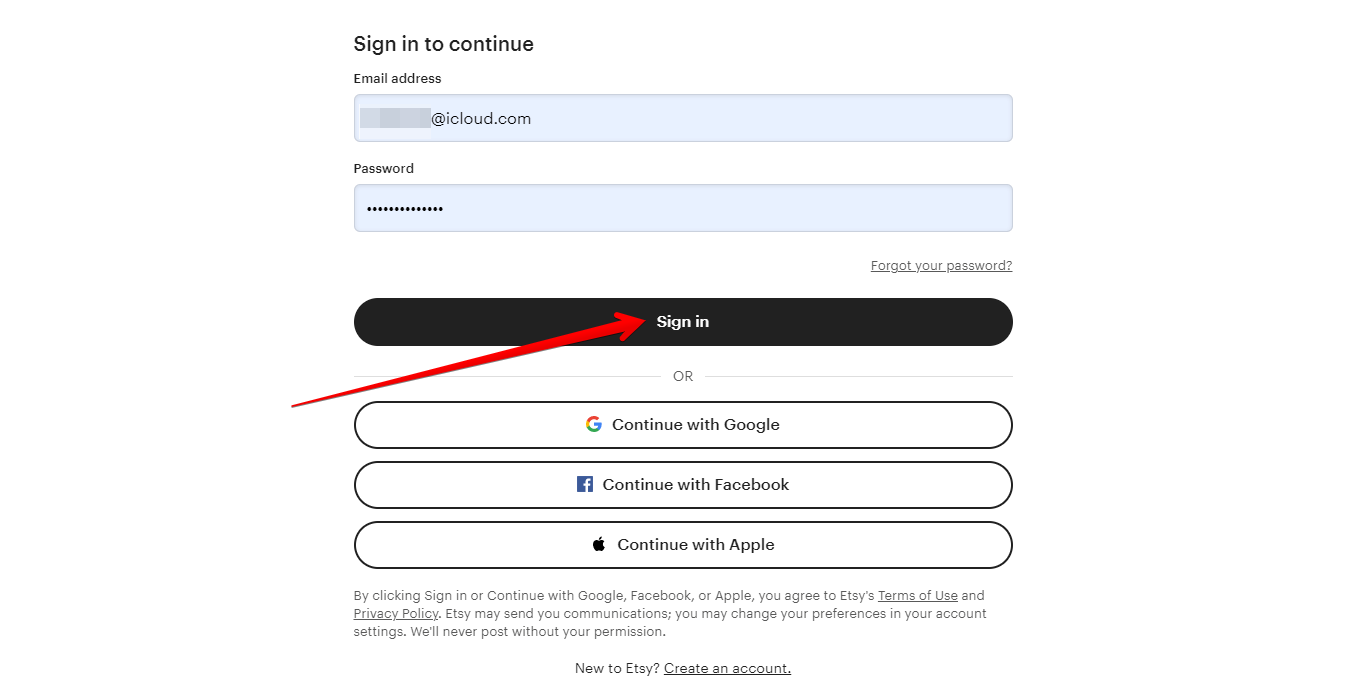
Sign in if prompted.
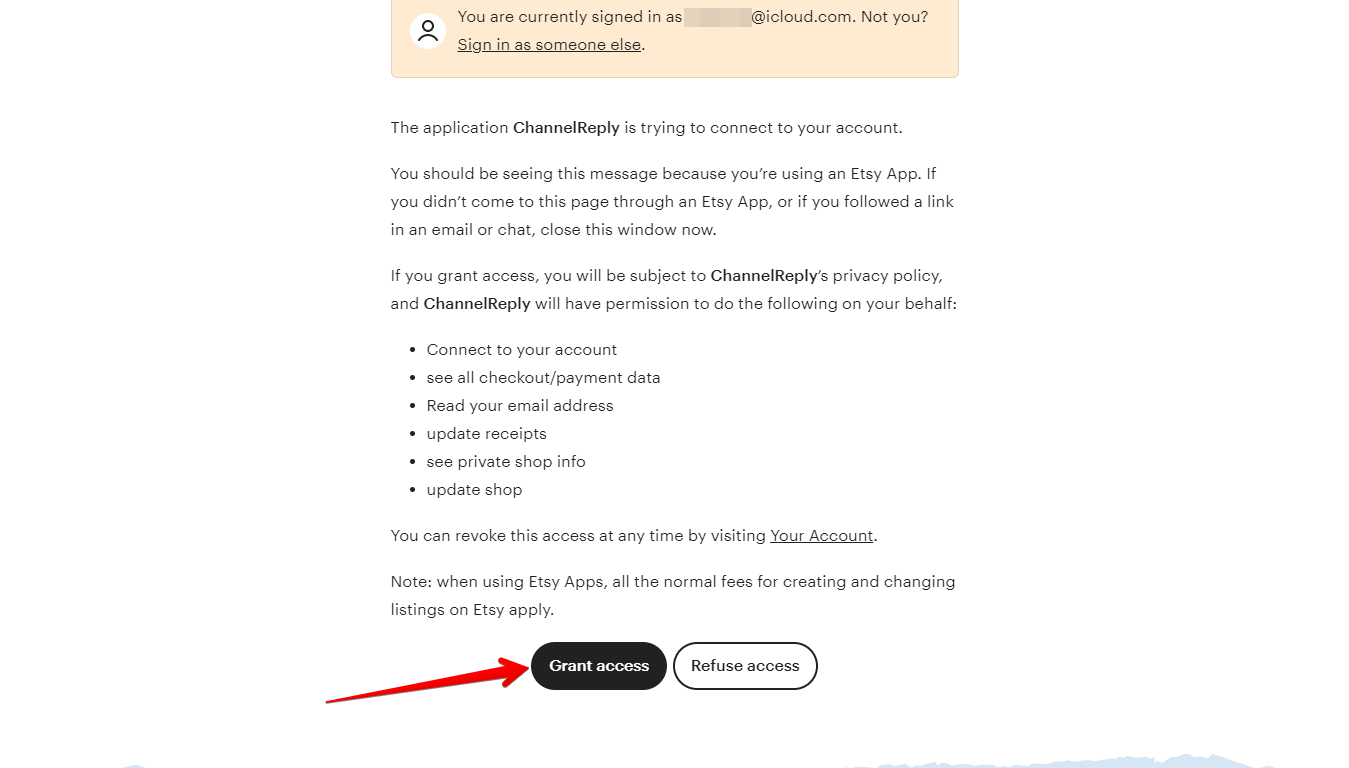
Click “Grant access.” (You may have to scroll down to see it.)
You’ll then be returned to ChannelReply. ChannelReply and Etsy are now connected!
3. Set Up Email Forwarding
To set up email forwarding, you can either follow along with this video and then skip to "After Forwarding Is Set Up," or continue reading below the video.
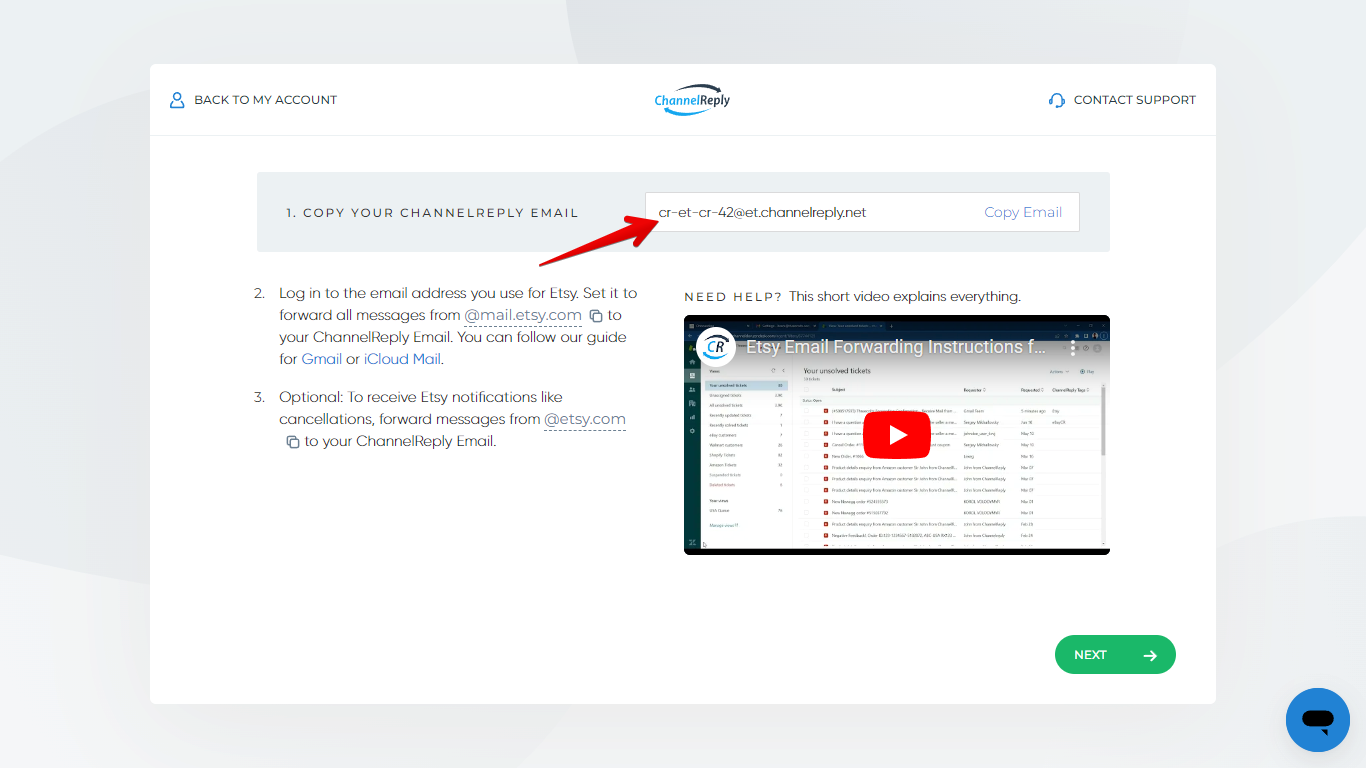
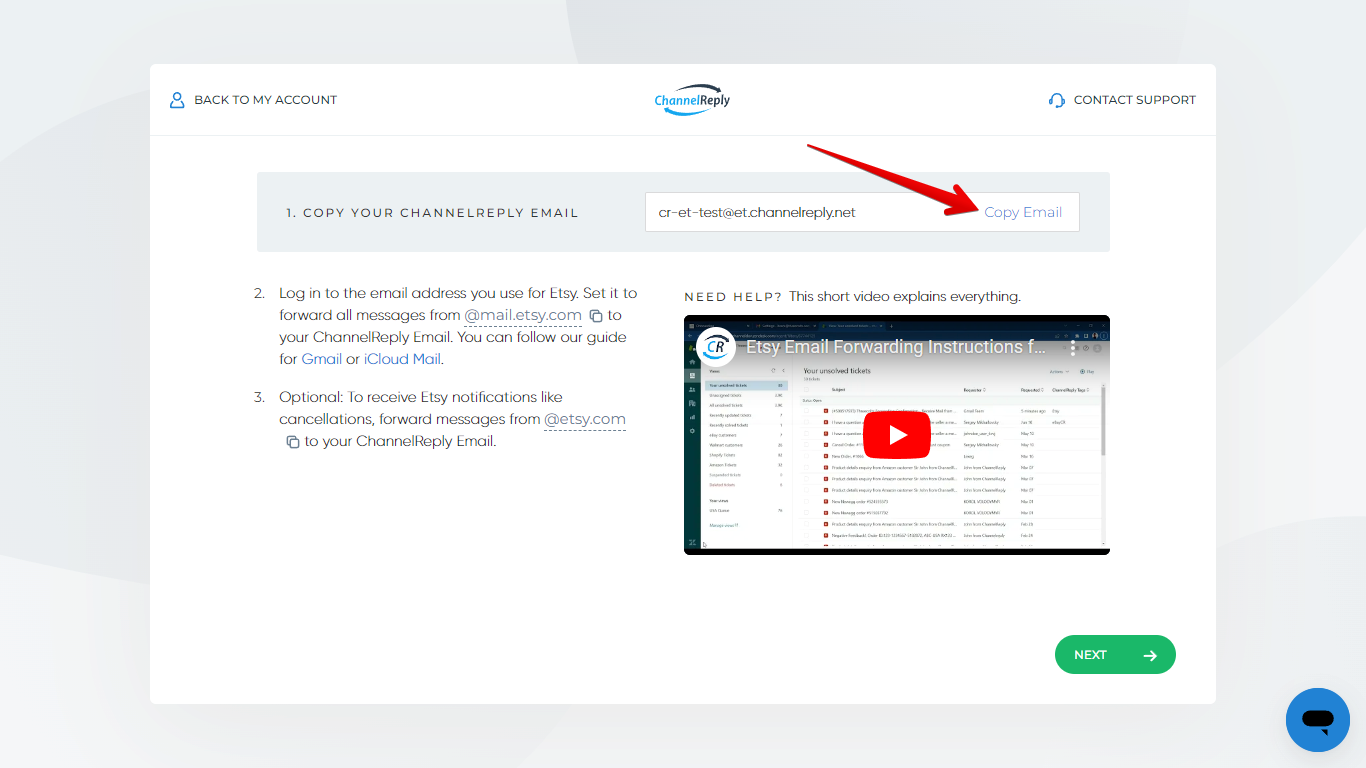
You’ll see your ChannelReply Email at the top of the new screen.
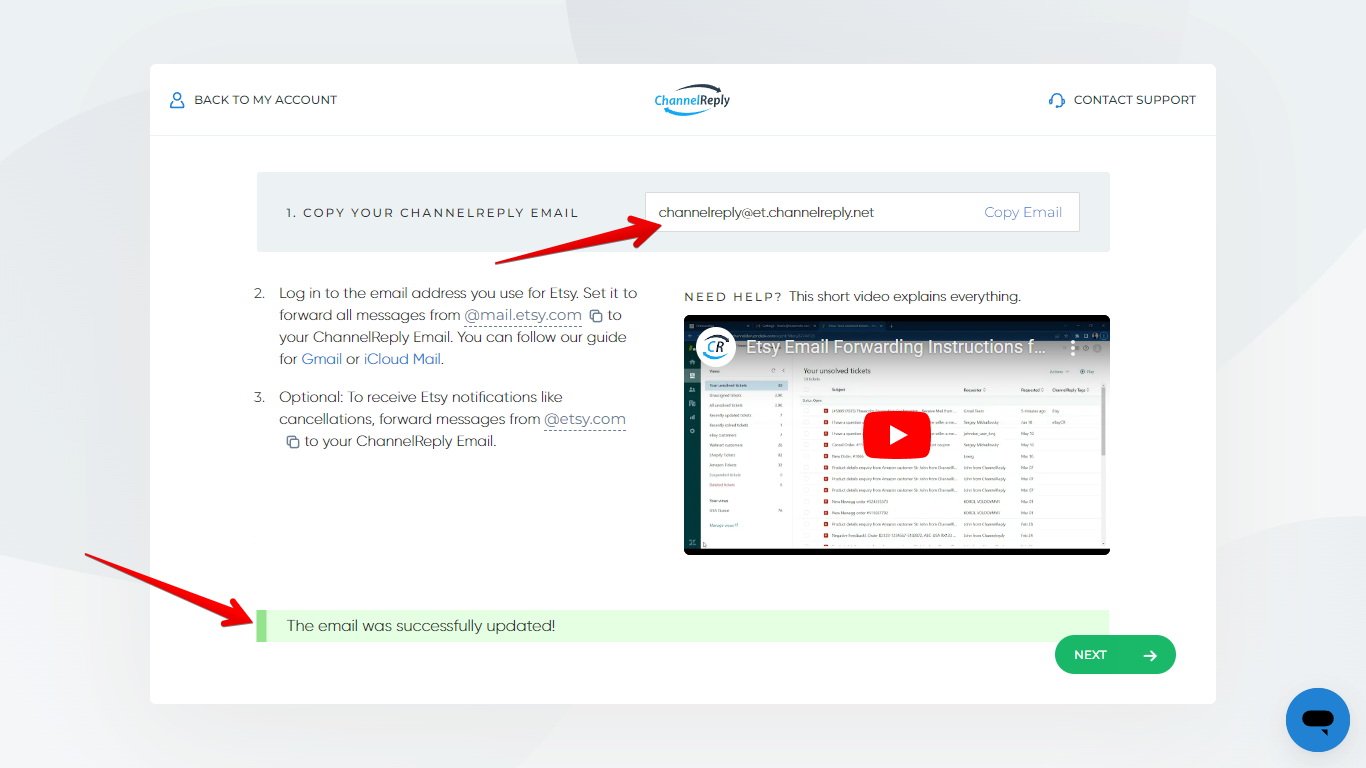
You can edit it if you’d like. Any unique email address that ends in @et.channelreply.net will work. After editing, click anywhere outside the ChannelReply Email field to save your changes.
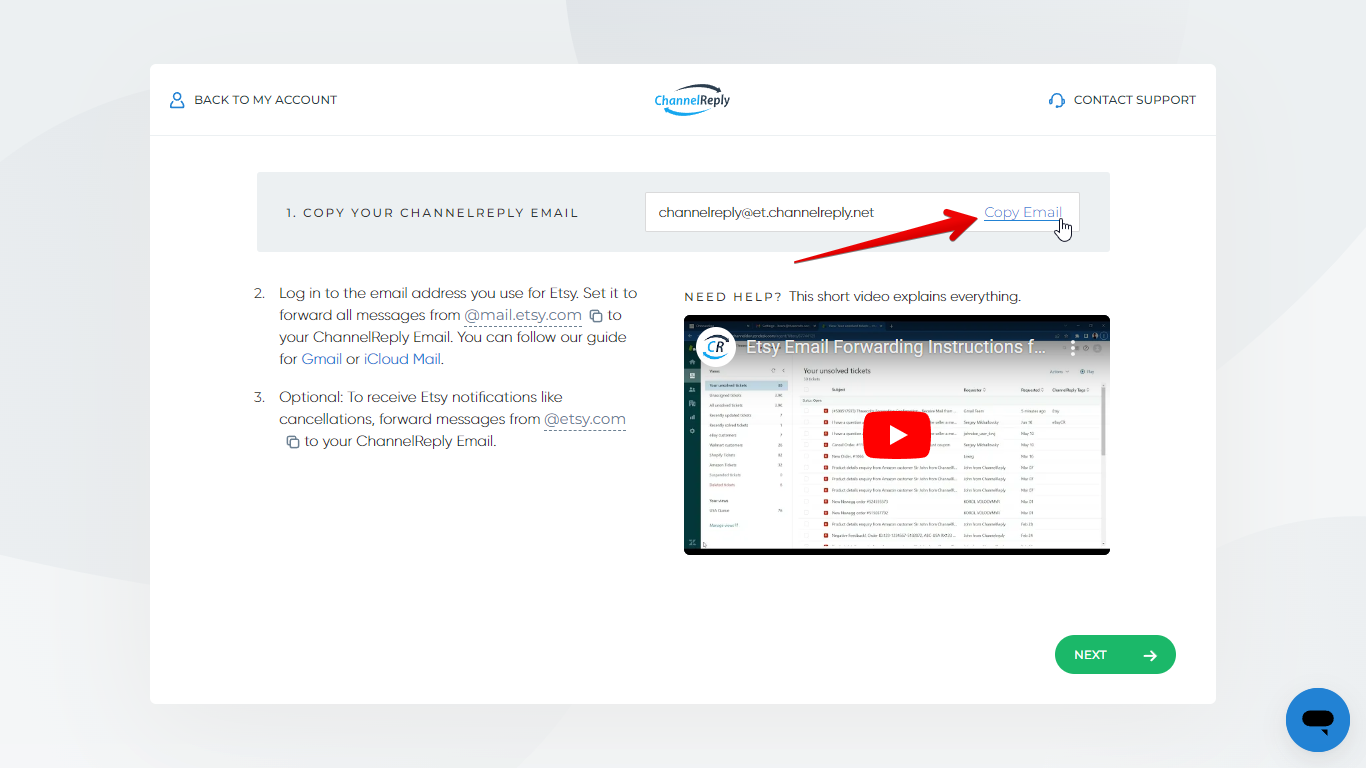
Click “Copy email” when you’re happy with the address.
In a separate tab, log in to the email address that’s connected to your Etsy account. You’ll need to set it to forward emails to the ChannelReply Email you just copied. We’ll show how to do this in Gmail below, and in Apple iCloud Mail below that. (If you use a different email client, please check with your provider or contact us for help.)
Gmail Email Forwarding Setup
A. Create a Forwarding Address
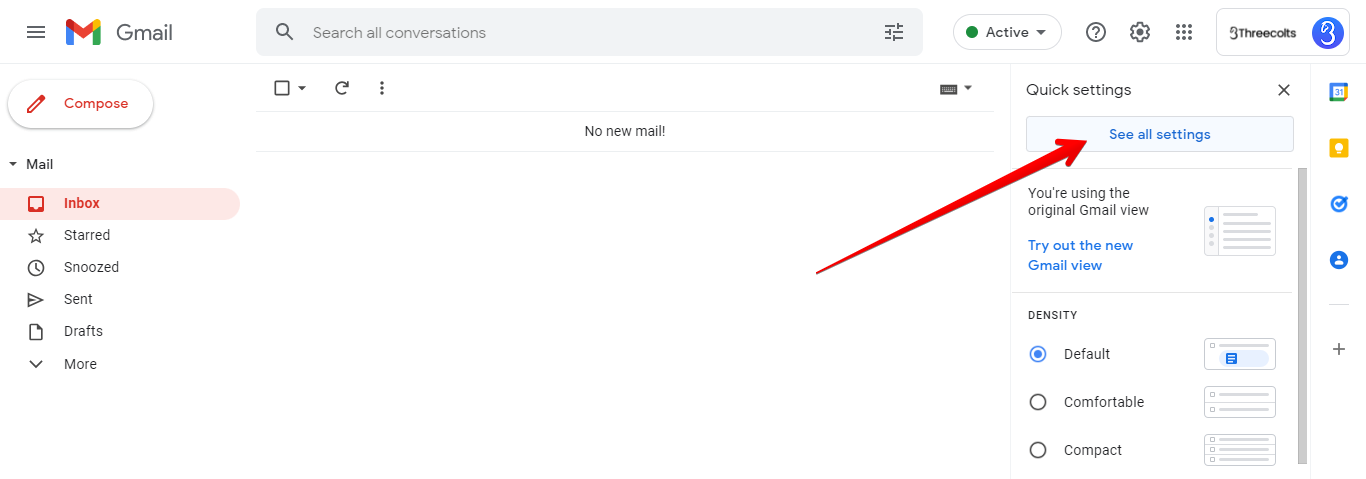
In Gmail, click “Settings” (the gear icon in the upper right.)
Then “See all settings.”
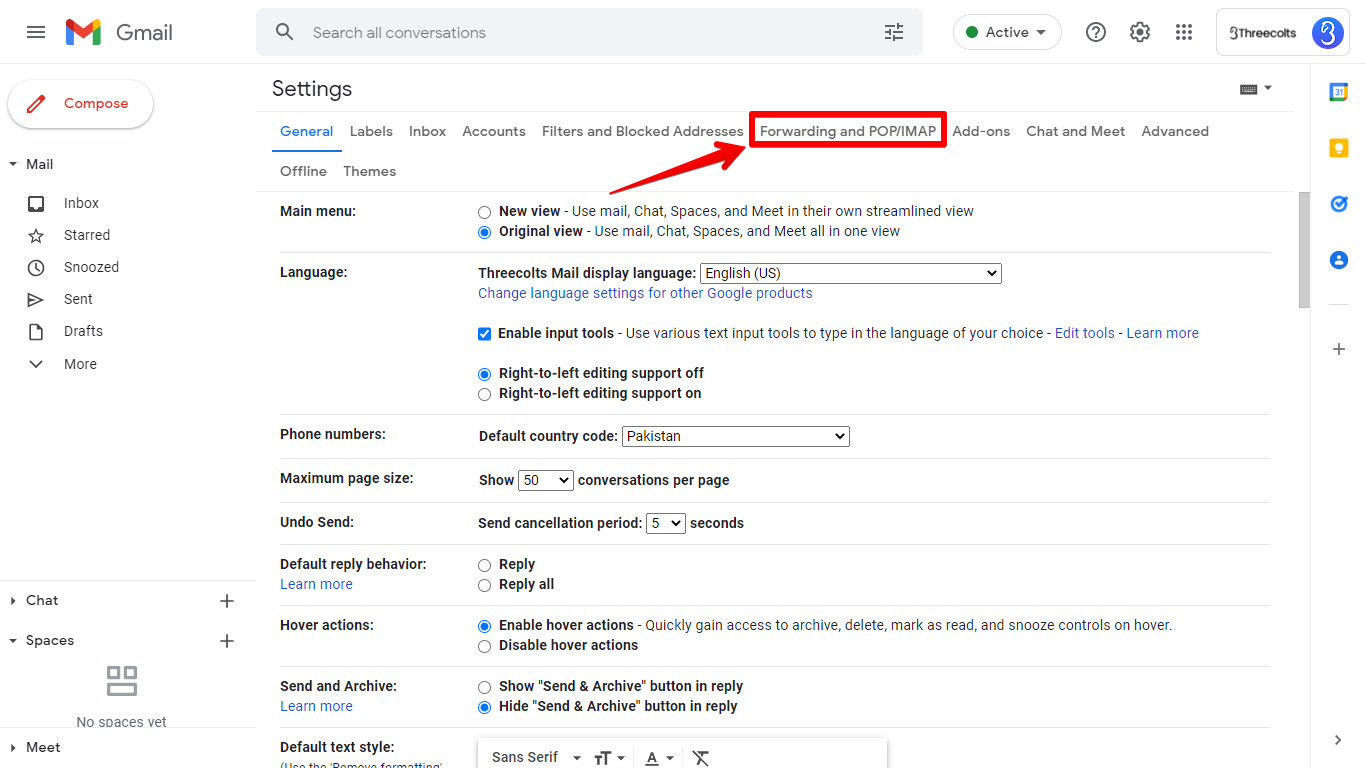
Click “Forwarding and POP/IMAP.”
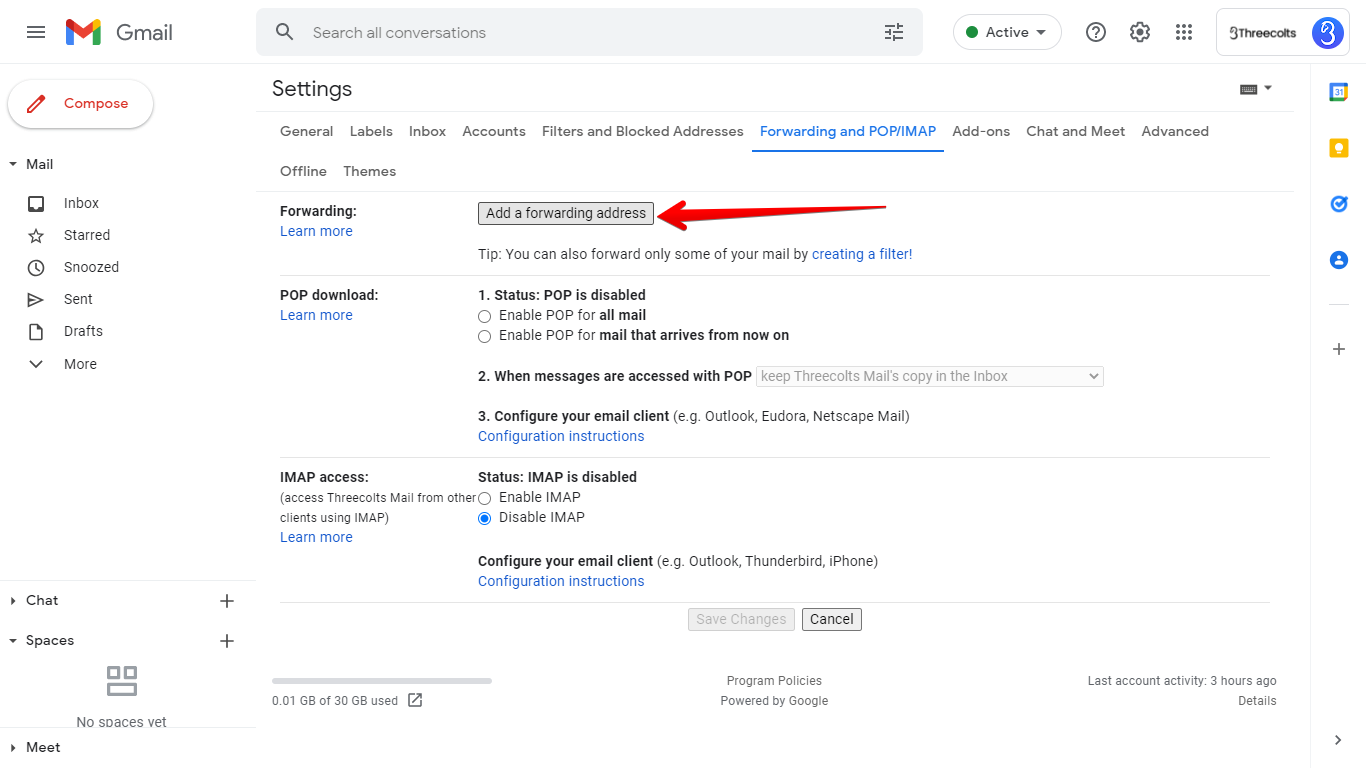
Hit “Add a forwarding address.”
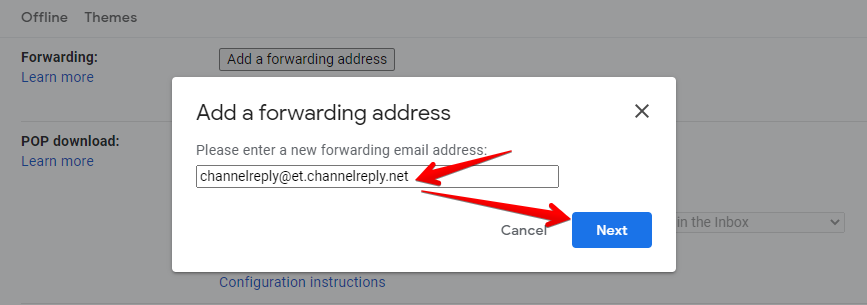
Paste your ChannelReply Email into the box, then click “Next.”
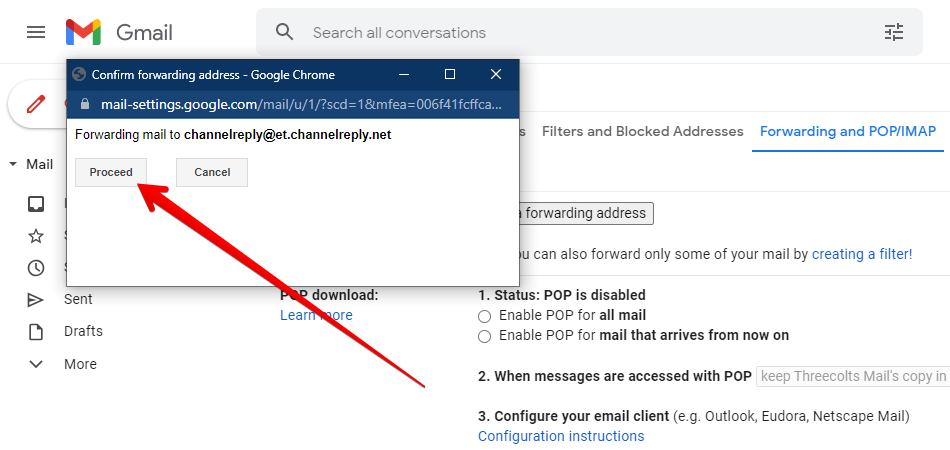
Hit “Proceed” in the popup that appears.
Finally, hit “OK.”
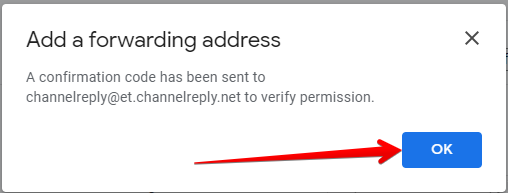
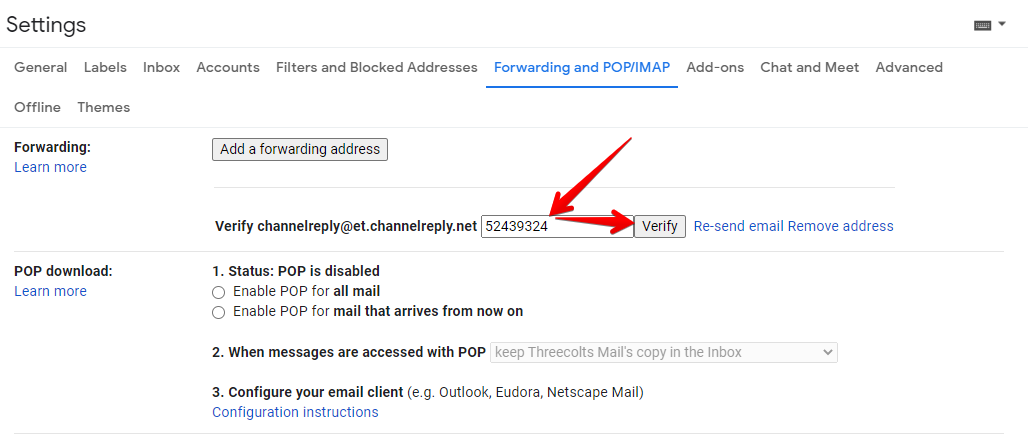
In another new tab, log in to your helpdesk account. Open the email you received from Gmail and copy the confirmation code.

Return to Gmail. You will see a line about verifying your ChannelReply Email. Paste the code into the “confirmation code” field, then click “Verify.”
Leave “Disable forwarding” selected.
B. Forward Customer Messages
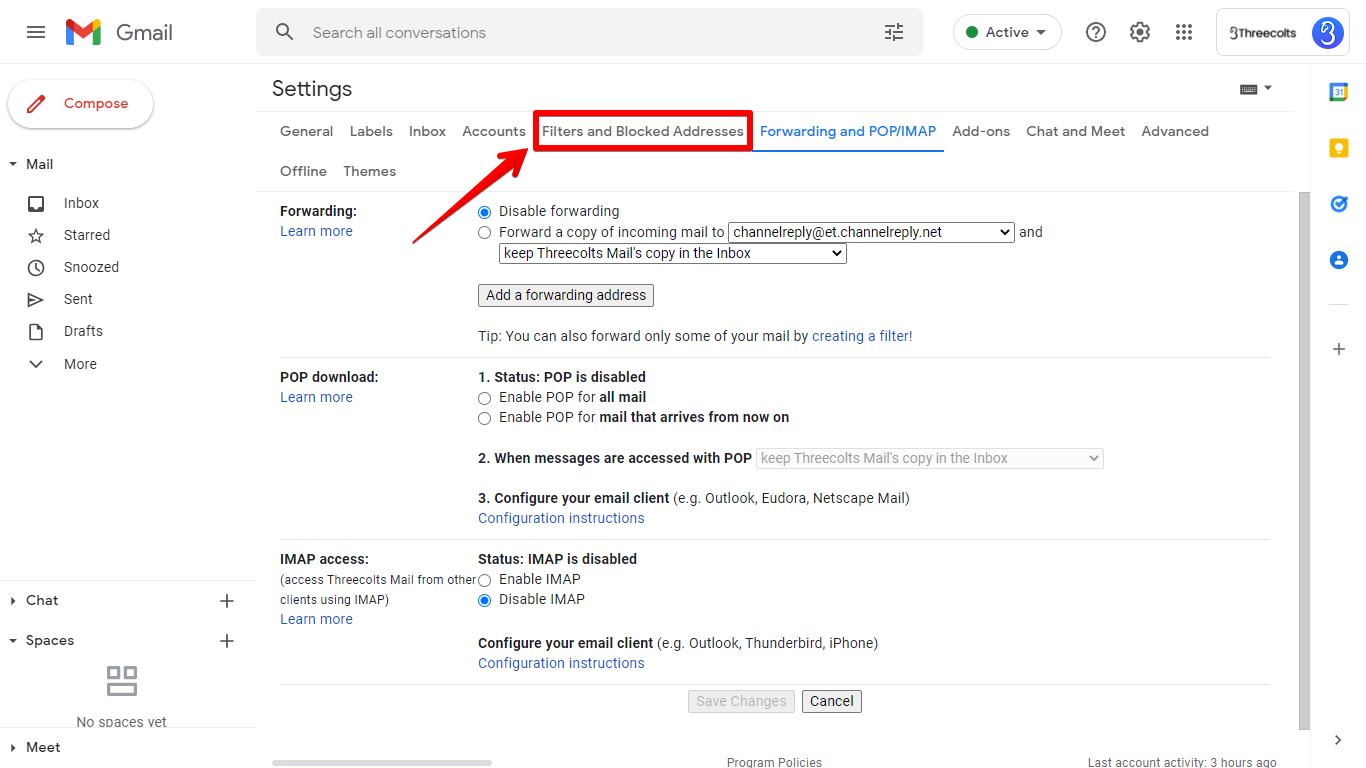
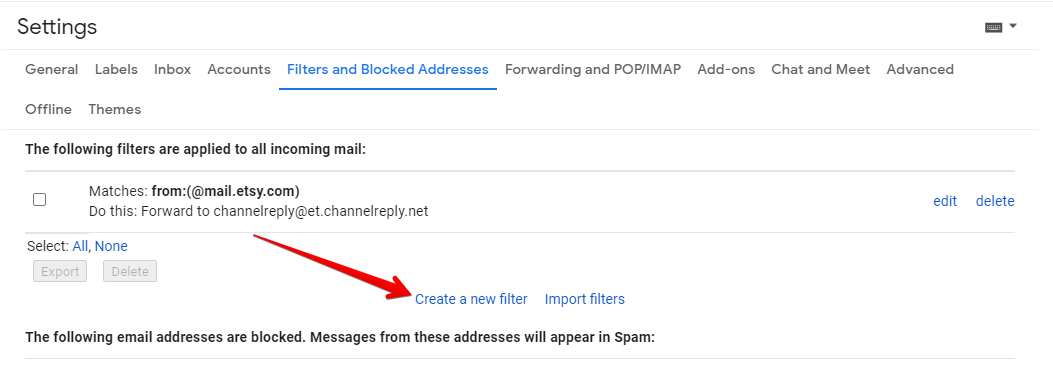
Go to “Filters and Blocked Addresses.”
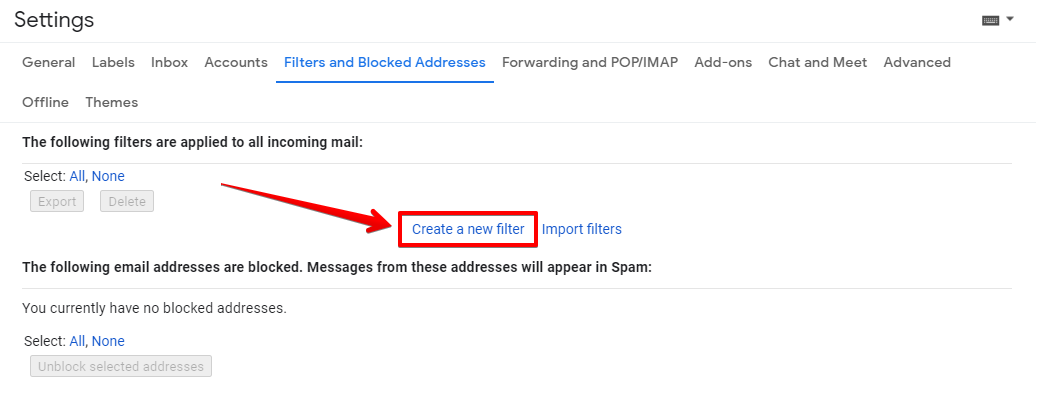
Click “Create a new filter.”
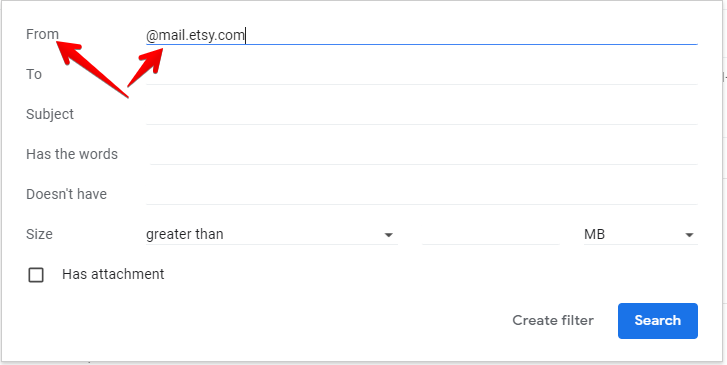
Enter the following in the “From” field:
@mail.etsy.com
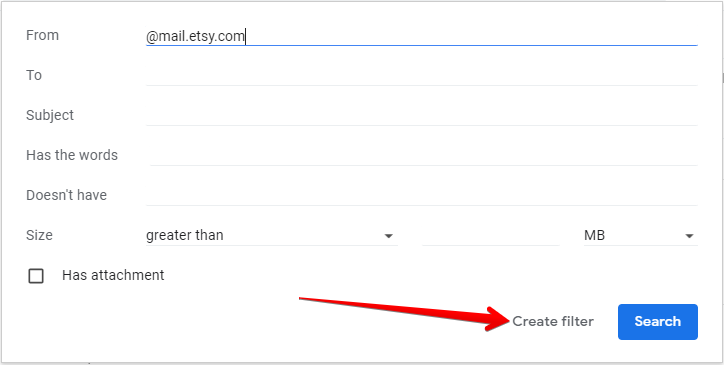
Click “Create filter.”
Check the “Forward it to:” box. Then click on the “Choose an address…” dropdown menu.
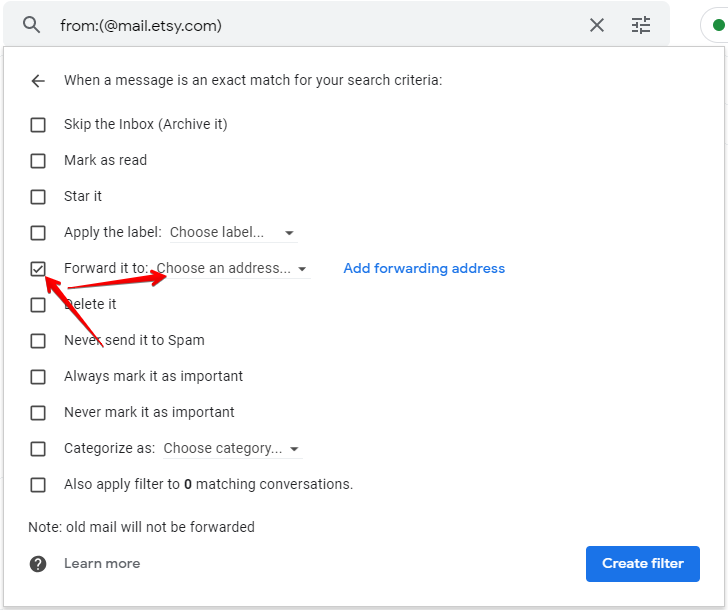
Select your ChannelReply Email. Finally, hit “Create Filter.”
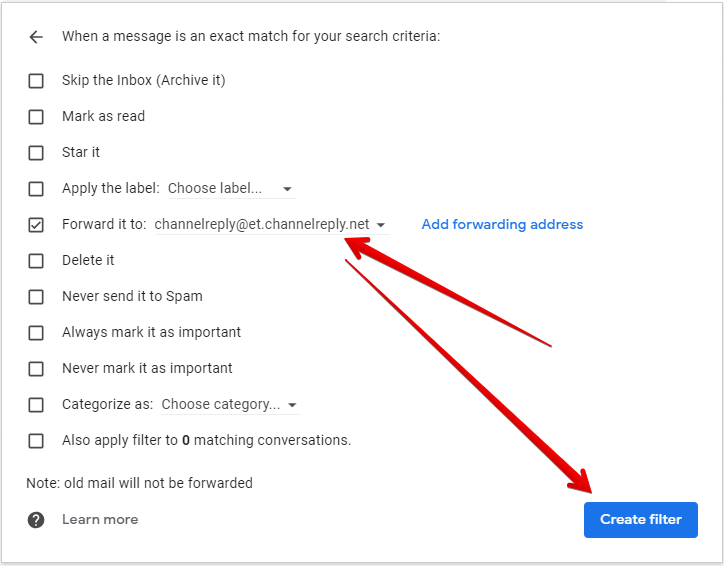
You’re all set to receive Etsy customer Messages!
If you want to receive Etsy notifications (like cancellations), continue reading. If you’re happy with just customer Messages, you can skip ahead to “After Forwarding Is Set Up.”
C. (Optional) Forward One-Way Notifications
Click “Create a new filter.”
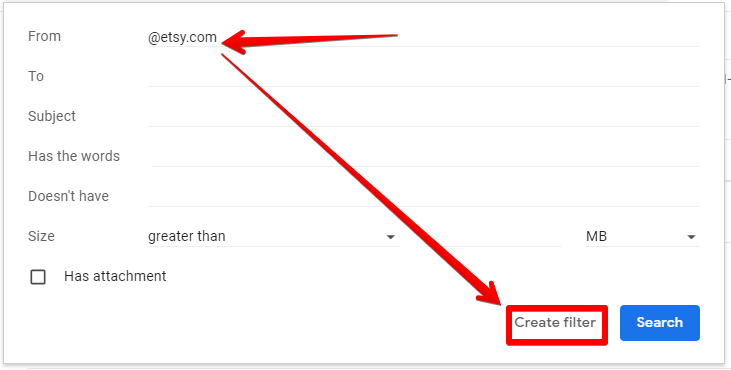
Enter the following in the “From” field:
@etsy.com
Then, click “Create filter.”
Check the “Forward it to:” box. Then click on the “Choose an address…” dropdown menu.
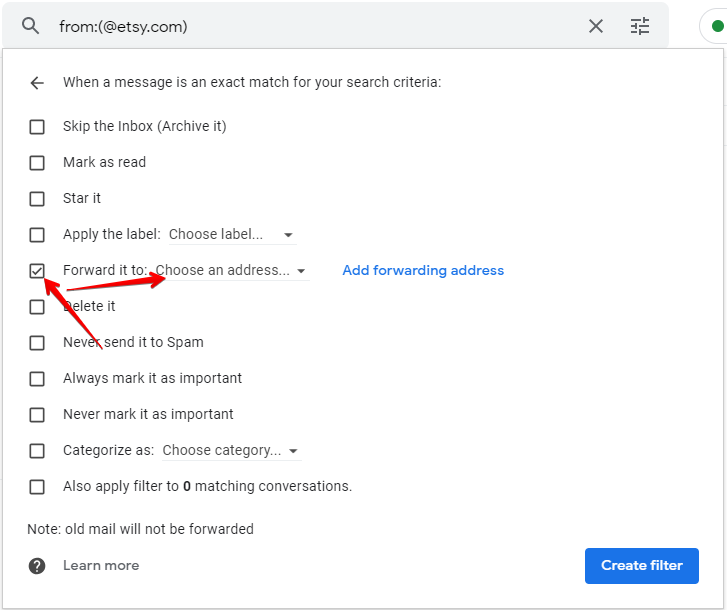
Select your ChannelReply Email. Finally, hit “Create Filter.”
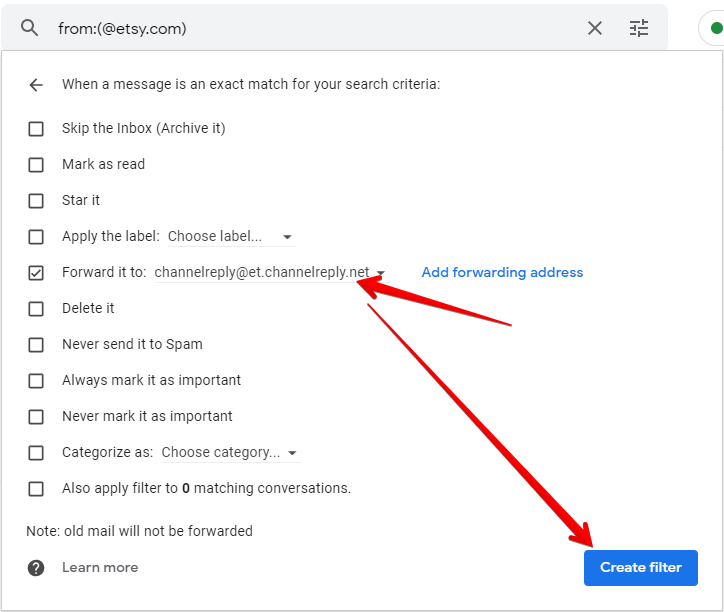
ChannelReply will now deliver your one-way Etsy notifications. The app will also display order data on notifications whenever any is available.
Email forwarding is now set up! Skip ahead to “After Forwarding Is Set Up” to continue.
Apple iCloud Mail Forwarding Setup
A. Forward Customer Messages
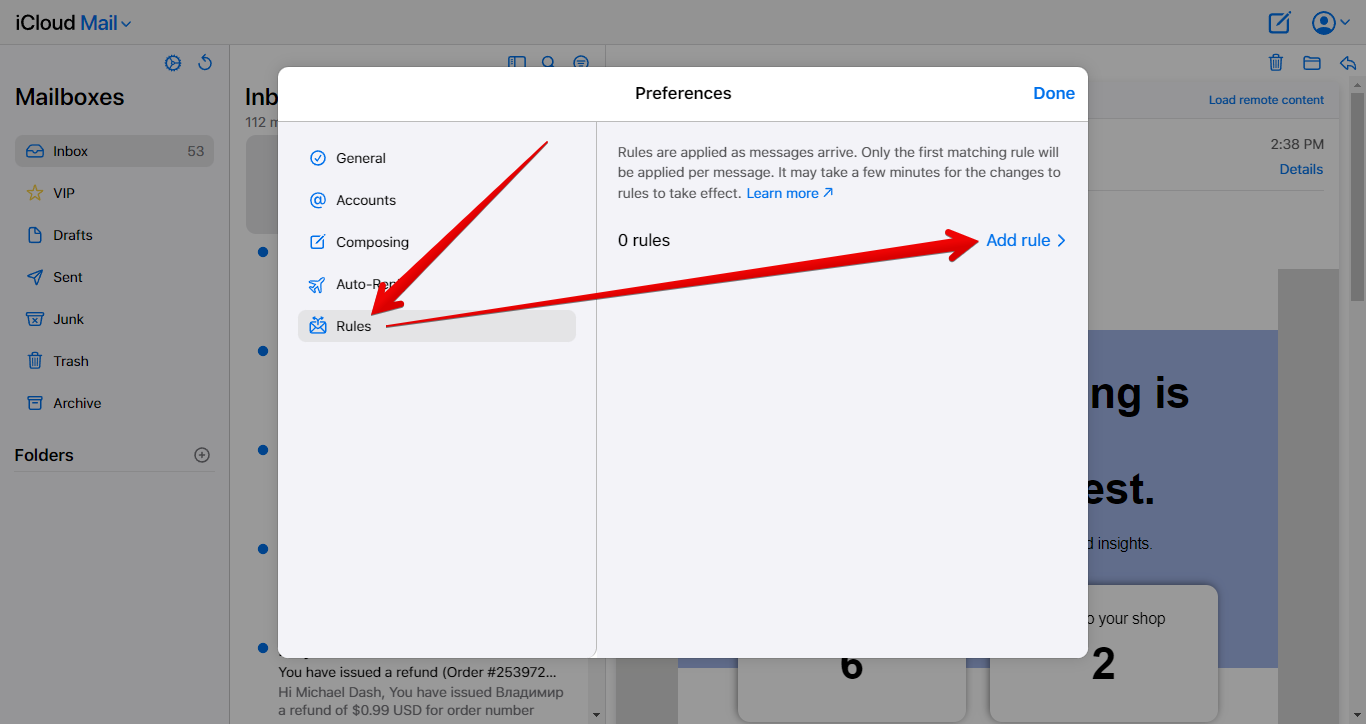
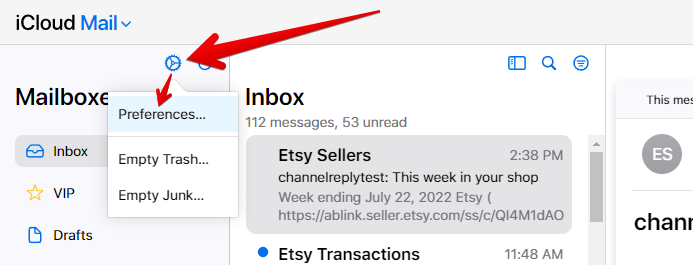
Go to icloud.com/mail. Click the gear icon above “Mailboxes” and choose “Preferences.”
Click “Rules,” then “Add rule.”
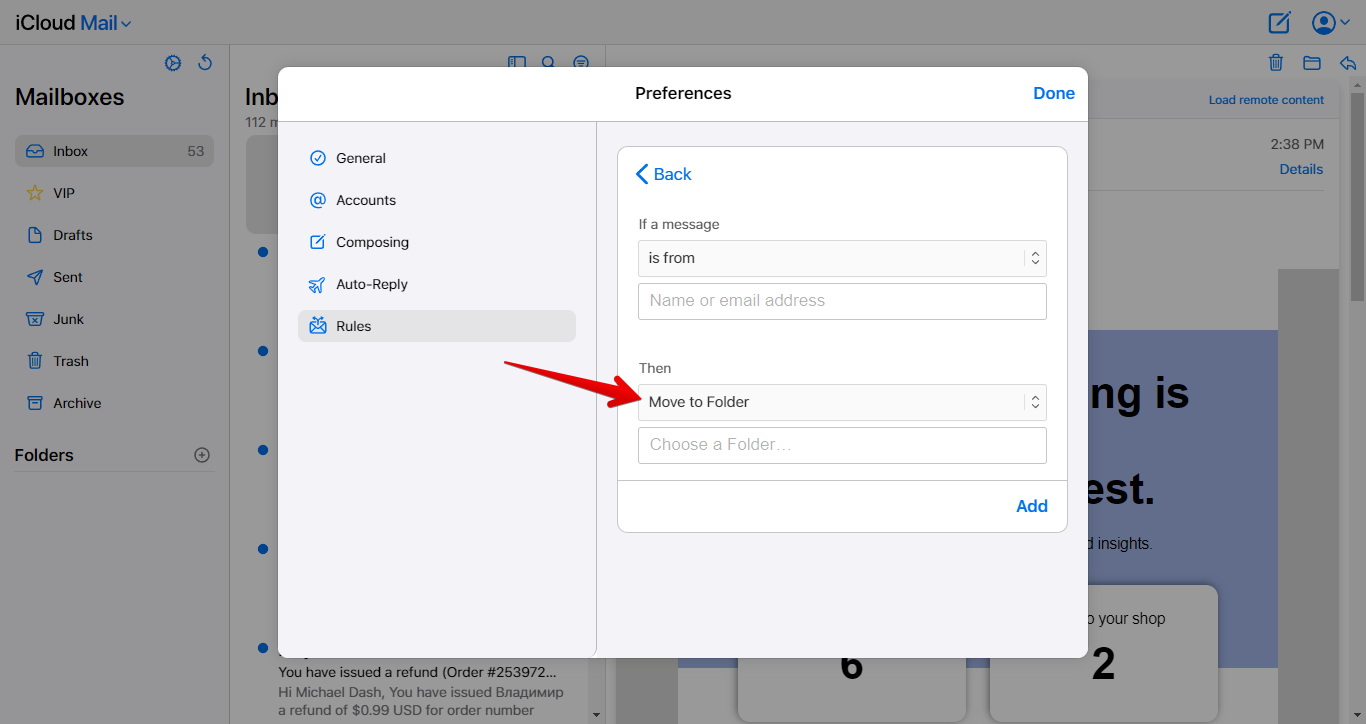
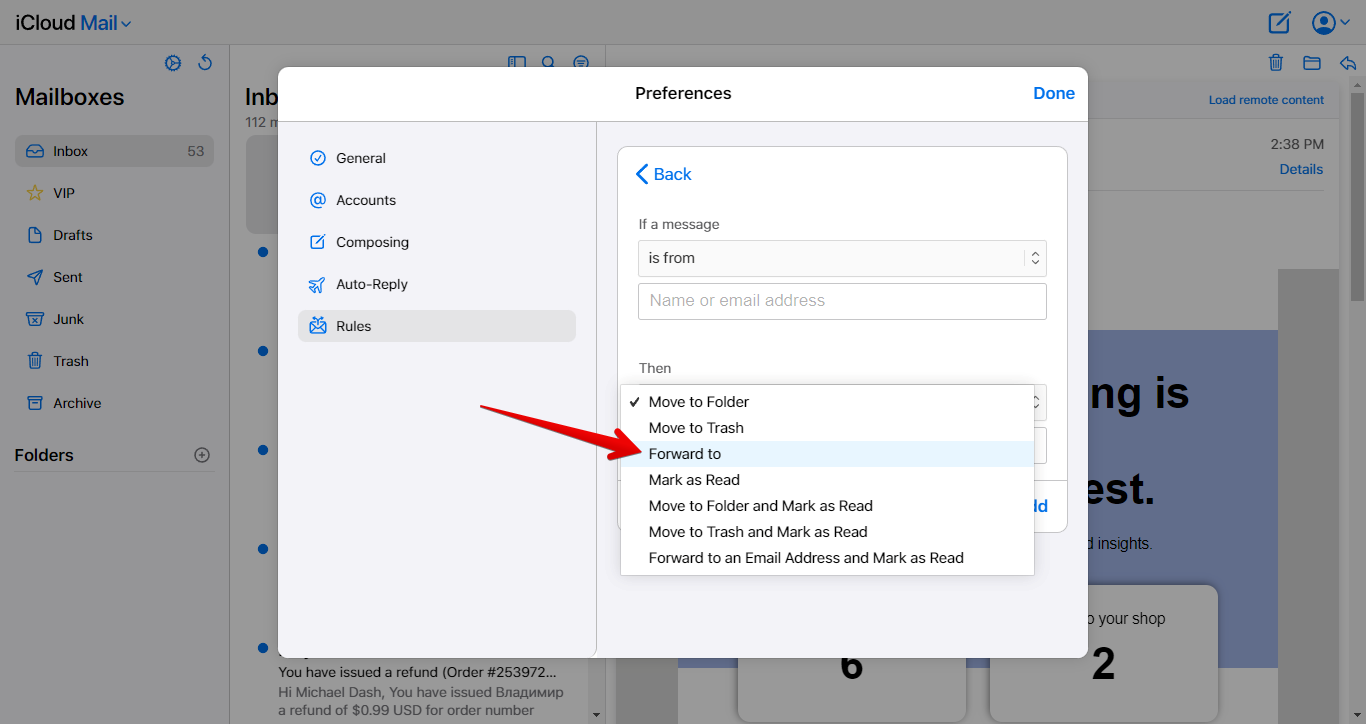
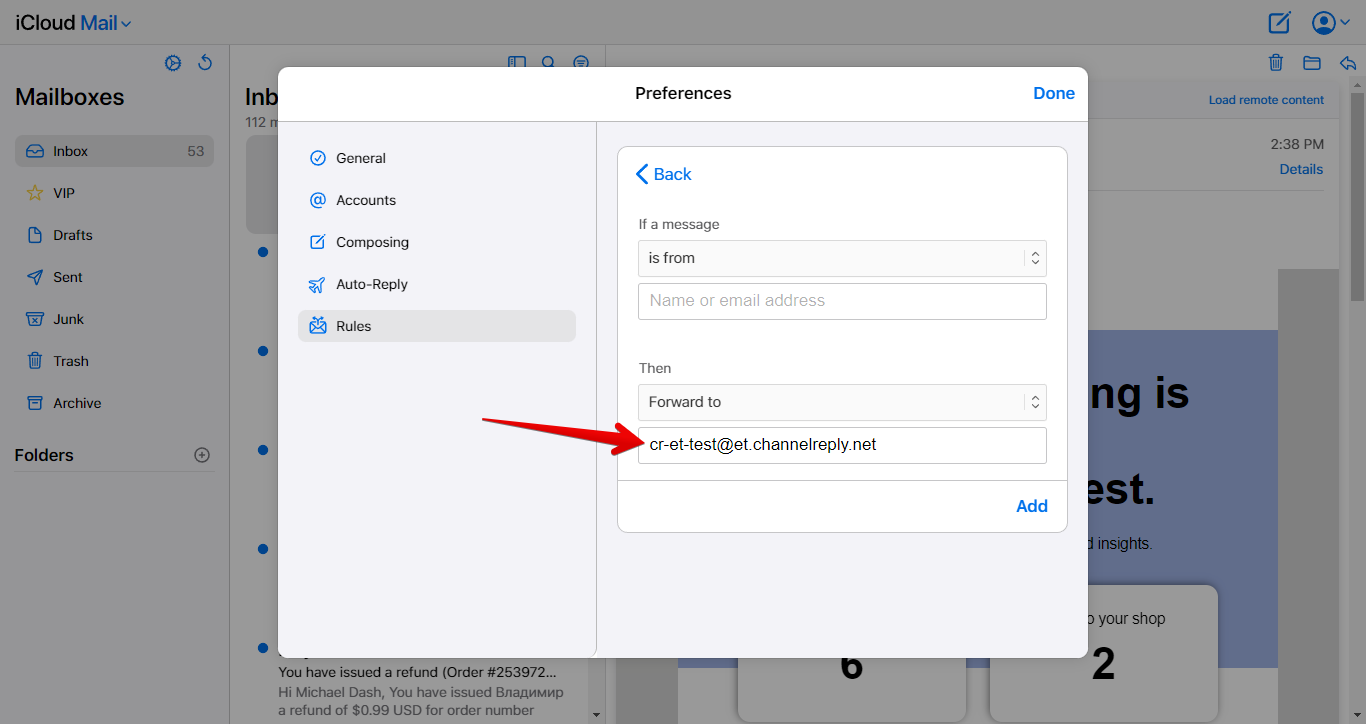
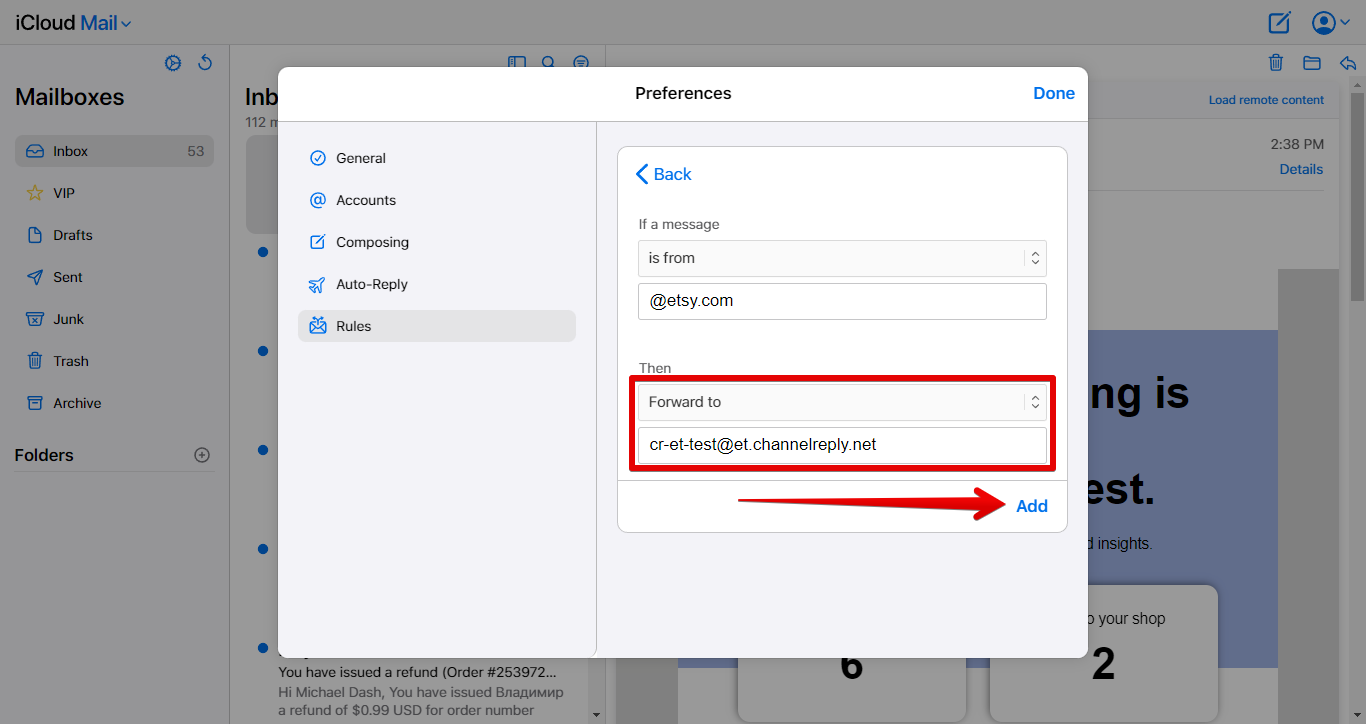
Down at the bottom, change “Move to Folder” to “Forward to.”
Paste your ChannelReply Email into the “Email address” field.
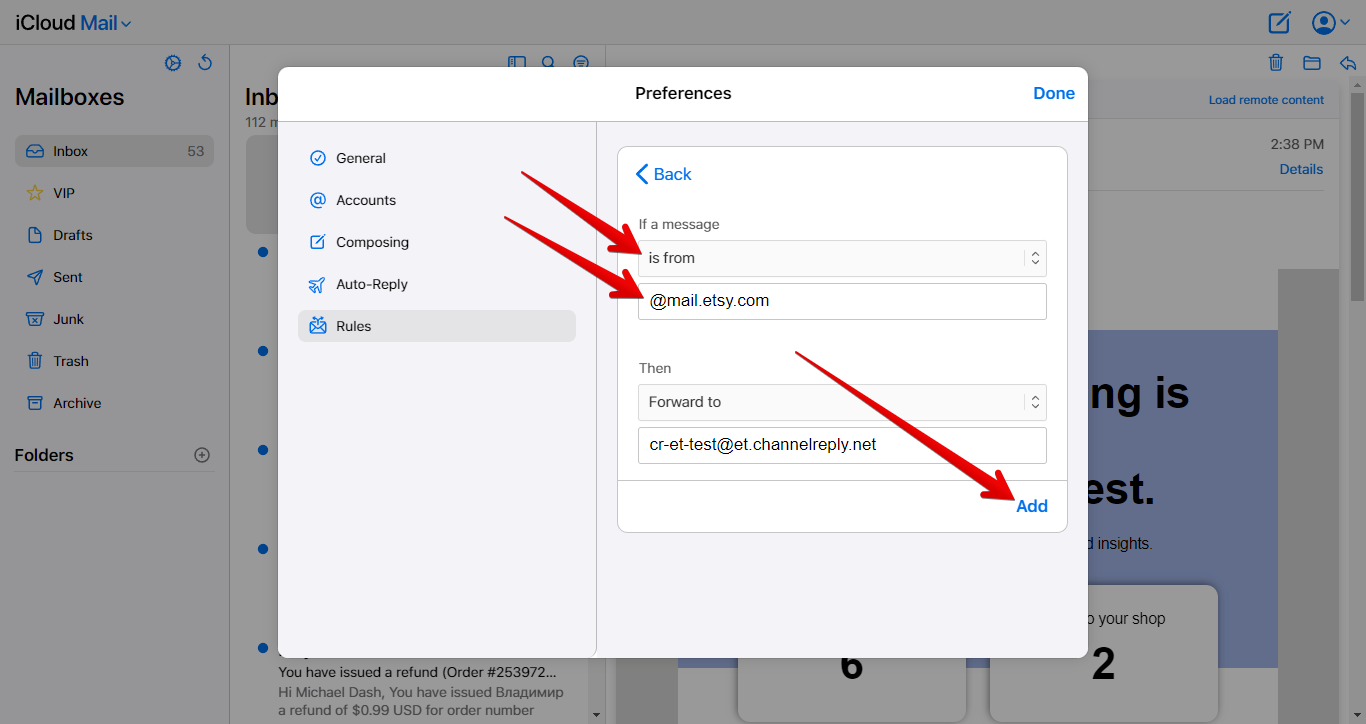
Back up at the top, leave “If a message” set to “is from.” Enter the following in the “Name or email address” field:
@mail.etsy.com
Finally, click “Add.”
ChannelReply will now deliver Etsy customer Messages to your helpdesk and display order info in the ChannelReply app!
If you want us to deliver your Etsy notifications (like cancellations), keep following the instructions below. If you’re happy with just customer Messages, you can skip to “After Forwarding Is Set Up.”
B. (Optional) Forward One-Way Notifications
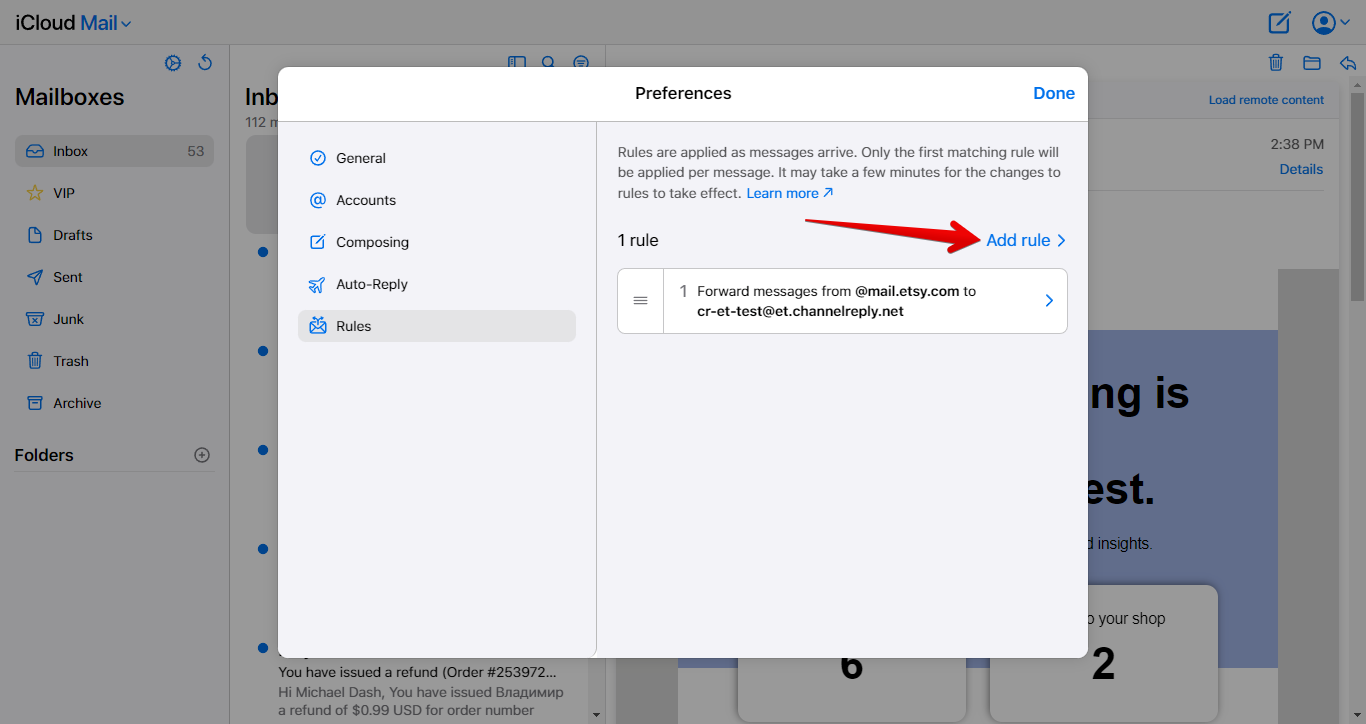
Click “Add rule.”
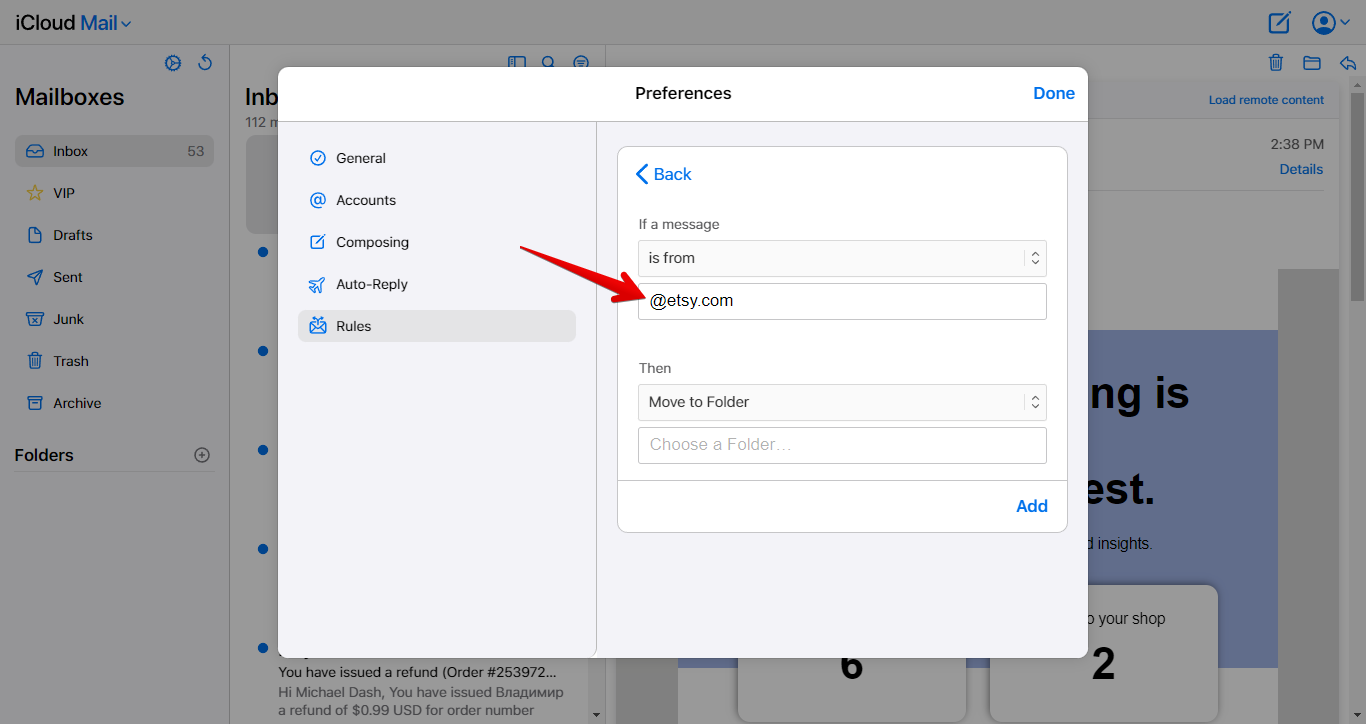
Leave “If a message” set to “is from.” Enter the following in the “Name or email address” field:
@etsy.com
Switch back to ChannelReply and copy your ChannelReply Email again.
Return to your iCloud Mail screen. Change “Move to Folder” to “Forward to,” then paste your ChannelReply Email into the “Email address” field. Finally, click “Add.”
ChannelReply will now deliver your one-way Etsy notifications. The app will also display order data on notifications whenever any is available.
Email forwarding is all set up!
After Forwarding Is Set Up
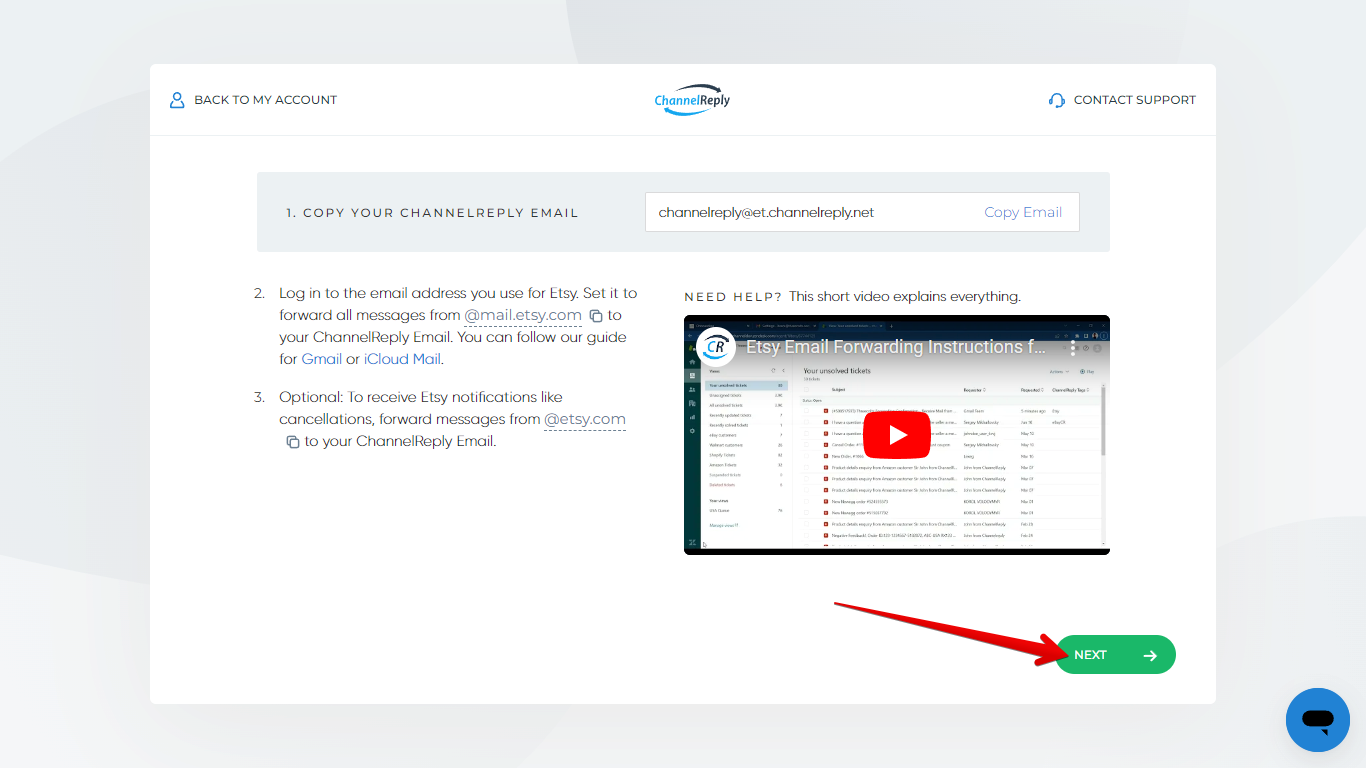
Return to ChannelReply and click “Next.”
You have now finished integrating Etsy with ChannelReply! All new Etsy Messages will appear in your helpdesk, complete with order info.
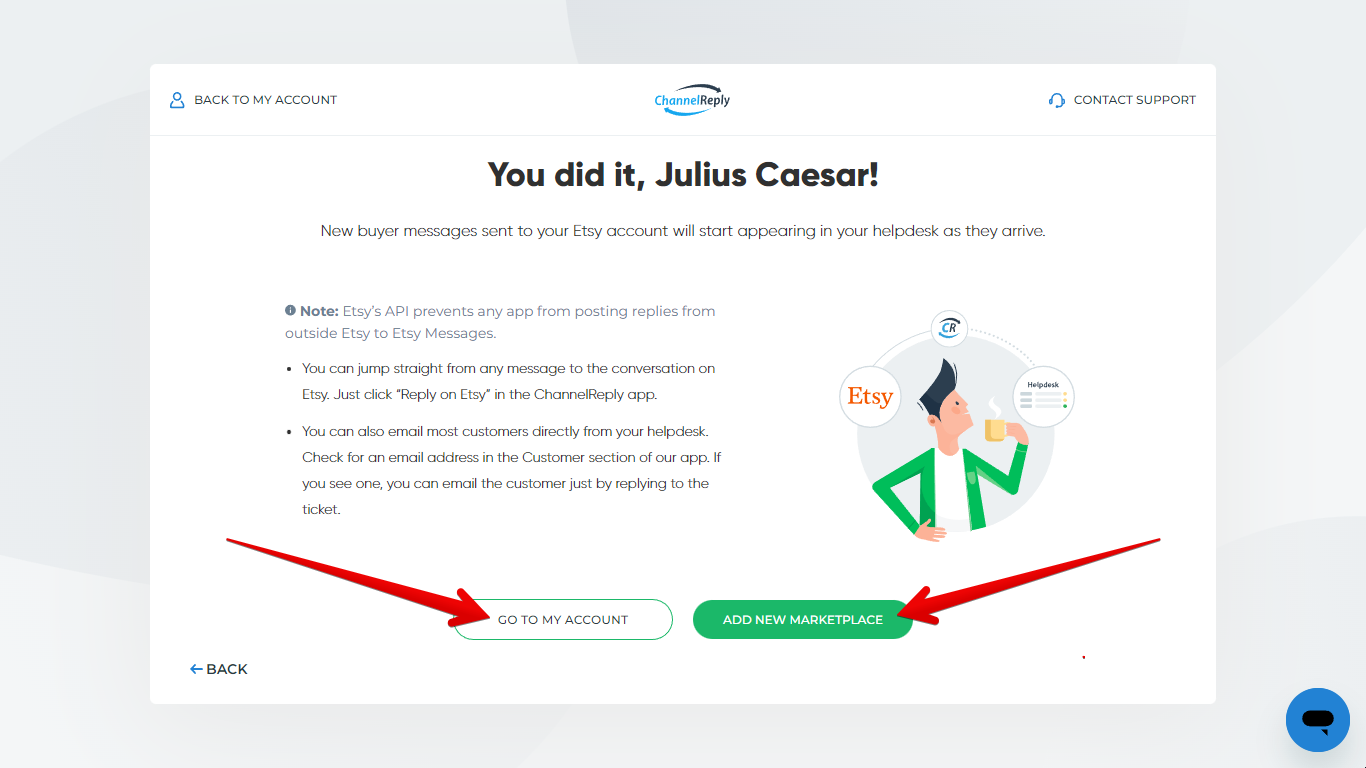
You’ll see the success screen below. Choose “Go to My Account” to exit setup, or “Add New Marketplace” to continue integrating your seller accounts.
4. (Optional) Configure Advanced Settings
From your ChannelReply dashboard, choose Etsy.
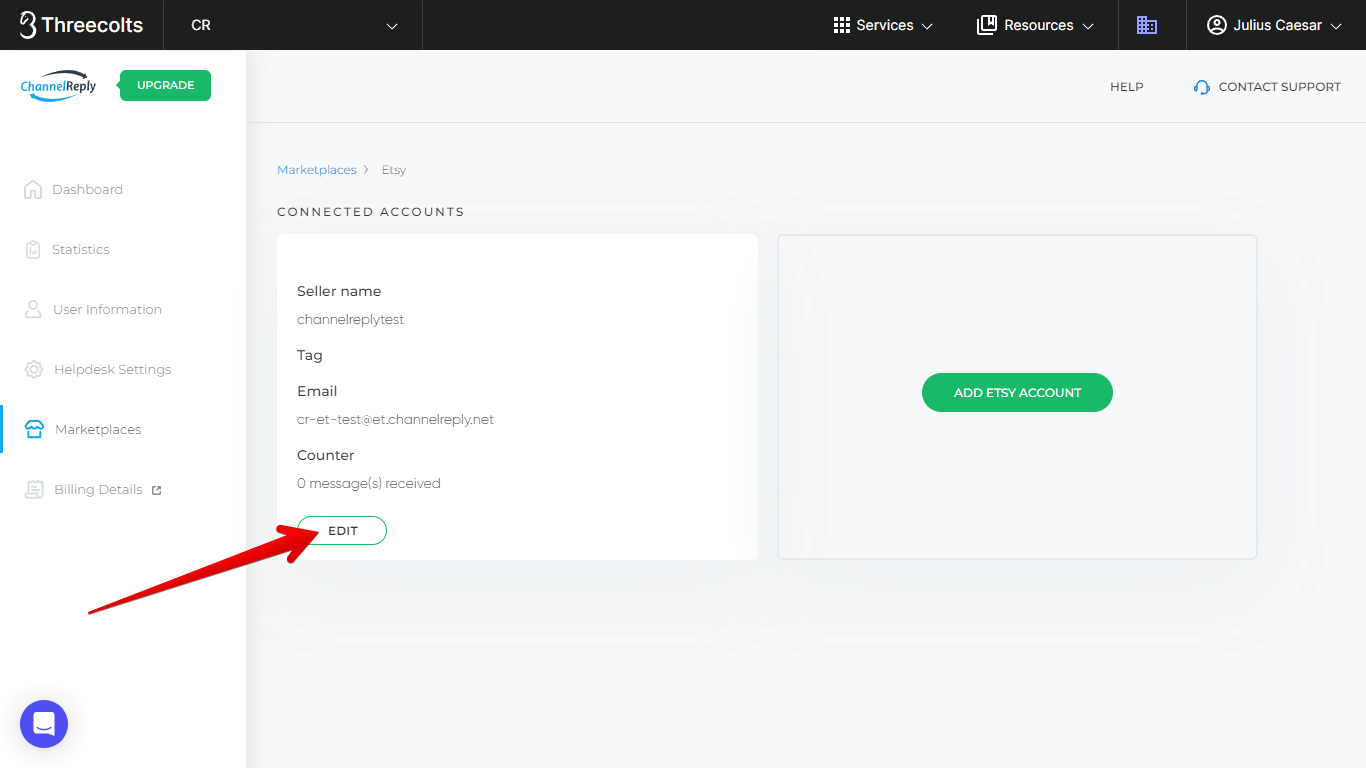
You will now see all your connected Etsy accounts. Click “EDIT” under any account you would like to manage.
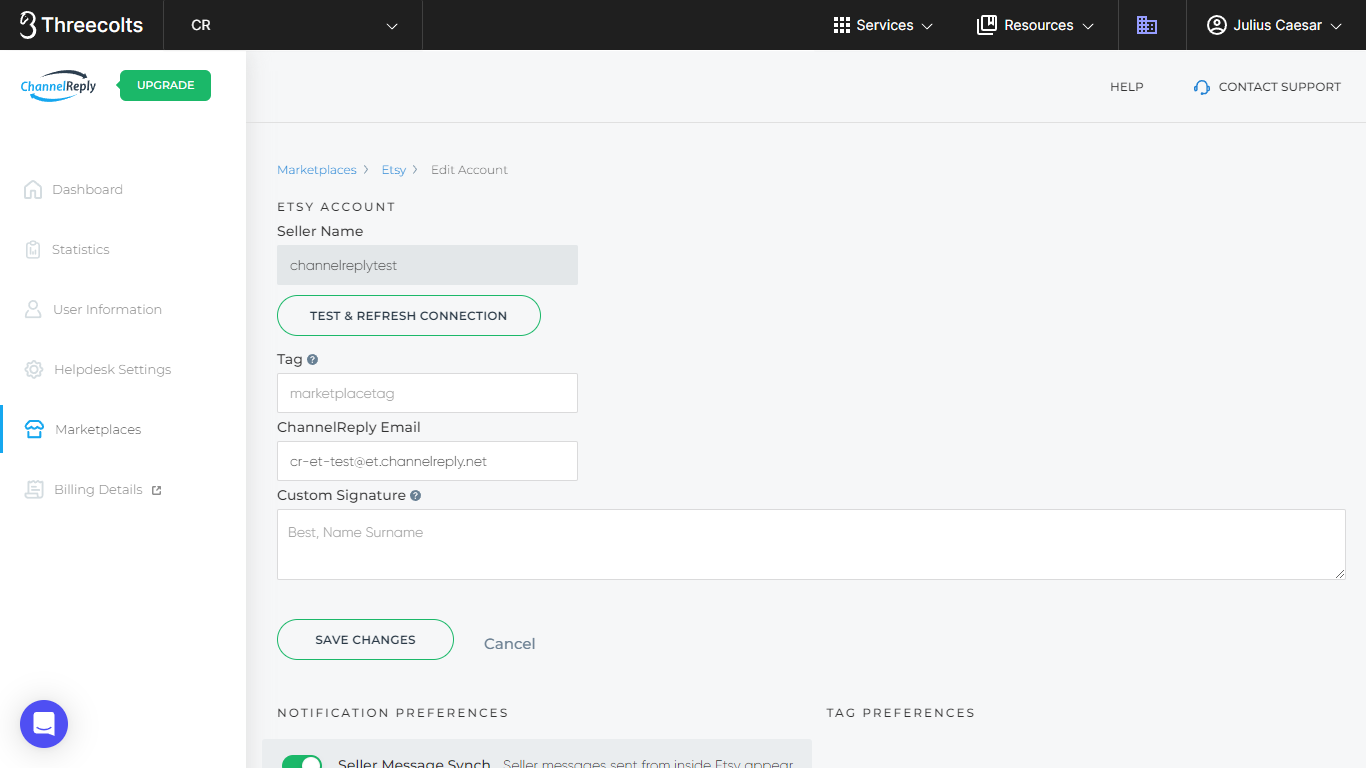
This will take you to your Etsy Edit Account page.
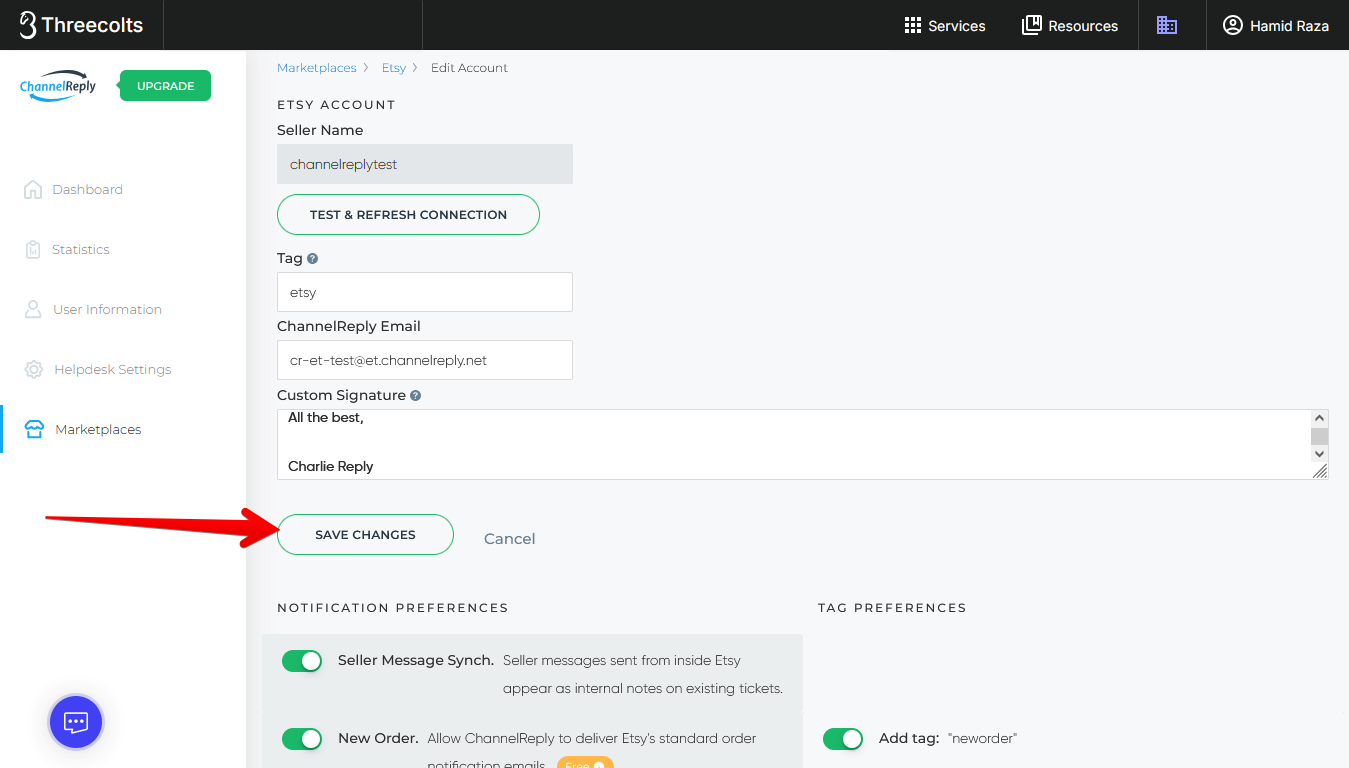
Here’s an explanation of each of the settings available here:
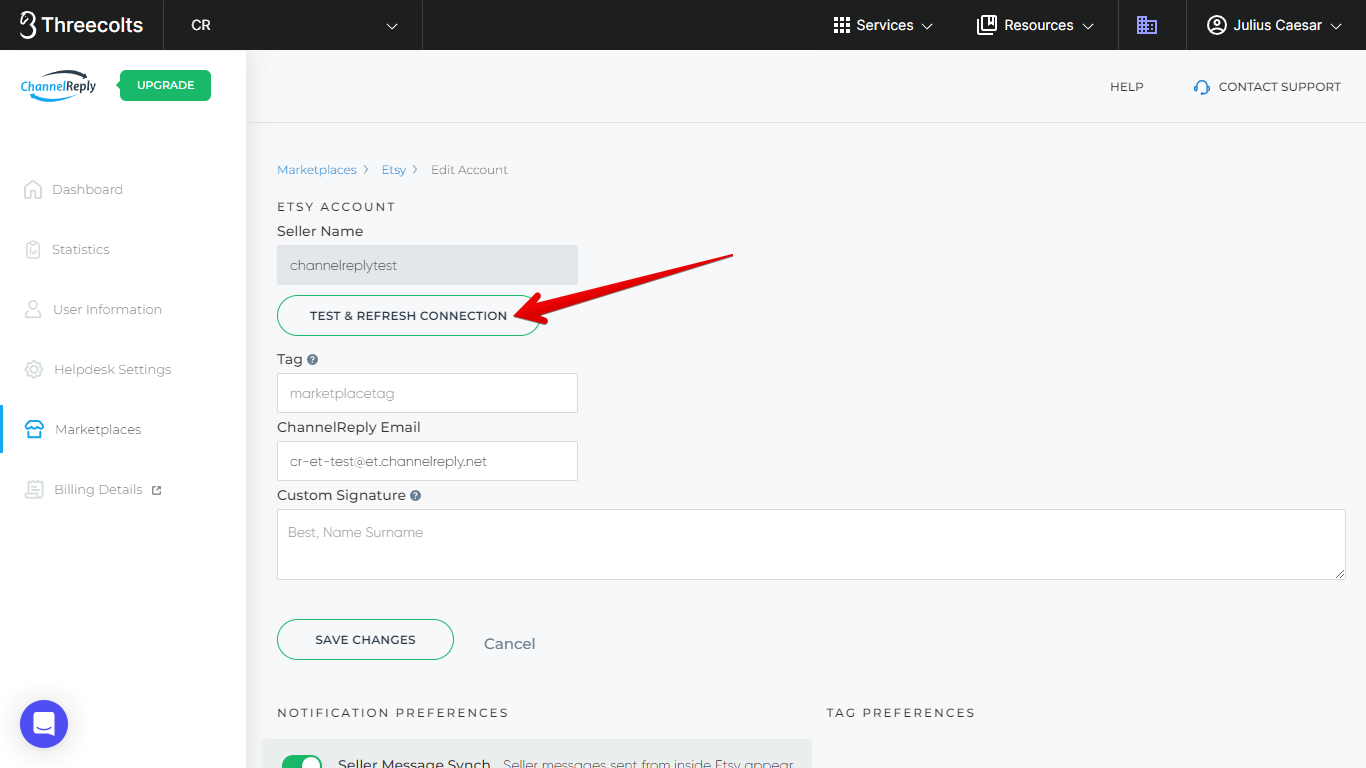
Seller Name and Test & Refresh Connection Button
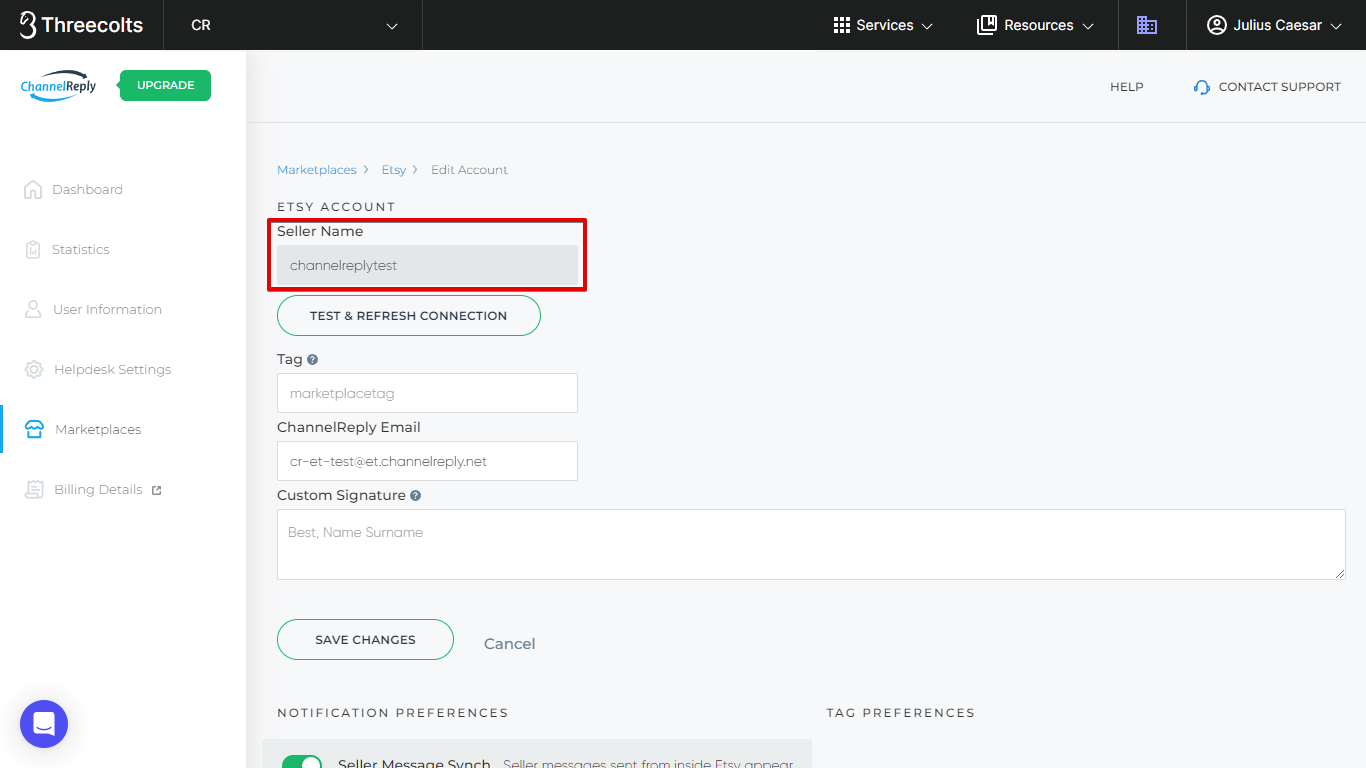
ChannelReply pulls your seller name directly from Etsy when you integrate your account. As long as your integration was successful, you should see it in the Seller Name field at the top of the screen.
It is not possible to edit this field directly. If it is blank, or if you've changed your seller name on Etsy, hit "TEST & REFRESH CONNECTION."
ChannelReply will then check your connection. If the test succeeds, ChannelReply will update your seller name.
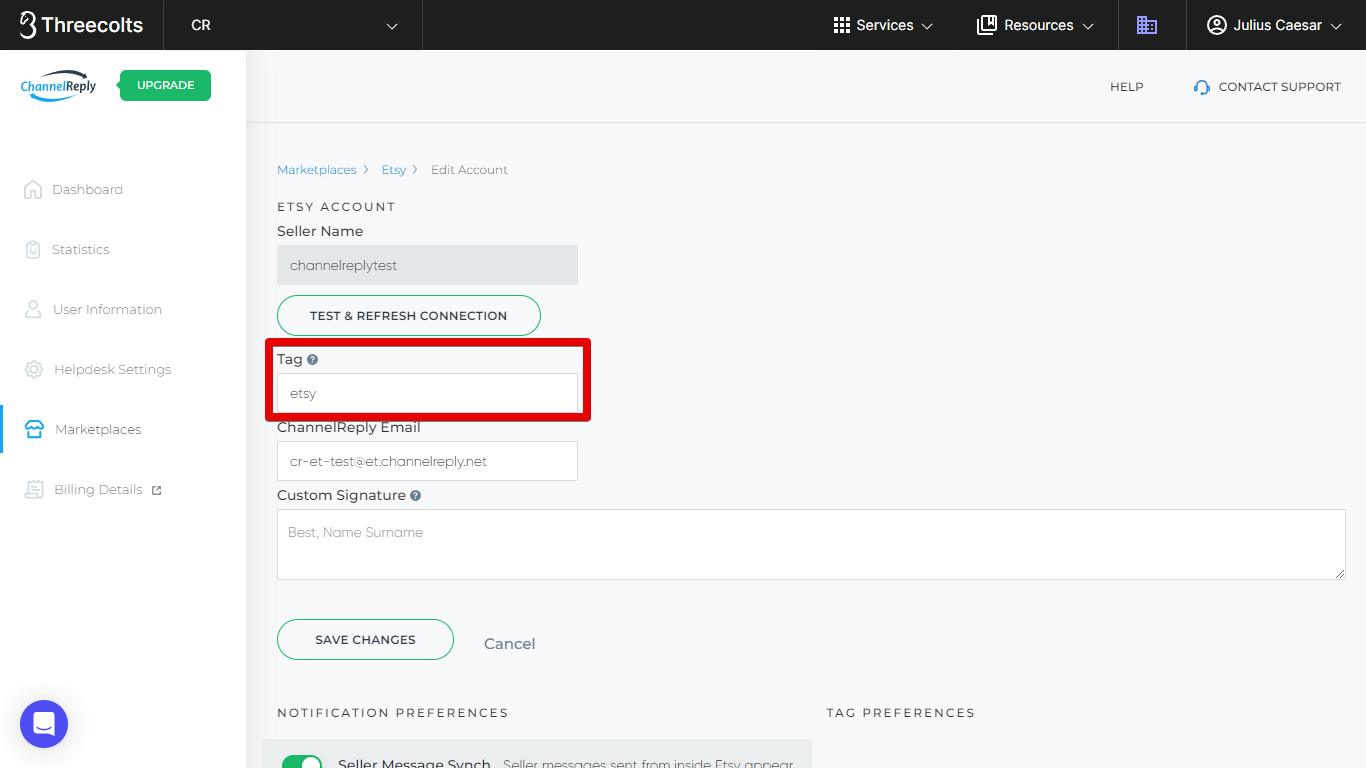
Tag
You can enter any tag or tags here and they will appear on all messages delivered from this Etsy account to your helpdesk. If you have only one Etsy account, something as simple as “Etsy” will do the trick.
If you want to include multiple words, we recommend separating them with underscores. Words separated by spaces will appear as different tags.
For more info on how tags work, see "Creating and Using ChannelReply Tags."
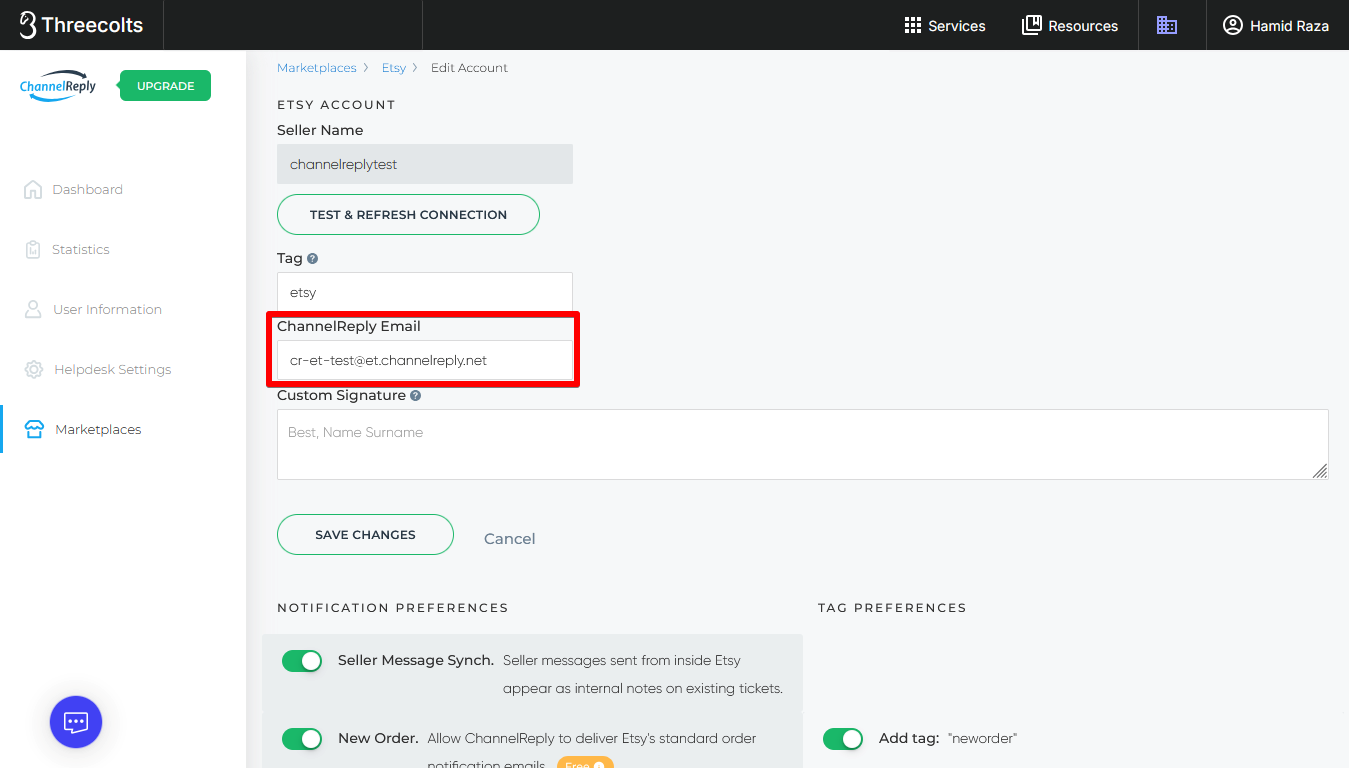
ChannelReply Email
If you modify your ChannelReply Email, you will need to repeat step 3 for this marketplace.
You can change your ChannelReply Email at any time. The new address must end in @et.channelreply.net. You will not be able to save your changes if the email is invalid or already in use on another account.
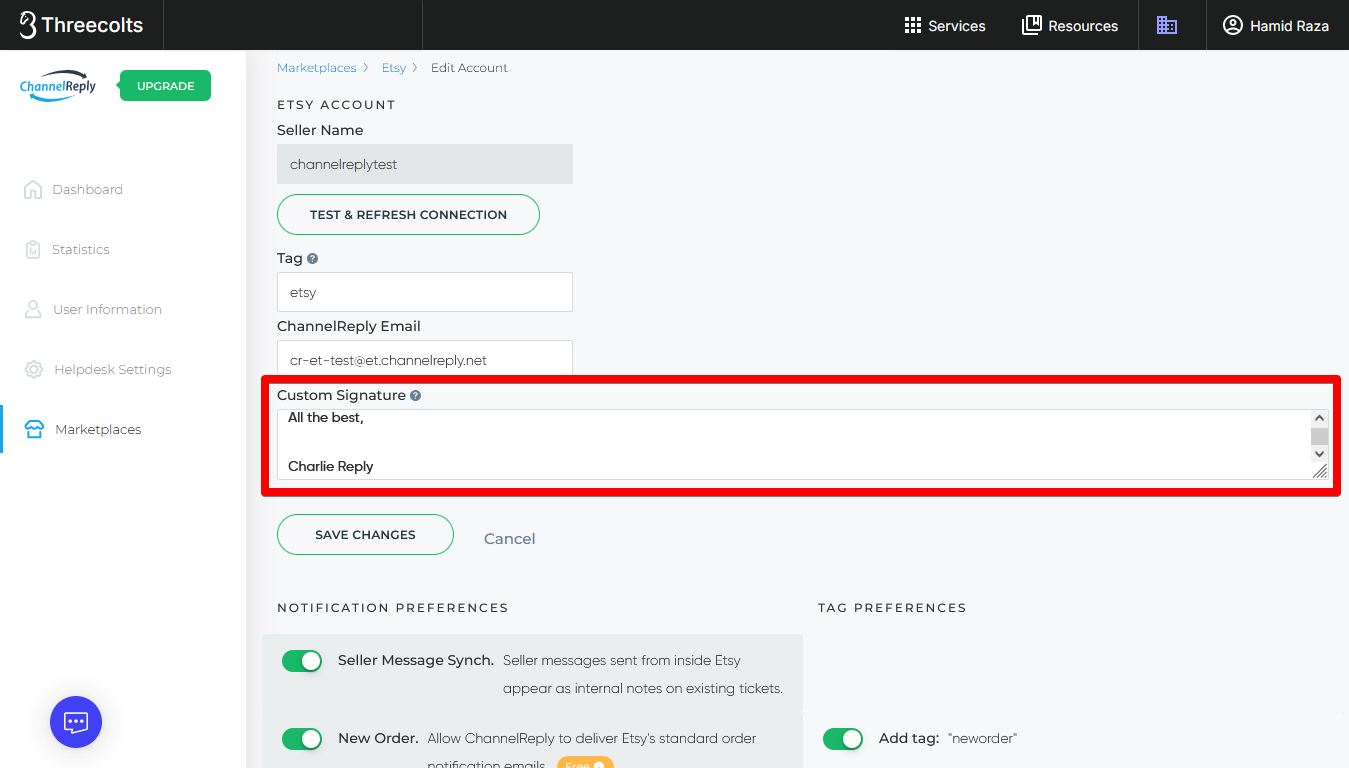
Custom Signature
You can enter a signature here to have it appear at the end of every reply you send to messages from this Etsy account. Note that this will appear in addition to the signature in your helpdesk, if you have one. To use only your helpdesk signature, leave this field blank.
Important: Never include any links in your signature other than Etsy links. Please refer to Etsy policy to learn more.
Once you’re happy with your settings, click “SAVE CHANGES.”
Notification Preferences
You’ll find a set of sliders near the bottom of the page. You can use these to decide which notifications you want to receive in your helpdesk.
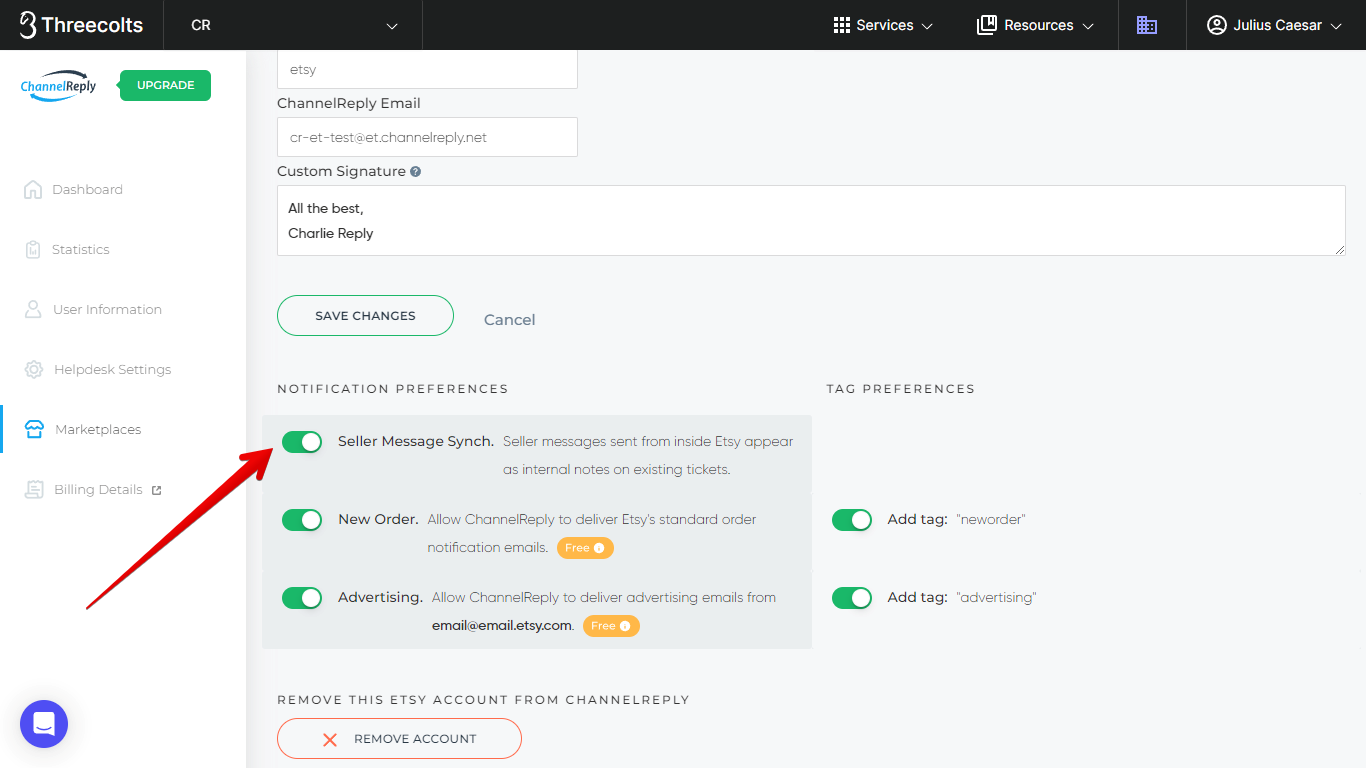
Seller Message Synch
Enabling "Seller Message Synch" will cause each message you send on Etsy to appear as an internal note on the related ticket in your helpdesk. This is recommended if you are mainly replying to customers on Etsy, as it will allow you to see conversations in full from your helpdesk.
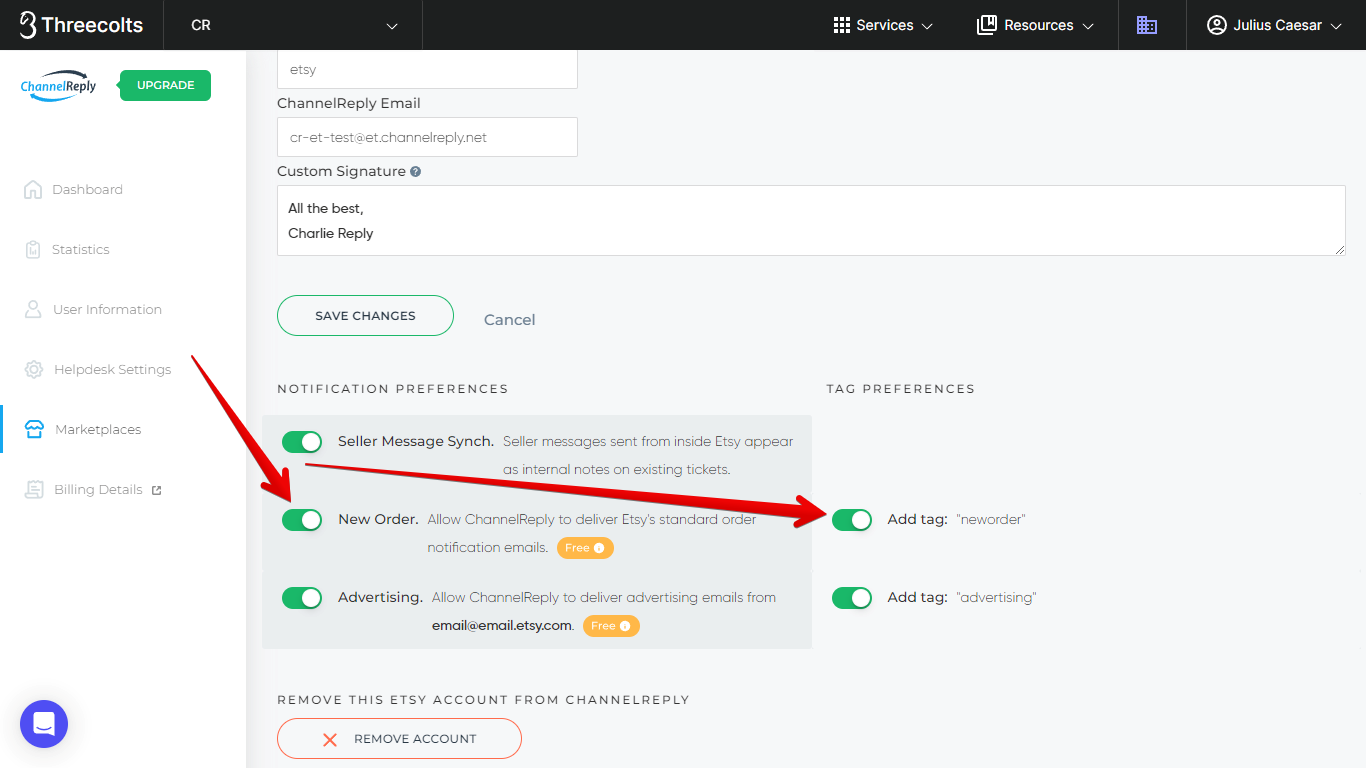
New Order
Leave the slider next to “New Order” enabled (green and with the knob on the right) if you’d like to receive Etsy New Order notifications. Use the “Add tag” slider to control whether the tag “neworder” is automatically added to these tickets.
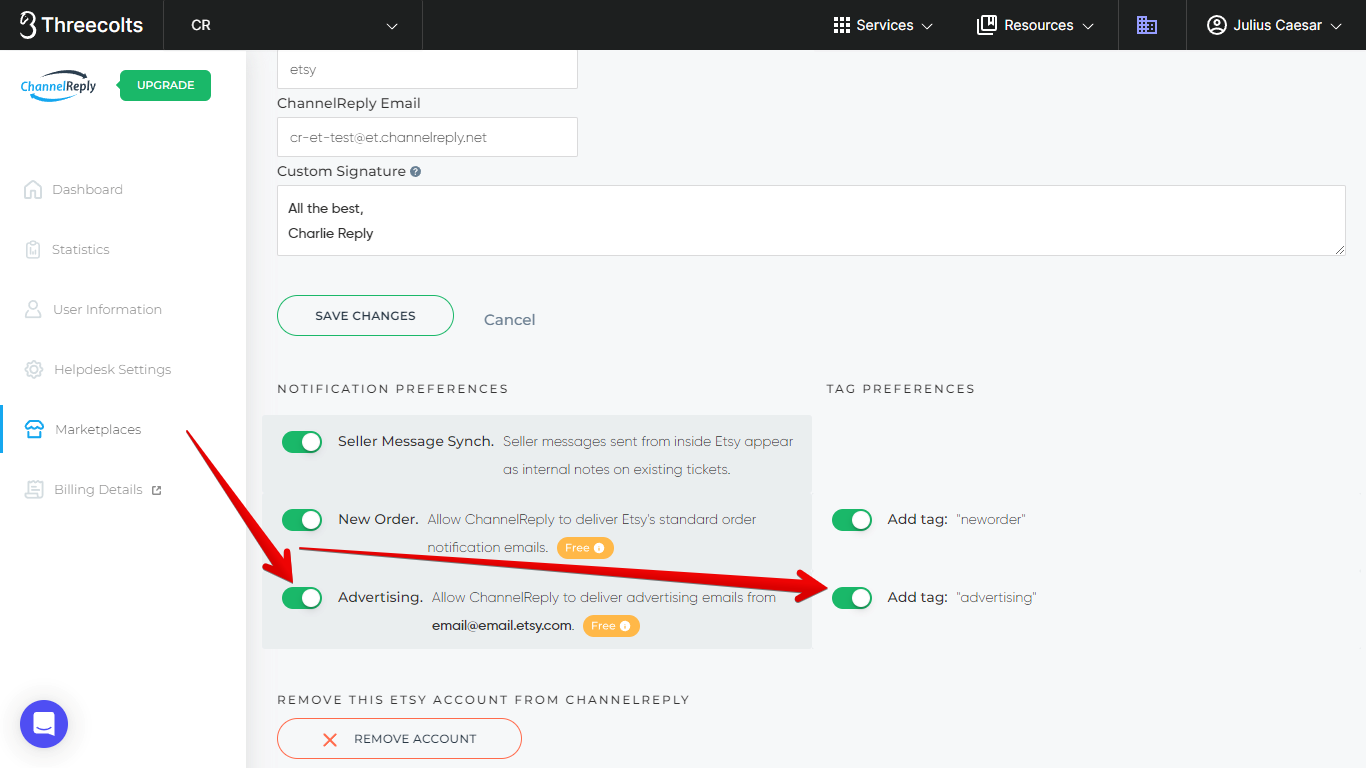
Advertising
Move this slider to the left (grey) to filter/disable Etsy advertising notifications from email@email.etsy.com. Or, you can leave this on and use the “Add tag” slider to decide whether the “advertising” tag will appear automatically on such notifications.
Remove This Etsy Account from ChannelReply
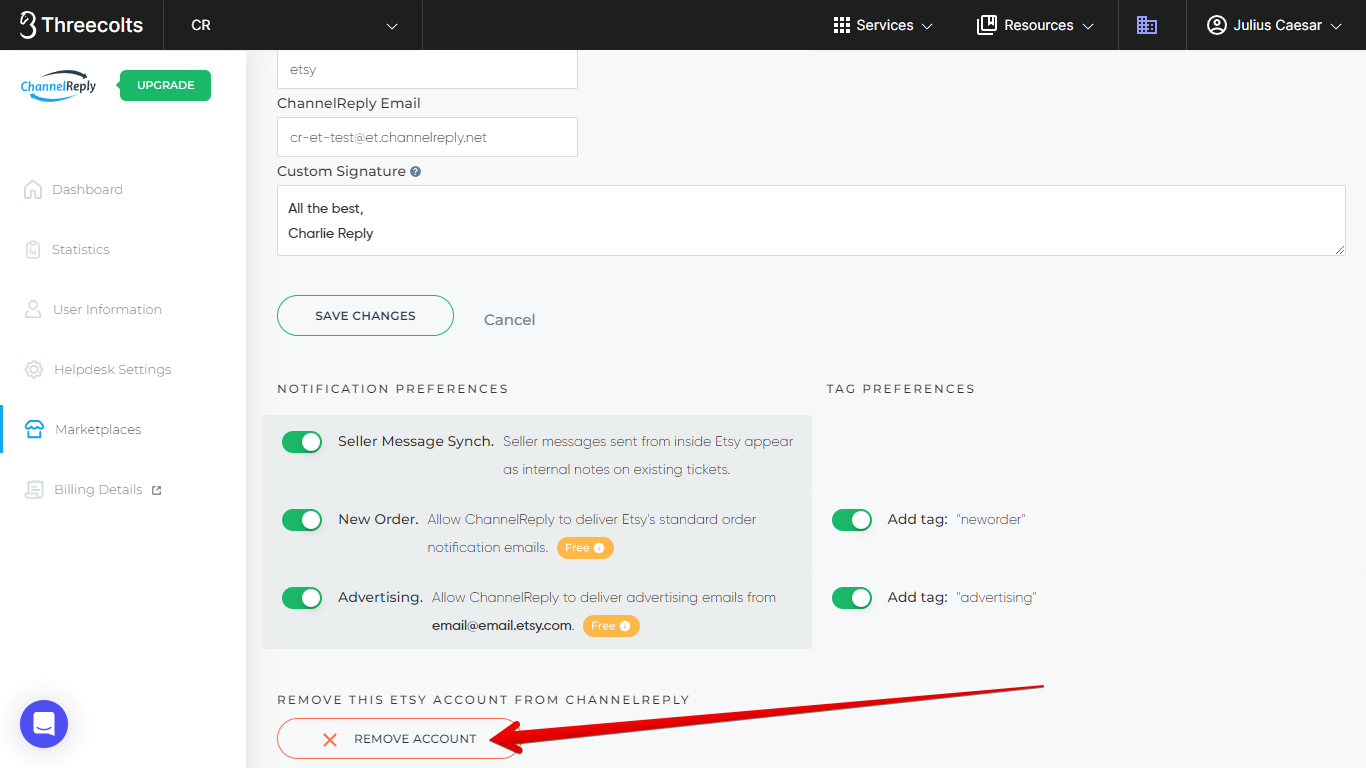
Click “REMOVE ACCOUNT” if you ever want to disconnect your Etsy account from ChannelReply.
You will be asked to confirm removal. Confirming completely revokes ChannelReply’s access to the account and deletes it from our system.
Adding More than One Etsy Account to ChannelReply
Once you’ve finished adding one account, simply follow these instructions from the beginning to add another. You can add as many Etsy accounts as you’d like.
Need support, or want tips on using your helpdesk’s advanced features with Etsy? Contact us and we'll be happy to help!


