Sending Amazon notifications to your helpdesk is easy, whether done through your ChannelReply account or simple email forwarding. Simply integrate Amazon with ChannelReply and then follow the steps below. They’ll work whether you have Zendesk, Freshdesk, Help Scout, Gorgias, Re:amaze, Zoho Desk, Kustomer or Onsite Support.
Click on any image to view it at full resolution.
1. Go to Your Amazon Notification Preferences
First, log in to your Amazon Seller Central account. Then hover over "Settings" in the upper right and click "Notification Preferences."
2. Forward Amazon Order Notifications to Your Helpdesk (Optional)
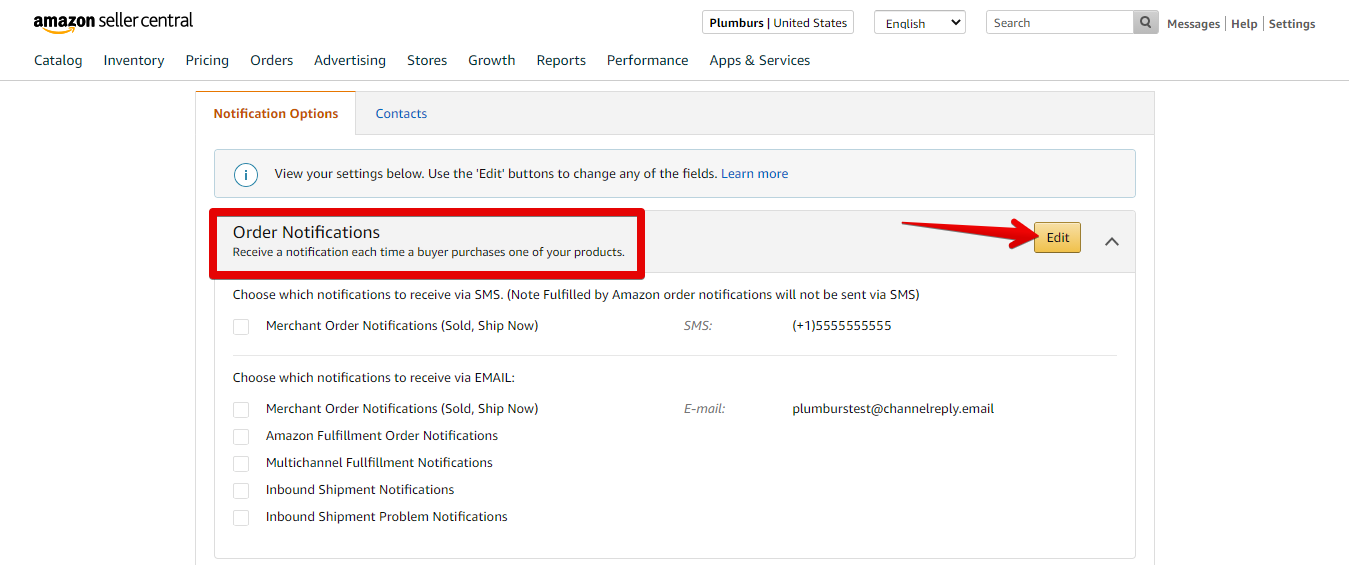
You'll see "Order Notifications" at the top. If you want to start sending order notifications to your helpdesk, click "Edit."
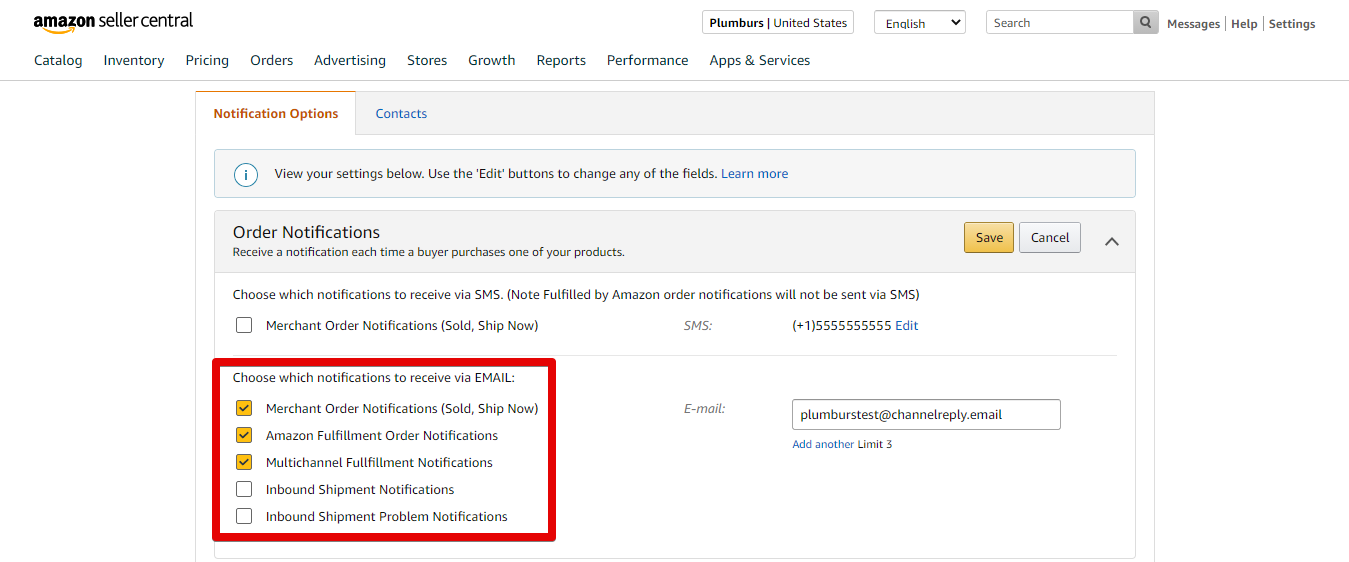
Under "Choose which notifications to receive via EMAIL," check the boxes for all the types of notifications you want delivered to your helpdesk.
After that, choose one of the following options:
Option 1: Forward Straight to Your Helpdesk
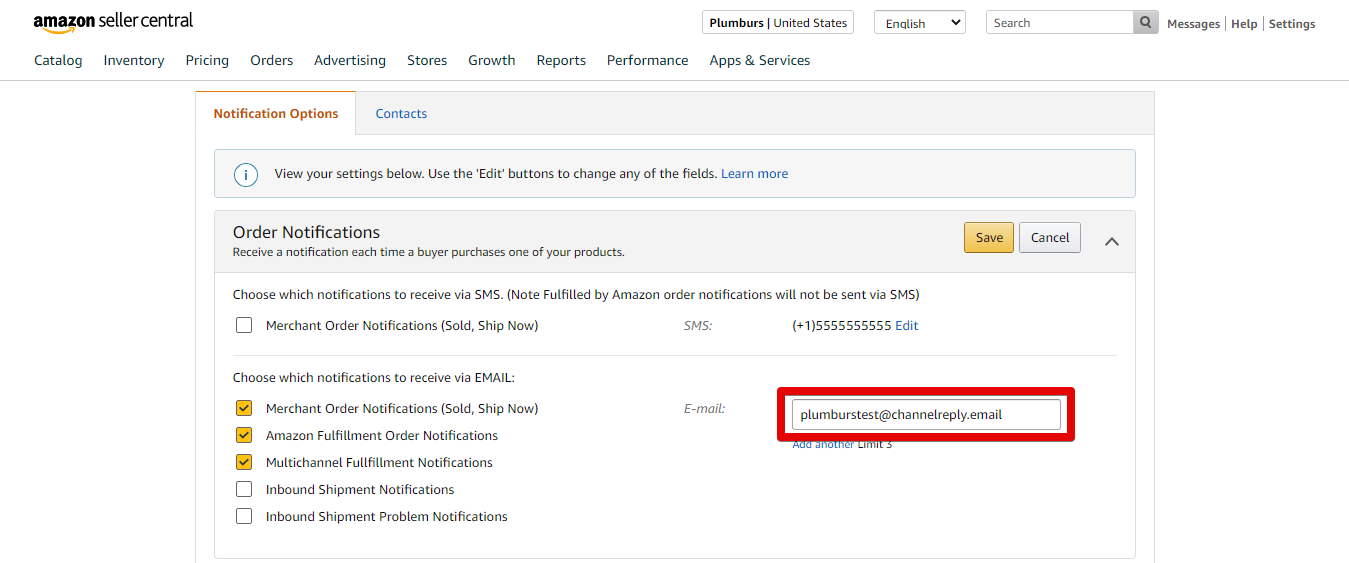
Enter an email address that's connected to your helpdesk. This is free, but the ChannelReply app will be blank on messages delivered this way. Our advanced delivery and threading settings won't affect them, either.
Option 2: Use ChannelReply
Enter the @channelreply.email address you created when connecting this Amazon account. This will send these notifications through ChannelReply, which unlocks the following features:
- All order data associated with the notification will appear in the ChannelReply app in your helpdesk.
- If ChannelReply identifies the customer, their email will be set as the requester so you can respond directly to the notification. (Without ChannelReply, the requester would be a generic Amazon sender, e.g. "Do Not Reply.")
- All system notifications delivered this way will be tagged "ServiceMessage," making it easy to sort them in views/filters, triggers/automations etc.
- You will have control over how these notifications are threaded in your helpdesk.
Just note that all messages sent this way will count toward your monthly message limit in ChannelReply.
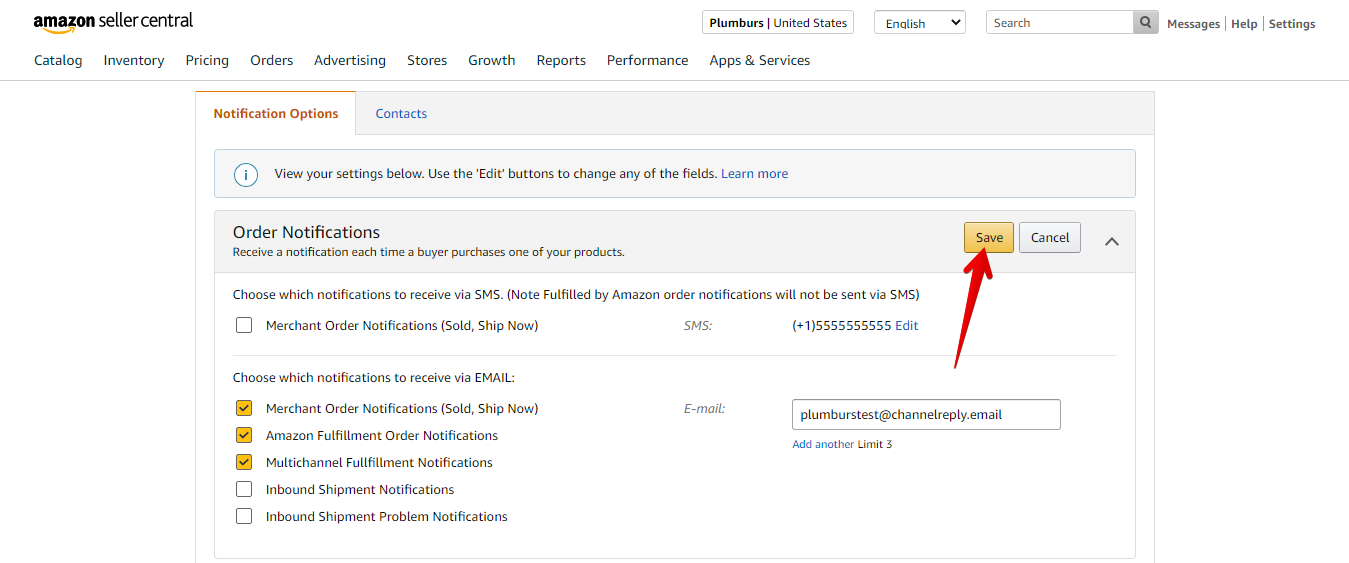
Once you've entered an email address, click "Save."
3. Forward Other Amazon Notifications to Your Helpdesk (Optional)
In addition to order notifications, you can forward the following to your helpdesk:
- Return and Claim Notifications
- Listing Notifications
- Reports
- Make an Offer Notifications
- Amazon Selling Coach Notifications
- Account Notifications
- Messaging (two-way communication through Buyer Messages is configured as part of default setup, but you can also set up forwarding for one-way notifications like Confirmation Notifications)
Just follow the same steps as above for each of these categories. You’ll have forwarding set up for all of them in no time.
4. Set Notification Delivery & Threading Preferences (Optional)
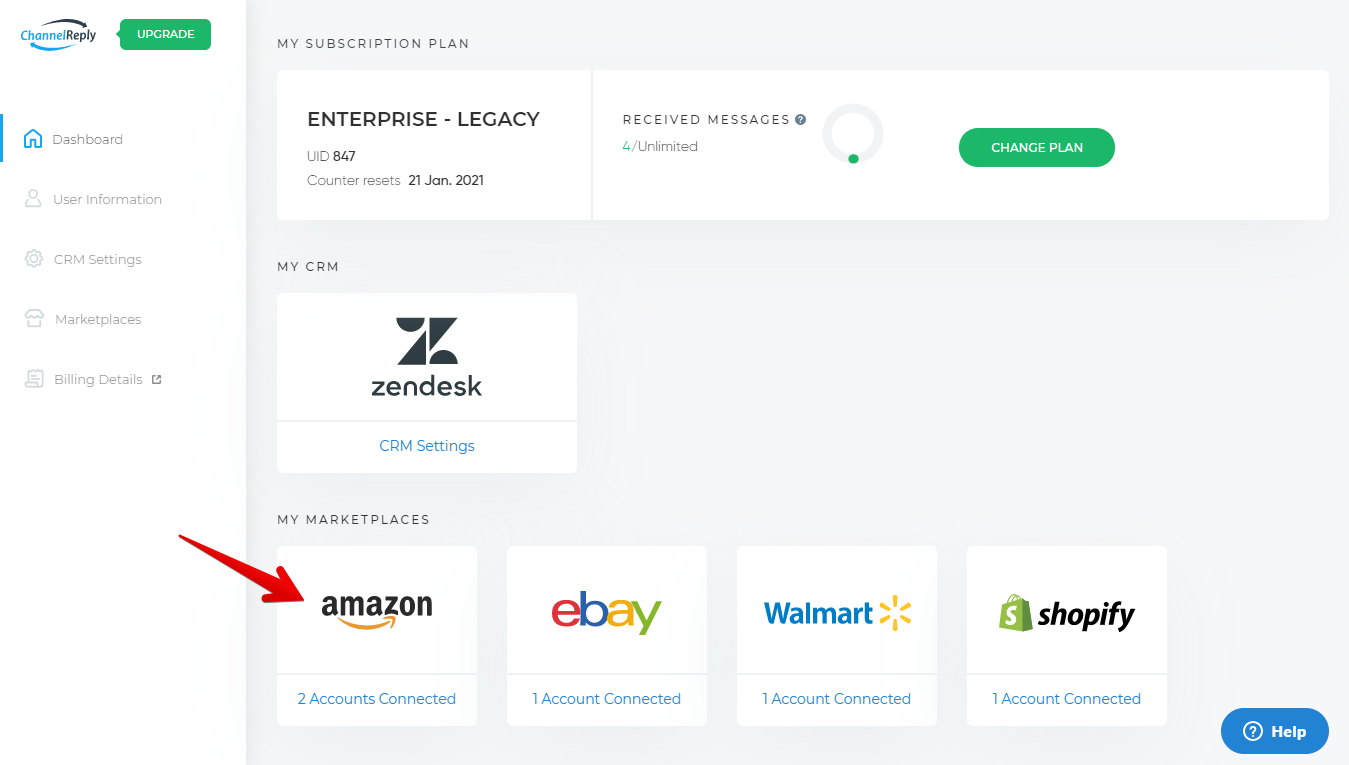
ChannelReply gives you further control over notification delivery and threading. To find these options, sign in to ChannelReply, then click Amazon on the dashboard.
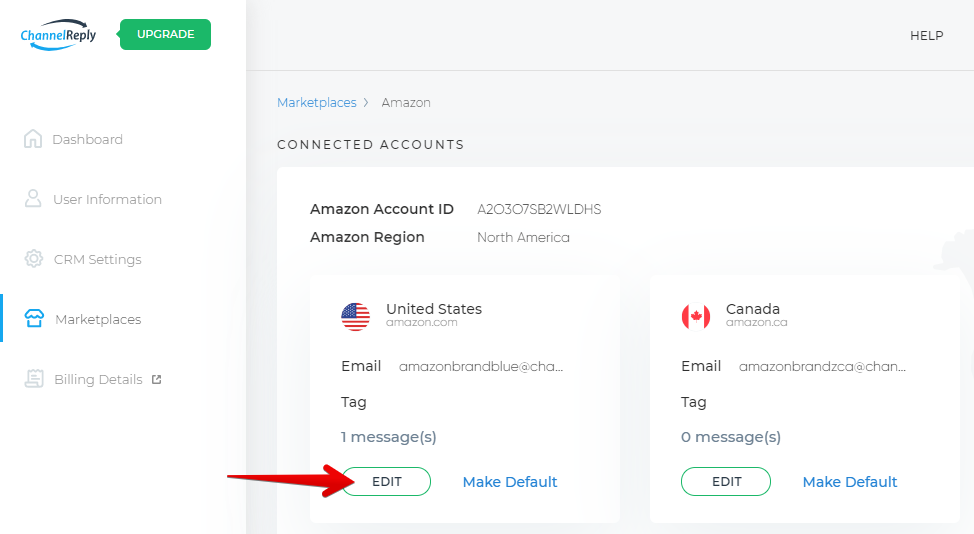
Hit "EDIT" under one of your accounts.
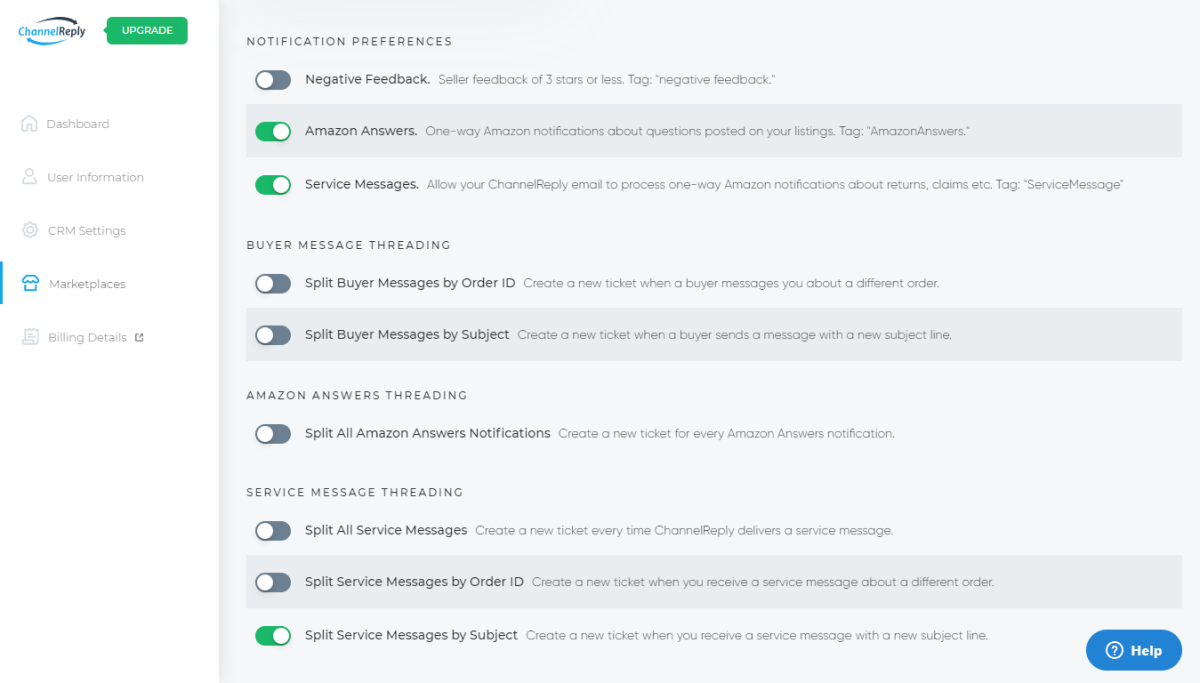
Scroll down to the "NOTIFICATION PREFERENCES" section and you'll see all your Amazon threading and delivery settings.
For detailed instructions on managing these settings and other advanced options for your Amazon account, see step 7 of our Amazon integration instructions.
Stuck? Can’t find the answer you’re looking for? Contact us and we’ll be happy to assist you.


