With UseResponse you can organize a dedicated space for customers to get answers to their questions from your online documentation and provide the tool for submitting requests in case the answers couldn't be found. Providing a self-service portal for customers to help themselves could reduce the number of incoming requests and decrease support expenses in your company. The best way you can scale your support is to provide the ability for your customers to be able to answer as many questions as possible on their own.
In this article, we'll take you through a few steps on how to build an effective help center.
You can also watch our video tutorial to learn the basics of the helpdesk system setup.
1. Support Channels
UseResponse provides a variety of channels that customers may use to contact your support and service team.
1.1. Email
Email is considered to be one of the main support channels, so it should be the primary setting you should work on.
UseResponse provides the default mailbox setup for incoming/outgoing messages. If you want to use your own email address, you need to add it in Administration » Support Channels, setup forwarder, add SPF record for proper mail delivery, verify new mailbox and make it default one. Here is the detailed information on how to configure mailboxes and add a custom mailbox in the cloud instance.
1.2. Community Portal
Users may fill out the contact form in your support portal so you need to configure portal settings in Administration » Support Channels » Community Portal:
- Make your community private and grant access to it only for the internal team or a limited list of customers;
- You can also change the language of your community.
There are use cases when you need to gather customer requests separately in different regions. To do this, you need to create several portals in Administration » Support Channels » New » Community Portal and control agents' and users' access to them in Menu » Users by creating custom teams with access to the specific portal. Check out the article to understand how to build multiple support centers. Multiple forums functionality can also be helpful if you want to build dedicated self-service portals for each of your products or brands.
1.3. Support Widget
You may want to collect user requests avoiding the routine authentication and extra redirects to your help center. Integrate the support widget into your website or application and capture users' requests with ease. Your customers wouldn't need to search for a dedicated platform to submit a private request.
1.4. Live Chat
You may deliver instant customer service via live chat widget and popular messengers. In Administration » Applications. First, you need to enable the necessary channels and then set up live chat widget settings and required messengers.
1.5. Knowledge Base
Except for the channels your customers may use to submit a request, you need to allow them to find the answers on their own using the official documentation around your product or service. Please refer to the article on how to set up the knowledge base effectively.
2. Tickets Workflow
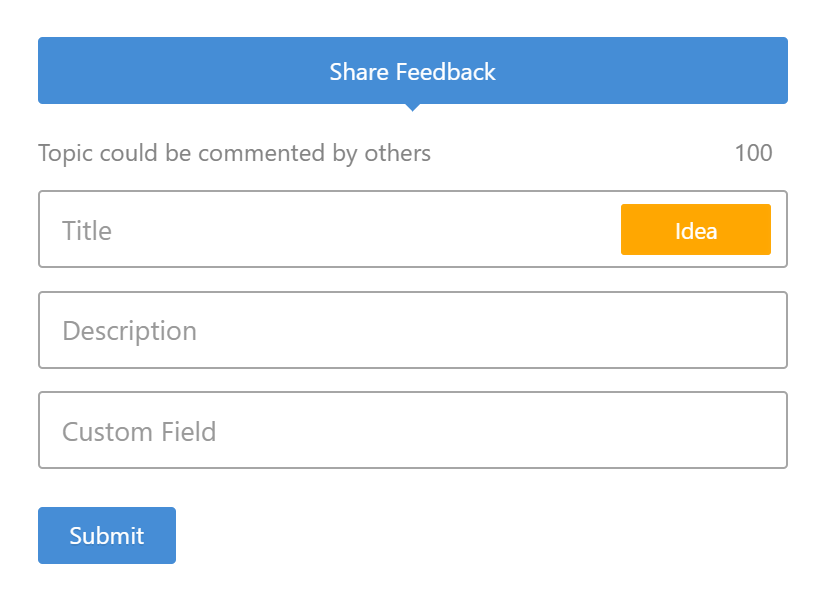
Apart from the basic information (title, description, screenshots), you might need to capture specific details from the customers' requests. UseResponse allows adding more options like product version or the plan the customer is signed up for to a new ticket form in Administration » Custom Fields » Tickets. In our online knowledge base, you can find how to build a custom ticket form.
In addition, UseResponse gives you the opportunity:
- To set up complex and well-organized hierarchy of ticket categories and subcategories using the conditional fields;
- To send a chatbot reply as a user, contact, or a custom form in the chat widget to be filled out before the customer is connected to a chat operator.
When a user submits a new request, you should help him to track its progress with statuses that can be managed in Administration » Statuses. If your ticket workflow includes other statuses than set by default, just rename them in Administration » Languages or create additional custom statuses.
By default, the system automatically notifies and subscribes all the support agents in the company when a new ticket is created. But if you want to override UseResponse logic, in Administration » Automation & Notifications you can create triggers to perform automatic subscription, send custom email notifications, change statuses, and automatically assign tickets based on the specific conditions.
In Administration » Support Channels » Help Desk you can allow submitting new tickets anonymously without authentication. Here you can also change the notification settings if you want all the ticket notifications to be sent from the name of the default mailbox instead of agent name who posted the reply.
3. Advanced Settings
There are several advanced settings that can be useful for companies with complex ticket workflow.
- Triggers mentioned above can also be used to set up automatic ticket routing. Tickets can be distributed automatically between all agents in the team one by one or based on agent workload or between online agents. With Smart Assignments feature you can also specify who should be assigned in case there are no available agents in the team according to the company’s working hours;
- UseResponse allows defining your business hours for the whole team or different agent teams if required;
- Business hours have an impact on the company’s SLA rules which you can determine to prioritize one customers over the others by providing them quicker support and set your support agents targets on ticket resolution or reply time;
- With UseResponse you can also identify if customers are satisfied with how you resolved the issue.
4. Portal Customization
UseResponse provides a variety of options to make your help center look the same way in design as your website or web application:
- Use a custom domain for your help portal in Administration » Support Channels » Community Portal » Custom Domain under Options;
- Change the basic identity of your community in Administration » Interface » Identity;
- Customize the home screen as you want according to your workflow and manage top tabs in Administration » Interface » Home Screen;
- Modify the overall look of the forum to match your brand design;
- Change any wording or expression in the system with our built-in translation tool.
5. Views & Queues
All the tickets and chat conversations coming from various support channels can be handled in Menu » Inbox with flexible options to manage support queues and custom reports. For easier ticket management you can build reports in Kanban view.
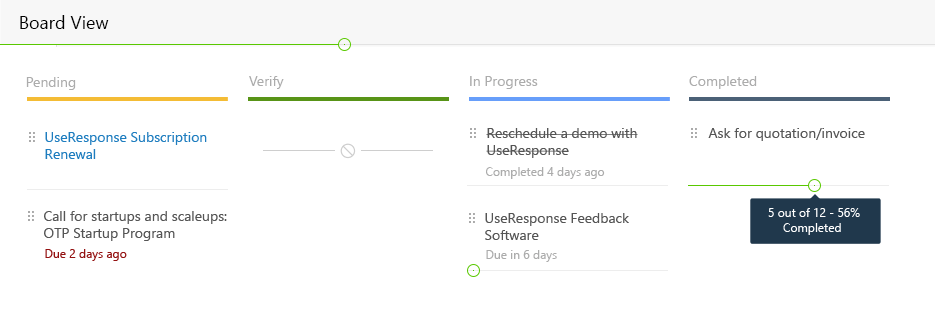
Please refer to the article on how to manage queues and reports.
In addition, UseResponse provides comprehensive analytic abilities to measure team performance and keep an eye on the workload overview.
6. Tools for Ticket Processing and Teamwork
In UseResponse multiple agents can work on one issue simultaneously.
If you want to avoid conflicts in simultaneous work/replies of several agents in the same request or you want to let other agents know that someone already took the request and is working on it, you can use the Lock feature.
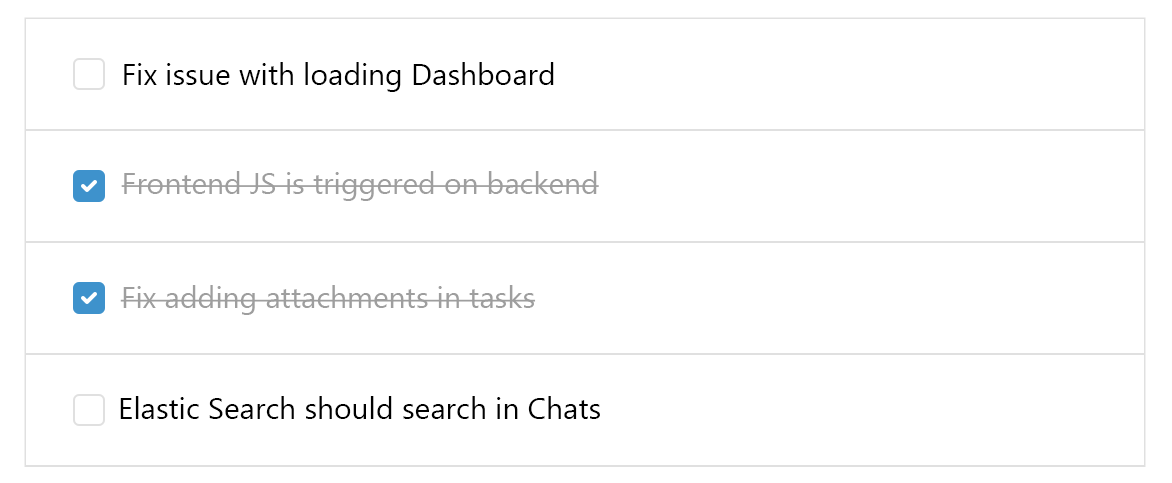
Sometimes while delivering customer support, agents have to perform several tasks before the user's issue gets resolved and the ticket status changes to "closed". Find how to organize a to-do list inside a certain ticket and share tasks among several agents in the team.
To include a member of the support team into teamwork on the ticket you can also use @mentions along with private notes to remind a colleague on his new assignment.
If you should process hundreds of similar requests every day, canned responses may help your support team by providing standard answers in just two clicks.
Keep in mind that every ticket update, new assignment, team collaboration with comments, and notes can be tracked in Menu » Activity Log in the management area or on the Dashboard.
7. Import Users and Sign-In Options
- Use the built-in importing feature to get users on board from a web application, CRM or other third-party systems;
- Specify the ways your customers log in UseResponse instance: it could be native login, Single Sign-On, or both options.
Now you're ready to start delivering amazing customer support with UseResponse.