This article would help you understand how to import your users from your web application, CRM or other 3rd party systems.
When you get started with UseResponse and want to get users on board with the support system, use the importing feature that is located on the Users page in the agent interface.

Importing could be done with the help of the CSV file and limited to 500 records at once. When you add users that way, your users won't get a registration email account, but all their requests would be assigned to their profiles. The same would be done with accounts when they log in with integrated Single Sign-On in your application.
If you import users and some of them are already in the database, then all their information would be updated
Associating Custom Fields When Importing
By default, you would need to have an email and full name in CSV with , delimiter. But you can change the delimiter that you use in CSV.
If you want to pass extended profile information, you would need to create custom fields first for users that could be done in Administration » Custom Fields » Users.
Give the names of the fields the same as they would be in a CSV file. For example, you need to import "Customer Type" information from your CRM to UseResponse. Make sure that both the CSV file and UseResponse have "Custom Type" as the name of the field for matching.
Process of Importing
In order to start the process, please go to main menu and click on Users. Then click on options icon at the top right and select Import. Select required CSV file, specify delimiter and if you have header with fields in the file or not.
Note: if you have header with the names of all your fields in csv, please select yes option in "First row is the header" setting. This way first row will be ignored while importing users.
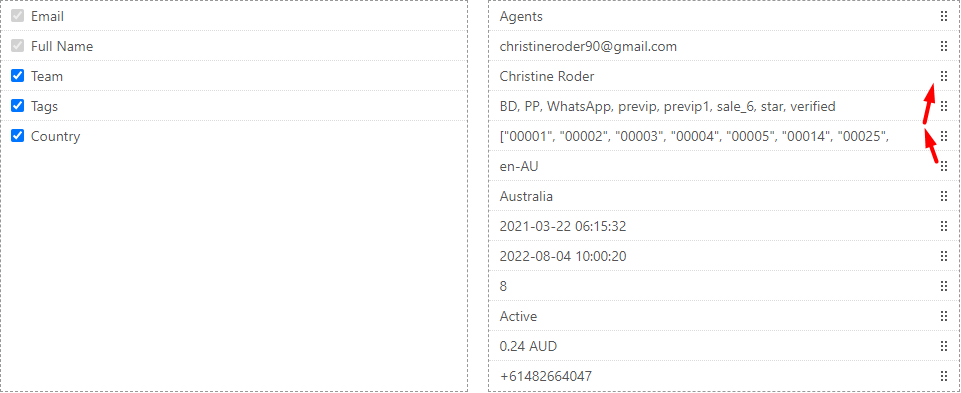
Match the columns according to your workflow by dragging them. You can switch off fields that you don't need and add additional fields in custom user fields in case you need more.

After you matched all the columns, please click Validate button.
In case you didn't match your columns correctly, you might get to the Conflict page where you need to fix your mismatches or alternatively ignore errors by clicking on relevant button for the system to ignore conflicts.
If you imported all the data correctly, the system will redirect you to the final page with the notification Data is valid and ready to be imported!
Click Import button to finish the process.
Troubleshooting Imports
The system accepts only user custom fields with "select" and string/text/numbers options, so if there is a mismatch in values that the user has in the file and database, the value won't be added to the user profile while importing.
Example: You have Country added as a select option in UseResponse for the user account with 3 options: Germany, USA, Russia. When you try to import your data from CSV and if you would have Italy as a value, it won't be added into the database.


