- Click on Administration (Setting Gear Icon) > Support Channels
- Click on Widgets > Pencil Icon
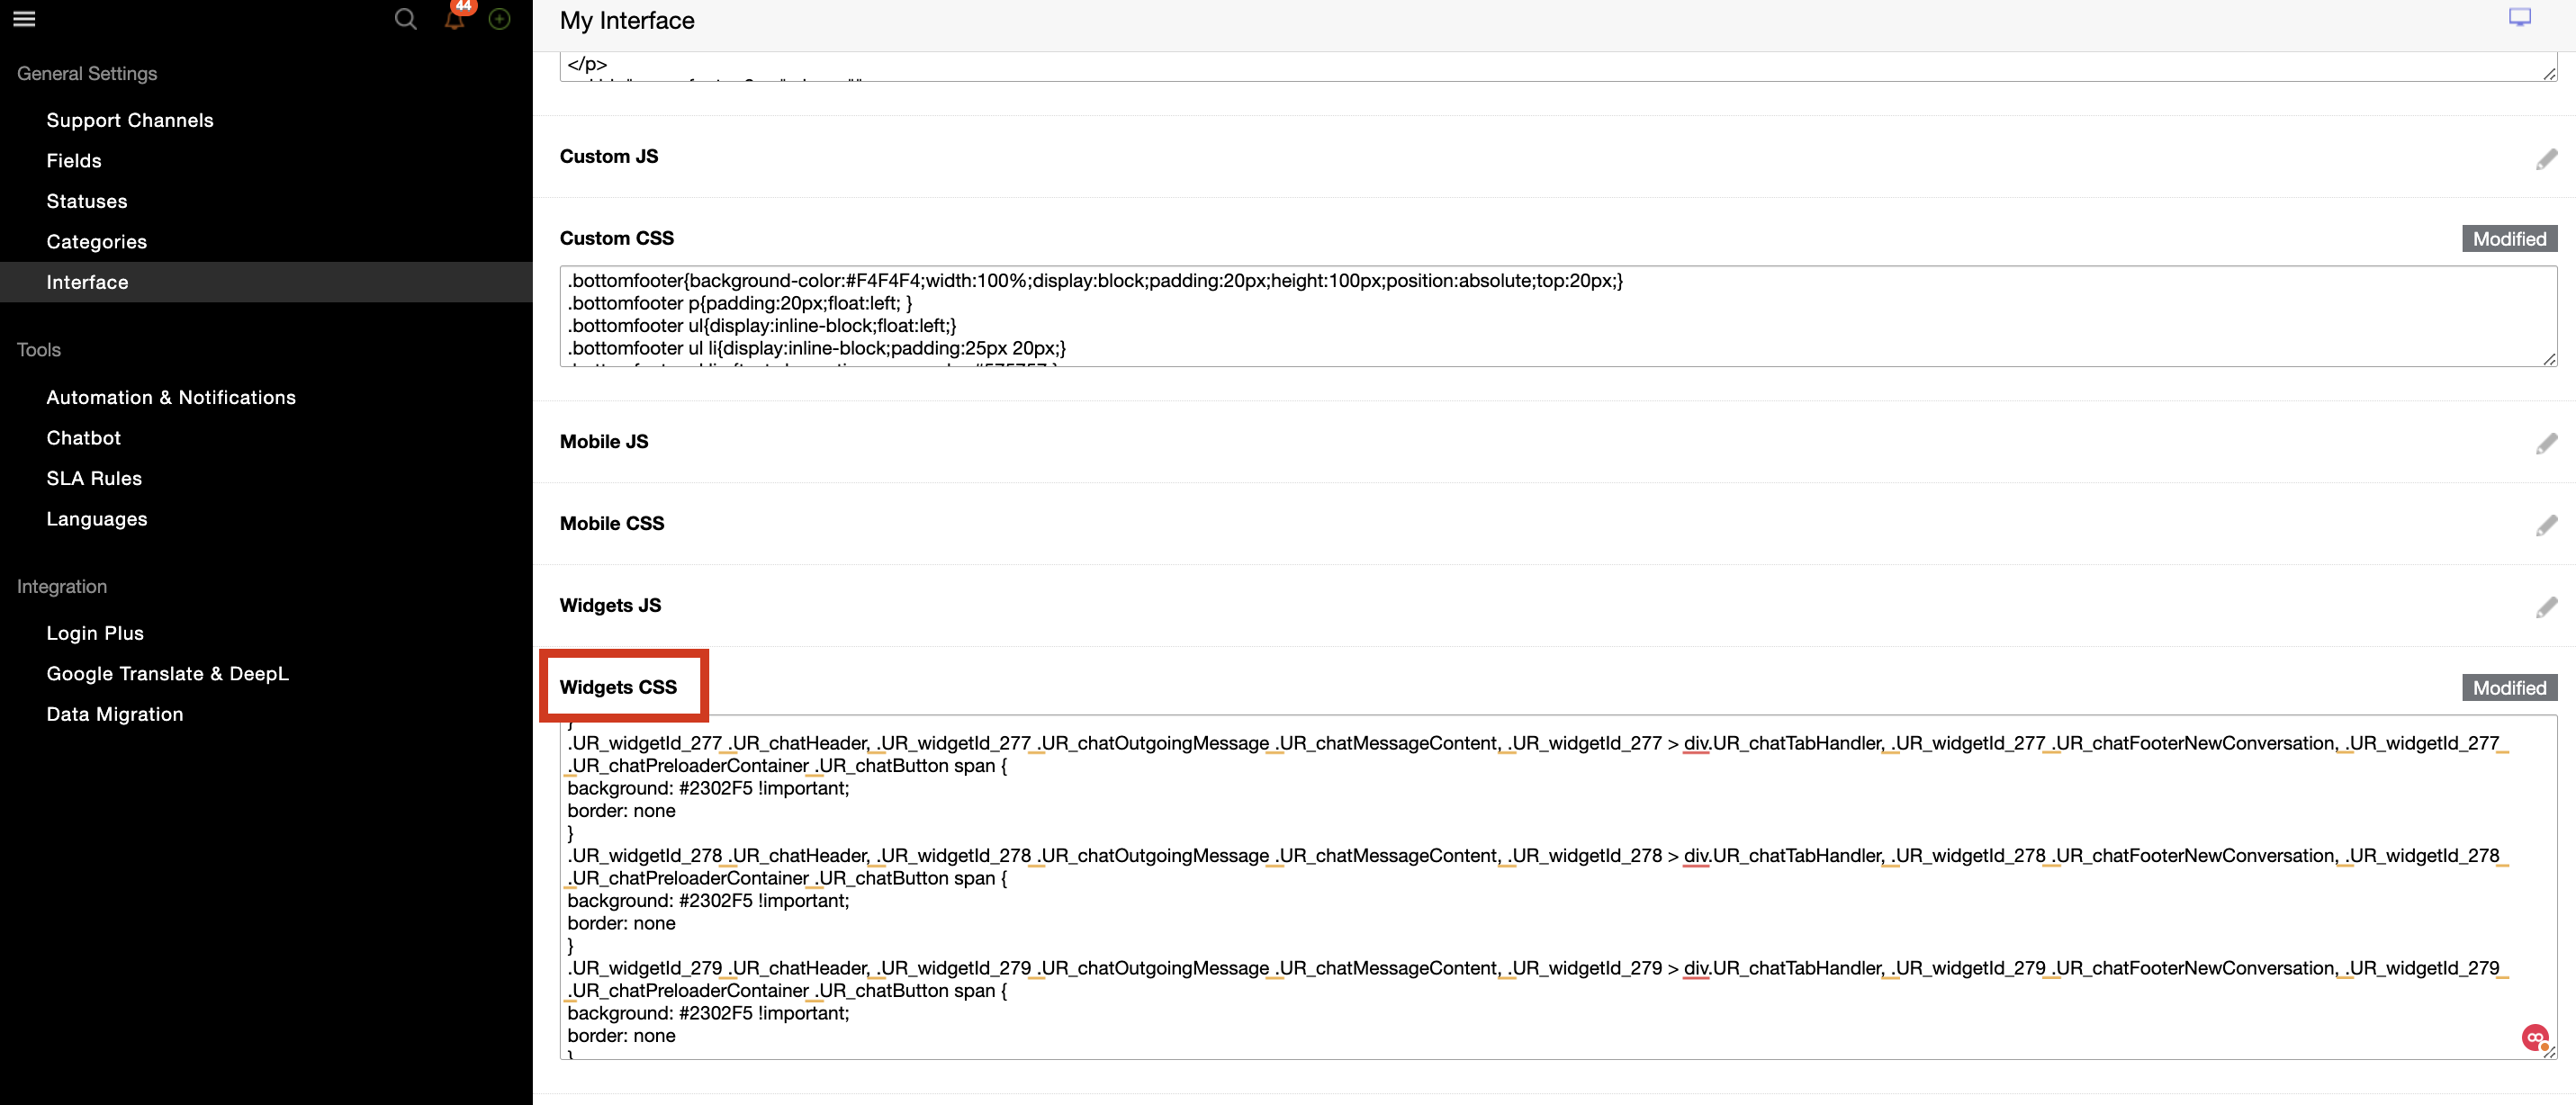
- Click on Administration (Setting Gear Icon) > Interfaces
- A new window would appear. Please click on Advanced > CSS
- Scroll towards “Widget CSS” and click on the “Pencil Icon” to edit
- Copy the belowscript and paste it within the Widget CSS field.
This article will guide you on personalizing your Live Chat avatar, changing the chat name, and adjusting the chat background colour in UseResponse.
Note: You need Admin permissions in UseResponse to perform these actions.
Finding Your Widget ID
Before making any changes to your live chat settings in UseResponse, it's essential to locate your unique WidgetId. The WidgetId represents a unique number assigned to your Support Channel > Widget for live chat. The unique Widget IDs that can be accessed via the following steps:
Copy the number before .js as that’s your Widget ID. As shown via the screenshot below, the Widget ID for this account is 13
Changing Your Live Chat Avatar
To change the Live Chat avatar for all of your Support Channels, please follow these steps;
#ur_chat_desktop_conversation_chat_13 .UR_chatHeaderAvatar img[src*="https://static.useresponse.com/public/admitad/branding/logo.png"] {
display: none;
}
#ur_chat_desktop_conversation_chat_13 img[src*="https://static.useresponse.com/public/admitad/branding/logo.png"] + span.UR_chatHidden {
display: block !important;
background-size: contain;
background-image: url("URL link");
}
.UR_widgetId_13  .UR_chatConversationAvatar.UR_chatAvatar.UR_chatAvatarLarge img[src*="https://static.useresponse.com/public/admitad/branding/logo.png"] {
display: none;
}
.UR_widgetId_13 .UR_chatConversationAvatar.UR_chatAvatar.UR_chatAvatarLarge img[src*="https://static.useresponse.com/public/admitad/branding/logo.png"] + span.UR_chatHidden {
display: block !important;
background-size: contain;
background-image: url("URL link");
}
.UR_widgetId_13  .UR_chatConversationContainer .UR_chatConversationName {
    font-size:0
}
.UR_widgetId_13  .UR_chatConversationContainer .UR_chatConversationName:after {
    font-size: 13px;
    content: "Brand name";
}
Note: Within the above script, the “chat_13”, the “URL link” and the "Brand name"will differ and the remaining script will remain unchanged.
5. Press button "Submit".
Updating Your Chat Name
To change the Live Chat name for all of your Support Channels, please follow these steps:
1. Click on Administration (Setting Gear Icon) > Interfaces.
2. A new window would appear. Please click on Advanced > CSS
3. Scroll towards “Widget CSS” and click on the “Pencil Icon” to edit
4. Copy the belowscript and paste it within the Widget CSS field:
#ur_chat_desktop_conversation_chat_13 .UR_chatHeaderTitle {
font-size: 0;
}
#ur_chat_desktop_conversation_chat_13 .UR_chatHeaderTitle:after {
  content: 'Chat name';
  font-size: 17px;
}
Note: Within the above script, only the “chat_13” and the "Chat name” will differ and the remaining script will remain unchanged.
5. Press button "Submit".
Customizing Chat Background Colours with custom colour
To change the Live Chat name for all of your Support Channels, please follow these steps:
1. Click on Administration (Setting Gear Icon) > Interfaces.
2. A new window would appear. Please click on Advanced > CSS
3. Scroll towards “Widget CSS” and click on the “Pencil Icon” to edit
4. Copy the belowscript and pasteit within the Widget CSS field:
.UR_widgetId_13 .UR_chatHeader, .UR_widgetId_13 .UR_chatOutgoingMessage .UR_chatMessageContent, .UR_widgetId_13 > div.UR_chatTabHandler, .UR_widgetId_13 .UR_chatFooterNewConversation, .UR_widgetId_13 .UR_chatPreloaderContainer .UR_chatButton span {
background: #FF6263 !important;
border: none
}
Note: Within the above script, only the “WidgetID_13” and the "#FF6263” will differ and the remaining script will remain unchanged.
5. Press button "Submit".
In case of Multiple Live Chat Widgets
If you’ve set up two Live Chat Widgets, you will have two unique Widget IDs. Each Live Chat Widget will have its unique Widget ID and while they will be accessed via the same steps as above, the script for the second one will be posted on a new line as shown below:
If you have any questions at all, please feel free to reach out to us by sending an email at support@useresponse.com